-
Notifications
You must be signed in to change notification settings - Fork 0
Threadripper workstation
The following are ways to interact with and use Nathan Skene's Threadripper workstation (or really any computer) remotely.
Rather than entering your password every time you ssh login to the Threadripper, you can simply use ssh-keygen to do this once:
ssh-copy-id <username>@129.31.68.96
This will ask you for your Threadripper password. Afterwards you will no longer have to enter your password from your local computer. For a more detailed explanation, see here.
Certain programs within applications (e.g. Rstudio/R/Python) will try to parallelise many processes. But an ongoing issue seems to be that the Threadripper doesn't always close these processes (e.g. when you force an R command to stop early). This means that processes can accumulate, causing applications like Rstudio to crash, even or cause the whole machine to crash/restart!
To avoid this, you have to pay close attention to how many resources you're using with a manager software like htop. Simply open a command line window on the Threadripper (via Teamviewer or via a remote ssh session) and enter:
htop
This will show all of the processes currently running on the Threadripper.
You can then kill the ones that are no longer needed.
Connect to the Threadripper via the command line (Mac Terminal) on your local machine. Ask Nathan Skene to create a username/password for you first.
ssh <username>@wmcr-nskene.med.ic.ac.uk
You can interact with Rstudio on the Threadripper via your web browser, by accessing a Docker image that's running on the Threadripper.
Brian Schilder has already created an Rstudio Docker image and launched it so it can be used by anyone in the lab.
If you ever need to create a new Docker image, you can follow these steps beforehand.
Here we will use the scfdev Docker container, which is stored on Docker Hub courtesy of Alan Murphy (see here for more details).
To create the image, run the following in the Threadripper command line.
docker run \
 -e PASSWORD=scflow \
 -d \
 -v /mnt/raid1/:/home/rstudio/raid1 \
 -e ROOT=true \
 -p 8787:8787 almurphy/scfdev
Notes:
- Make sure you mount whatever folders you need access to from within Rstudio with one or more
-varguments. - Make sure you set your mounted file/folder permissions to be accessible by via the Rstudio server, e.g.:
chmod -R u=rwx,go=rwx <my_subfolder>/ - Note that we mount the folder
/mnt/raid1which is an 8TB hard drive connected to the Threadripper. It's preferable to use this as it has much more storage capacity than the Threadripper's main hard drive (~750GB).
Troubleshooting:
- If you encounter errors, check that you can run
docker run hello-worldsuccessfully. - If you get the error
docker: Got permission denied while trying to connect to the Docker daemon socket at unix:///var/run/docker.sock: Post http://%2Fvar%2Frun%2Fdocker.sock/v1.24/containers/create: dial unix /var/run/docker.sock: connect: permission denied. See 'docker run --help'.then runnewgrp dockerfirst. - By default, Docker will stores all images within the main HD at:
/var/lib/docker. However, this partition has limited storage. To change Docker's storage location to the much larger raid1 HD, have someone with admin permissions (i.e. Nathan Skene) follow these steps.
This -p 8787:8787bit forwards the port from inside of the docker image to the workstation, so it's -p <workstation_port>:<docker_port>. If you wanted to run a new docker image then you could, for example, change this to : -p 8786:8787and then connect to http://129.31.68.96:8786/ etc.
Notes:
- You may need to
sudo ufw enable 8786first to ensure you can use that port.
Connect to a remote Jupyter Notebook/Lab session on a remote server (e.g. the Threadripper) as if it were on your local computer.
For detailed instructions, follow this Tutorial. To summarise you:
- If you haven't done so already, create a password for Jupyter on the remote machine:
jupyter notebook password
Or, if you prefer using Jupyter Lab:
jupyter lab password
- Start a Jupyter instance on the remote machine via command line. Optionally, you can start a
tmuxsession first to ensure that Jupyter will keep running even if the terminal on your local machine is closed (see here for further details).
tmux new -s jupyter
Now start the Jupyter Notebook:
jupyter notebook --no-browser
Alternatively, you can use Jupyter Lab:
jupyter lab --no-browser --ip "*" --notebook-dir </your/dir>
- NOTE: make sure you change
<username>to your actual remote server username first. Access it using the following bash command on your local computer saved in your~/.bashrcfile.
function tr_jupyter(){
    # Forwards port $1 into port $2 and listens to it
    ### Example of what the final command looks like ###
    ## ssh -N -f -L localhost:1080:localhost:1070 bschilder@146.169.8.44
    ### A more flexible function to use any port you want
    ssh -N -f -L localhost:$2:localhost:$1 <username>@<hostname>
    open http://localhost:$2/
}
- Make sure the function is loaded (you may need to start a new
bashsession if you just amended the~/.bashrcfile). - In command line, run:
tr_jupyter <port1> <port2>
-
This will open a Jupyter notebook folder in your web browser, which you can then use to open a Jupyter notebook. Importantly, this notebook has access to files on the remote machine and runs commands using the remote machine's computing resources (as opposed to your local machine).
-
You may notice that your conda environments don't automatically appear as options when selecting your kernel.
You can setup each conda env to be detected like so:
conda activate base
conda install -c conda-forge nb_conda_kernels
conda activate <env_name>
ipython kernel install --user --name=<env_name>
Alternatively, you can use the mamba_gator extension to manage your conda environments directly from within Jupyter Notebook/Lab. Install jupyterlab and mamba_gatorto your "base" conda env like so:
conda activate base
conda install -c conda-forge jupyterlab mamba_gator
Now when you go to your Settings tab, you'll see a new option called "Conda Packages Manager".
Note: The first time you click this, it may take a long time for it to find all your environments and the packages within them (note the spinning arrows). Wait until this is done and then you can begin managing your conda envs. If it continues to take a very long time, you may need to restart your Jupyter session and reconnect (the issue should be resolved automatically after this and you should see all of your conda envs listed).

- Install macFUSE.
- Create the folder that will be used as an access point to your remote computer's folder system.
sudo mkdir /Volumes/TR
sudo chown ${USER}:staff /Volumes/TR
- Mount the remote computer:
sshfs <username>@wmcr-nskene.med.ic.ac.uk:/home/<username> /Volumes/TR -o allow_other -o noappledouble -o volname=TR -o follow_symlinks
- [
ln -s /Volumes/TR ~/Desktop
The mounted subfolder will erase itself each time you umount it. To make this easier to remount each time, you can turn these commands into a function and add it to your ~/.bash_profile or ~/.bashrc .
nano ~/.bashrc
mountTR(){
        diskutil umount force /Volumes/TR

        sudo mkdir /Volumes/TR
        sudo chown ${USER}:staff /Volumes/TR
        sshfs <username>@wmcr-nskene.med.ic.ac.uk:/home/<username> /Volumes/TR -o allow_other -o noappledouble -o volname=TR -o follow_symlinks
}
The next step assumes your bash_profile/bashrc have been sourced upon login.
If they haven't been, run source ~/.bash_profile or source ~/.bashrc first.
Then, simply run the function we created in command line.
mountTR()
The mounted folder should now appear, and be accessible via the link you created on your Desktop (if you did that step).
When setting this up, you might run into this error:
mount_macfuse: mount point /Volumes/TR is itself on a macFUSE volume
This arises when you've previously (unsuccessfully) tried mounting the directory of the same name.
To overcome this, simply run the following (Note; make sure you type umount, not unmount)
umount /Volumes/TR
If the above approaches don't work for you, you can also try the suggestion here:
https://unix.stackexchange.com/questions/62677/best-way-to-mount-remote-folder
Sometimes it's necessary to use the graphical interface for a machine, as opposed to the Terminal alone. TeamViewer can do this, but has some security issues. Therefore we recommend you use TigerVNC instead. You can find a setup guide here, but here is a summarized version:
All commands are to be executed in the remote computer's Terminal.
- Install TigerVNC on the remote computer (if not already installed):
sudo apt-get install tigervnc - Create a TigerVNC config file:
nano ~/.vnc/xstartupand add the following to it:
#!/bin/sh
# Start Gnome 3 Desktop
[ -x /etc/vnc/xstartup ] && exec /etc/vnc/xstartup
[ -r $HOME/.Xresources ] && xrdb $HOME/.Xresources
vncconfig -iconic &
dbus-launch --exit-with-session gnome-session &
- Start TigerVNC:
vncserver - Verify that TigerVNC has launched successfully:
pgrep Xtigervnc
ss -tulpn | egrep -i 'vnc|590'
- Install TigerVNC on your local computer. For MacOS, use the TigerVNC-1.12.0.dmg: https://sourceforge.net/projects/tigervnc/files/stable/1.12.0/
- Connect to the remote computer using your username on the remote computer (
<user>) and the IP address <remote.server>:ssh <user>@<remote-server> -L 5901:127.0.0.1:5901 - Open the TigerVNC application, enter the address
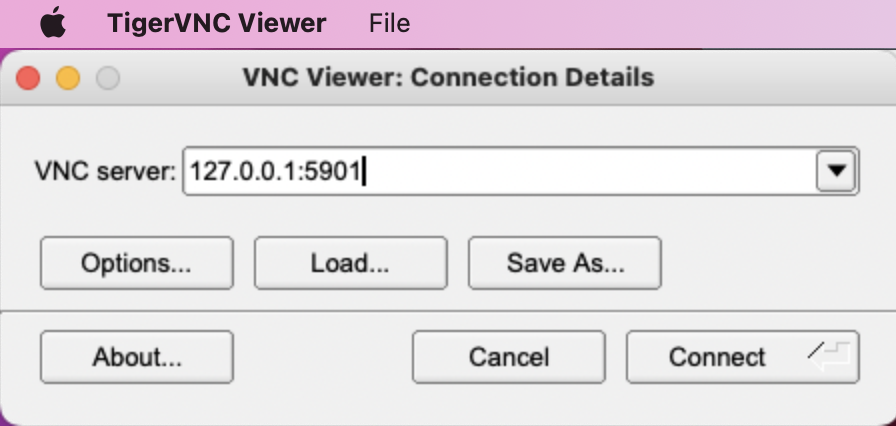
127.0.0.1:5901and click "Connect":

- This should launch a new window giving you access to your remote desktop. Enter your password for your account on the remote computer.
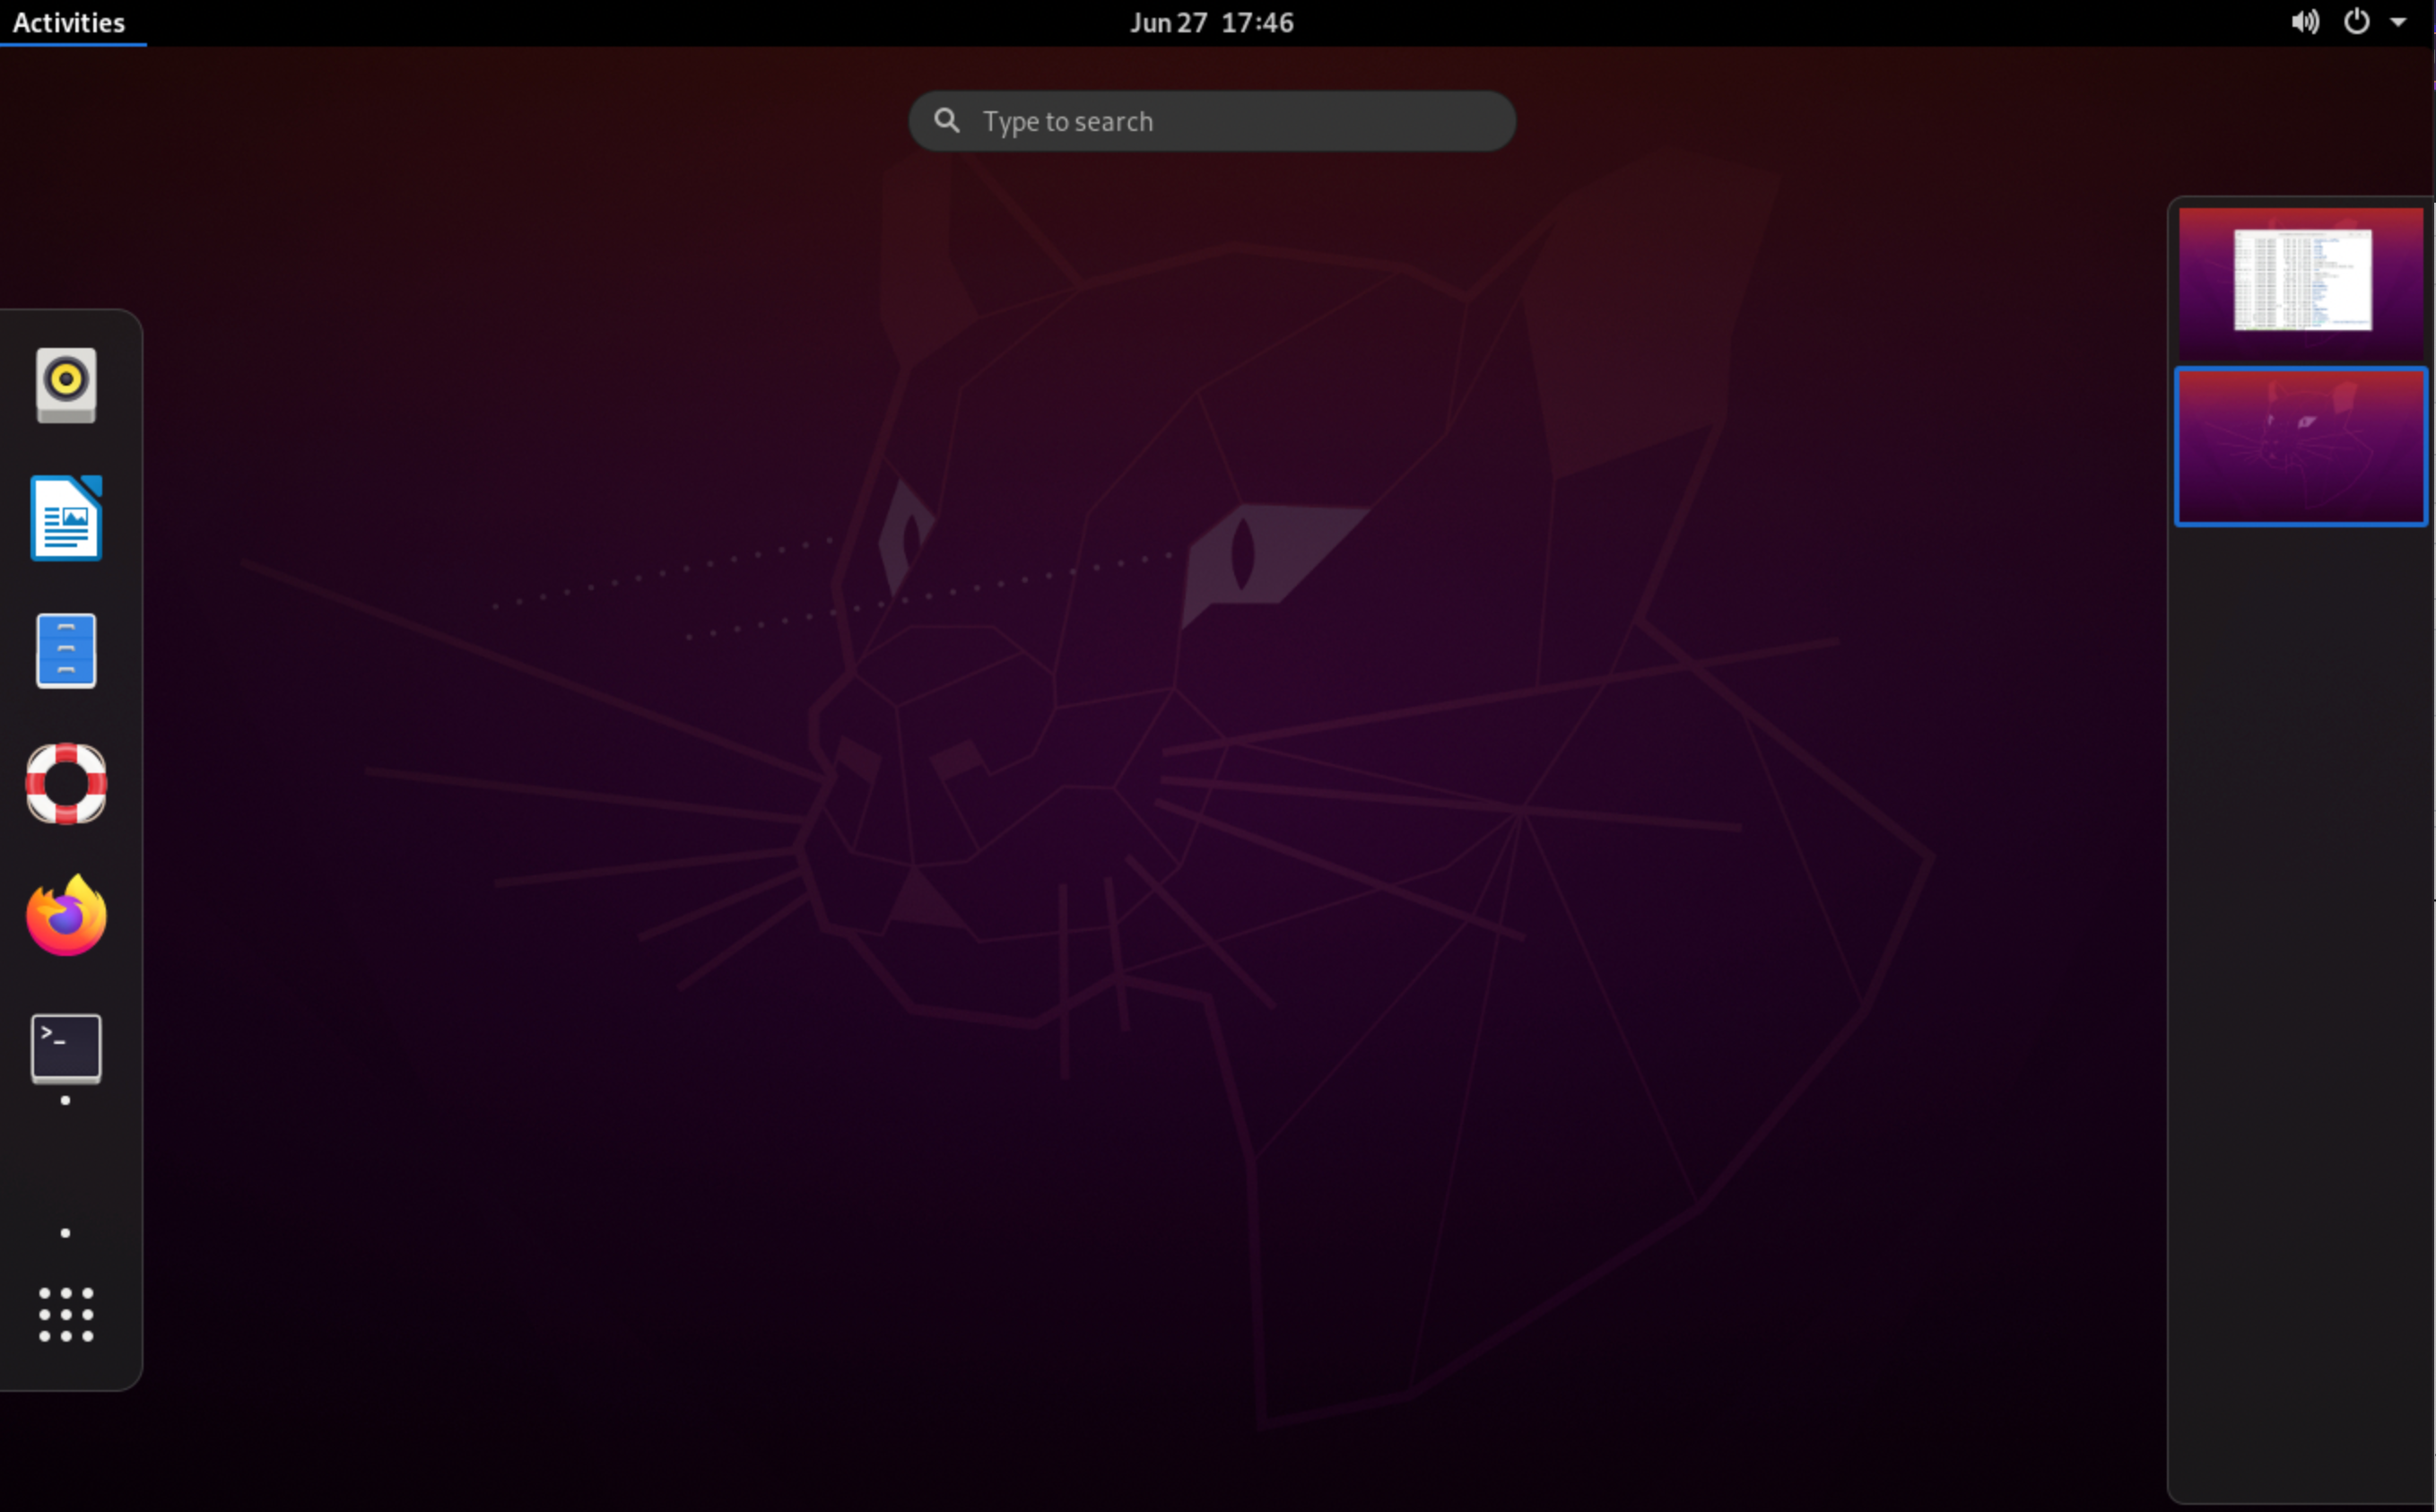
- You can now interact with the remote desktop. This will look quite bare at first, but you can begin to customise it and open applications by clicking "Activities" in the upper left corner:

- Launch the Terminal by clicking its application icon, or use the hotkeys
CTRL+CMD+Ton the desktop. You can use this to install a useful app for app installation/management:apt-get update & apt-get -y install gnome-software. The "Software" app will now appear under "Activities" --> "Show Applications".
Managing core and memory usage is important when using the Threadripper.
Programs like Rstudio are not very good at cancelling processes on the machine that you ended with Rstudio (e.g. via CTRL+C or ESC). This means that you can easily clog up the Threadripper with jobs you thought you cancelled already, but are actually still running indefinitely in the background.
The easiest way to kill processes on the TR is to use htop.
In command line:
htop- Hit spacebar to select the processes you want to affect (use the up/down keys or click to move around). Hit spacebar again on the same item to deselect. Use
SHIFT+Uto deselect all items.-
/usr/lib/rstudio/libexec/QtWebEngineProcess... When trying to kill Rstudio processes, look for rows with something similar to the following in the
-
- You can sort the processes according to different columns (including
- %MEM
- Hit
kand then9on your keyboard. Then hitEnter. This will kill the selected processes.- Note, unless you have root privileges, you can only kill processes that you started (i.e.
htop is also quite handy for Macs, and can be easily installed via brew here.
TR can start up in emergency mode after a reboot because of an issue in the /etc/fstab file. To get around this:
hit CTRL+D... then "sudo vi /etc/fstab" and commented out the line causing the issue
It should then restart as normal
- Home
- Useful Info
- To do list for new starters
- Recommended Reading
-
Computing
- Our Private Cloud System
- Cloud Computing
- Docker
- Creating a Bioconductor package
- PBS example scripts for the Imperial HPC
- HPC Issues list
- Nextflow
- Analysing TIP-seq data with the nf-core/cutandrun pipeline
- Shared tools on Imperial HPC
- VSCode
- Working with Google Cloud Platform
- Retrieving raw sequence data from the SRA
- Submitting read data to the European Nucleotide Archive
- R markdown
- Lab software
- Genetics
- Reproducibility
- The Lab Website
- Experimental
- Lab resources
- Administrative stuff