A Blue instrument: ImagePlayer
Author: Menno Knevel
Blue has some excellent ways to generate scores by using of scripts (python, Clojure, Lisp) as well as Score Generators like Jmask, nGen, NoteProcessors and AthenaCL. More information on this subject can be found here. Using some of these scripts permit to give it a seed value, so that the user can give some direction in his/her choice as to the score pattern generated; setting the seed to a certain number assures that every time the events are generated, the pattern will sound the same. The seed gives the user the Power Of Choice – it is not dependent on the moods of the machine...
There is yet another way to generate scores, that seems random, but in fact is not: scan an image and convert it to sound. The sounding result will depend on the image. In fact it is a stable entity, but the user still has ways to influence the final outcome by changing the many parameters of the sounding result. Clearly scanning the image with this instrument 'follows' the patterns and colors as can be seen in the image, but frequency range, at what starting/ending point it will scan, turned upside down or rotated, and several more parameters can be tweaked.
I have uploaded in BlueShare an instrument called ImagePlayer. It uses the image opcodes created by Cesare Marilungo. In the manual, have a look at https://csound.com/manual/ImageopcodesTop.html.
Good questions. I'll tell you:
- it scans an image – PNG format only
- scans the image from left to right (X- axis) and from top to bottom (Y- axis). But can be changed to move in the opposite direction. Or rotated.
- the lower part of the image corresponds to the lower frequencies, the higher part to the higher frequencies. Or the other way around if you want to scan it upside down.
- it looks for the RGB information in the image. That means Red, Green, Blue. White, for example, contains all the 3 basic colors.
- the intensity of the red, green or blue pixel is converted to a value between 0 and 1
- the color white (all the 3 basic colors summed), will produce 1 + 1 + 1 respectively
- the sound generator uses 'adsynt2', which, according to the manual, 'performs additive synthesis with an arbitrary number of partials -not necessarily harmonic- with interpolation.'
- basic frequency can be set.
- X axis is the time scale. Begin and end of the image to scan can be set
- Y axis is for limiting the screening of the Y axis of the image, so in a way controls the higher frequencies of the image
- very high frequencies may be produced. This will create aliasing and may be desirable. If not, there is a switch for turning on the anti-aliasing filter and adjust the higher part of the frequencies to your liking.
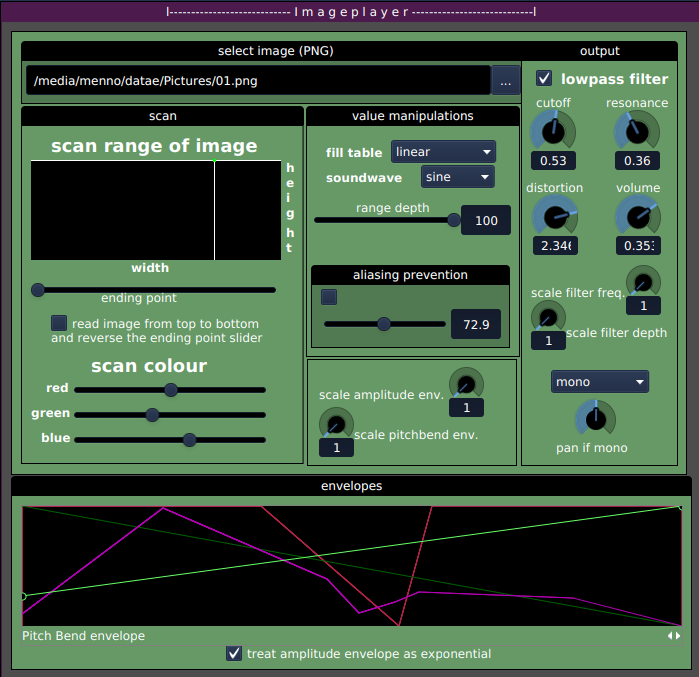
The ImagePlayer has sliders that can narrow down the width of the image so that it plays only a part of it. Or, when the start and end time is reversed, it will screen the image from right to left instead of from left to right. The XY controllers have influence on the range of frequencies as well as the part of the image to scan. Further, the amount of each of the 3 colors of the RGB's amplitude can be regulated at k-time. The 'range depth' slider widens or shrinks the range of the lower and higher frequencies, while you can set 'base frequency' to position the lowest frequency.
Unlike more familiar instruments that have Oscillator, Filter and Amplifier etc., this surely is an instrument to experiment with.
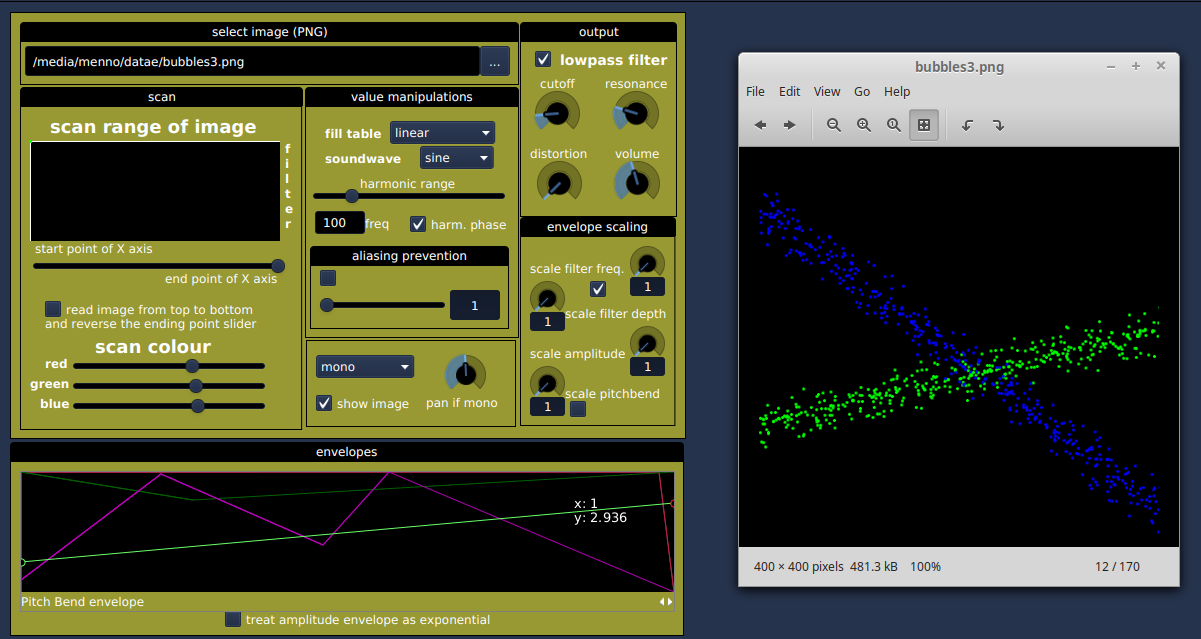
There is also a Sound SoundObject version available from BlueShare, as i can image that this instrument is a typical one-shot instrument. The advantage of the SSO is that several SSOs can be put on the Timeline, each with its own image. The picture below shows this SSO and the image it scans.
The Sound SoundObject , like all Sound SoundObjects, passes the mixer through the SubChannel. This means:
- a name entry must be given in the box SubChannel:
- create a subchannel
- rename this Subchannel to name given in the box SubChannel:
- apply effects (if needed)
Instead of using existing images you can design your future sound with a third party program. GIMP is well-known and took me some time to get acquainted with. Something lighter and easier to use for drawing and painting is (on Linux!) XPaint, Pinta or Gnome Paint. I started my experiments with Xpaint; it has a cool tool called 'spray' that allows to spray clouds of colors that will later, when scanned by the ImagePlayer, become clusters of tiny sounds. The paintbrush of XPaint has features like Radius and Density and it is fun to experiment with these settings. Xpaint is an old program – some 20 years old – and it looks and feels antique, but the features of the program largely compensate for this :)
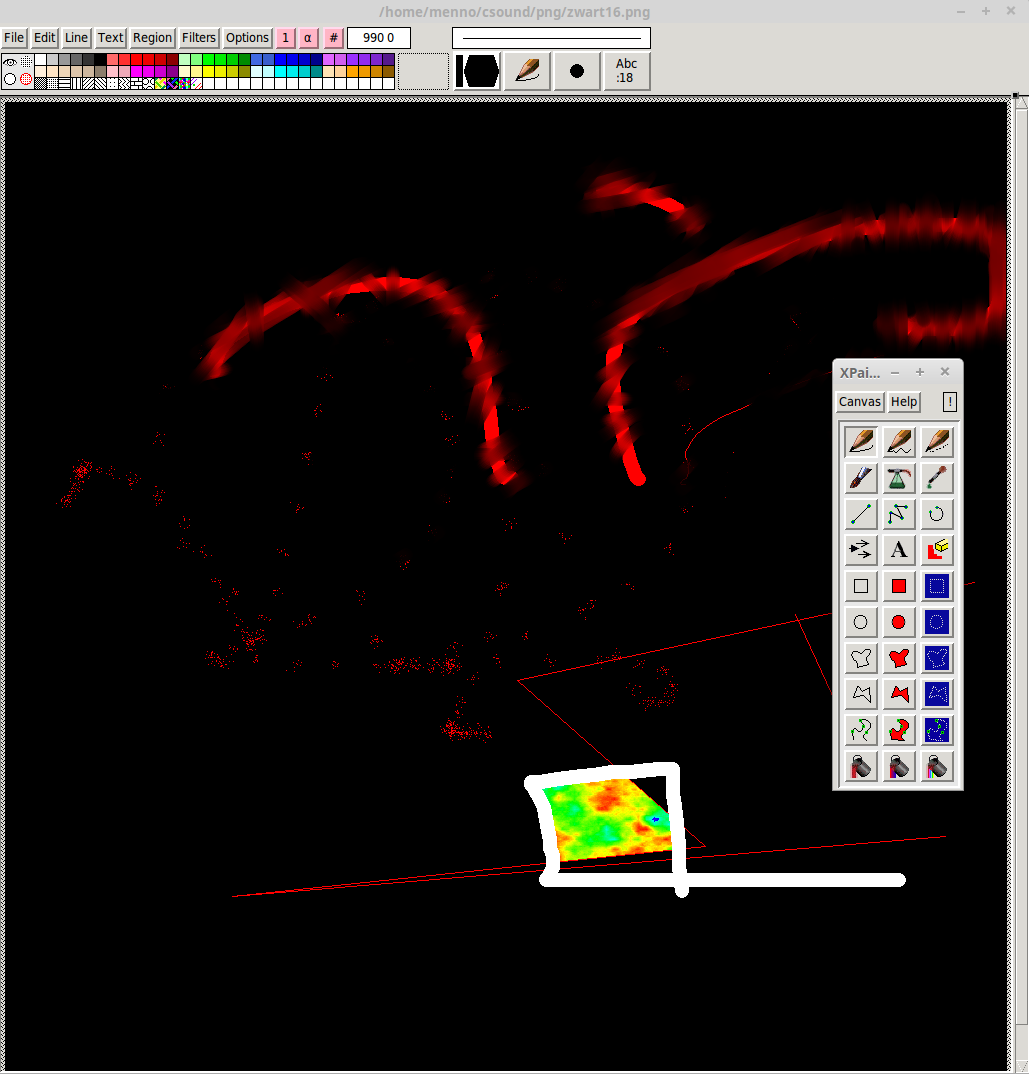
The painted PNG above can sound like this: imagesound_mono.ogg and in stereo that would be imagesound_stereo.ogg, depending on some settings and adsynt's base frequency. Perhaps not the prettiest sound you have ever heard, but it shows the sounds of different paint brushes.
If you want to start from scratch and need an empty canvas it is good to know that you must start on a BLACK canvas. Black is the color that produces only silence, so this is your “white paper”. Here is how to create a black canvas in GIMP.
- start GIMP
- File → New File
- choose image size. This will be the resolution of your “sound palette”
- Advanced Options → Color Space → RGB
- Fill With → Background Color → OK
- Right Click on the white Canvas → Tools → Paint Tools → Bucket Fill
- Choose the color black to fill the canvas anf fill the image
- Export As → Export Image As PNG
- set compression level to 0 (compression might lead to pixel distortion and that would that some unwanted sound will be heard in the ImagePlayer)
If you choose to create a “big” image, like for example 500 x 500 pixels, in principle you have created an image that can hold 500 different frequencies from the lowest to the highest frequency. An image of 32 x 32 pixels has room for only 32 frequencies.
This is a good thing: it forces you to some kind of grid, some quantization on the frequencies to be created. Remember that you can scale the frequency range later, when moving the X axis of something i called Voices (in lack of a better term). This frequency range will be build on top of the base frequency.
Here is a lovely example using a high-resolution image (500 x 500)
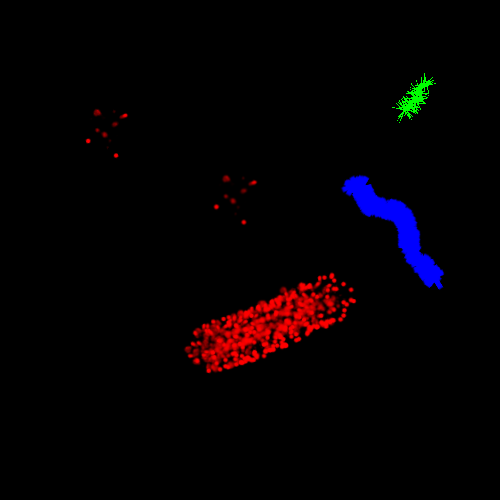
Listen to the result. This is a mix of all the RGB pixels in equal volume, but you can set the levels of the RGB individually – or leave out a color as you wish.
Time for a low-resolution 32 x 32 pixels example:

It is hard to see the image because of its small size, you will have to zoom in. Below, the same image, scaled 10 times, so you can actually see what is happening inside the image:

The resulting sound however is loud and clear. Notice the bigger separation of frequencies than with the high resolution image.
Back to the image; it is not easy to draw exactly one frequency. The pencil or brush must be set to 1 pixel in order to get only one frequency and even then it is likely that you will get the sounding result of a frequency range instead of only one. But this makes it an instrument that separates it from others. And yes, it is quite difficult to see it and draw a line of one pixel. You have to use the magnifier. When working with small, low resolutions images (32 x 32 for example) you won't need the magnifier because you are already zoomed in 1600% or so to be able to see what you are drawing. In this case the one-pixel-pencil is already 1/32 of the image...
I find it interesting that one can draw thick lines, so that the produced sound will be a package of neighbouring frequencies around a centre frequency. And using the jitter function is fun….
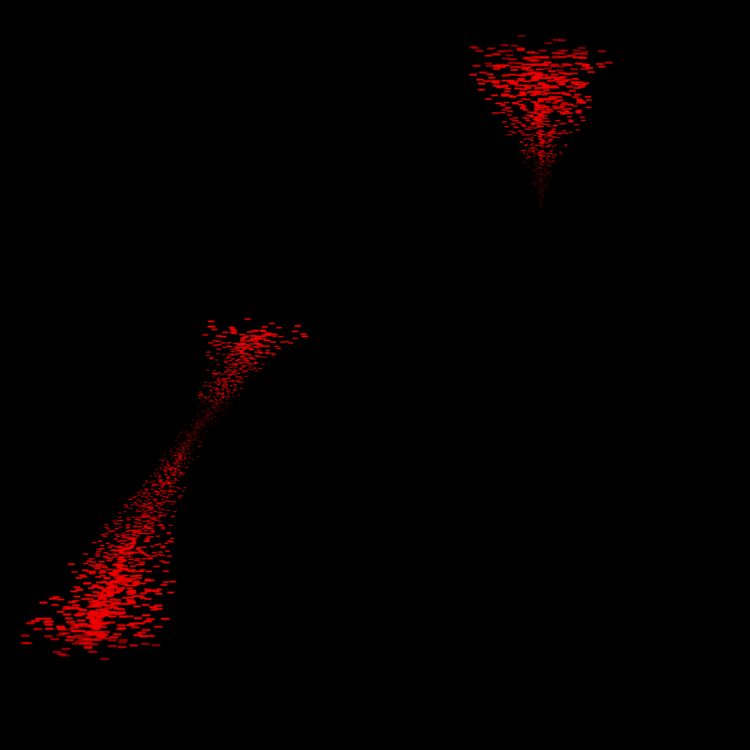
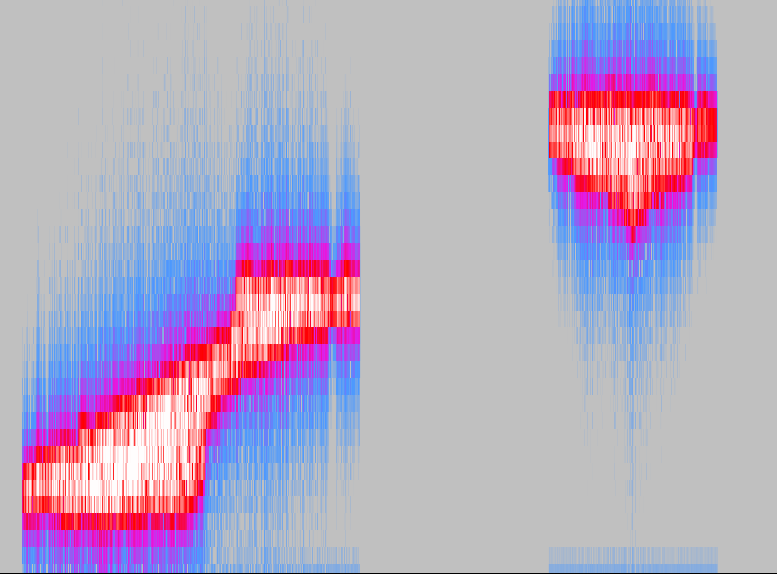
Here you see an example of a PNG file and the spectrogram of the rendered sounding result. As you can see in the spectrogram of Audacity, it follows the movements and structure of the painting quite well...
To end this chapter of the article, a quote from Bob Ross: “Happy painting!”
Future plans for ImagePlayer
- it seems feasible that, at some point, jpeg and tiff images can be imported and scanned. On most computers these libraries are already there but it takes an enthusiast developer to implement the code.
- the image that is being scanned could be shown in the ImagePlayer instrument once all the JavaFX are implemented in Blue.
Blue version 2.8.1, updated October 2021