A painless Gitea installation for Raspberry Pi Zero.
![]()
Raspberry Pi Zero users that would like a quick and easy way to install a private, local Gitea server.
-
Streamlined Gitea installation with full compatibility for Raspberry Pi Zero running Raspberry Pi OS Buster.
-
User-friendly dialog-based setup.
-
Backup & Restore.
-
Custom readme, labels, license, and .gitignore installer.
-
Quick
gitea.serviceHandler:-
start,restart, andstopGitea. -
enableanddisableGitea on boot (enabled by default).
-
-
Easily configure 18 Gitea
app.inisettings, including:-
Repository, Server, Indexer, UI, & more.
-
Custom Editor. Add/edit custom settings found in the app.ini reference.
-
-
Desktop/Menu launchers for the customizer, easy config, backup, restore, and
gitea.servicehandler. -
Theme installer, including the Github-flavored Teakettle Theme Suite.
-
Stylized README.md templates for Gitea.
-
Github-styled issue label set for Gitea.
-
Gitea updater.
-
If you encounter any problems, please open an issue.
-
Pro user? Check the Quick Setup Guide for a concise guide.
-
If you would like to use external storage, please ensure it is mounted to your needs before installing Gitea.
-
Gitea will be installed to
/usr/local/bin/gitea/. You can choose where to install the working/giteaand/repositoriesdirectories during setup.
-
Download the setup scripts:
sudo wget https://github.com/trainingmode/gitea-rpiz/releases/download/1.0/gitea-rpiz.zip sudo unzip gitea-rpiz.zip sudo rm gitea-rpiz.zip -
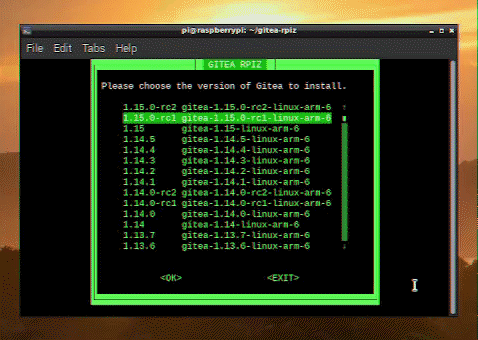
Run the setup and follow the prompts:
 cd gitea-rpiz
 bash gitea-rpiz.sh
-
A
gitea-rpiz.configfile will be created to store your/giteaand/repositoriespaths for customization and uninstallation. Update this config if you change these paths after installation without using gitea-rpiz. -
To serve Gitea using your Raspberry Pi's wireless capabilities, set up an access point and navigate to your static IP.
- A static IP of
192.168.4.1with Gitea HTTP port of3000would connect to http://192.168.4.1:3000/.
- A static IP of
-
You may remove gitea-rpiz at any time while Gitea is installed, as long as you preserve your
gitea-rpiz.config. Simply redownload gitea-rpiz whenever you need it and replace thegitea-rpiz.config. Below is an example:GITEA_INSTALL_PATH=/mnt/MyDrive GITEA_REPO_PATH=/mnt/MyDrive/repositories
-
Run the setup and choose
custom:bash gitea-rpiz.sh custom
-
Custom labels, licenses, readmes, and gitignores can be freely named.
- NOTE: Default licenses supplied by Gitea do not automatically fill with your profile info and require you
to update each license for each new repo. The gitea-rpiz license installer provides a license tag replacer.
- NOTE: Default licenses supplied by Gitea do not automatically fill with your profile info and require you
-
You can also install desktop/menu launchers:
bash gitea-rpiz.sh custom launcher-
Or create your own. Use a
customizerArg(ex:service) for a specific utility:-
Command:
bash '/path/to your/gitea-rpiz/gitea-rpiz.sh' custom customizerArg -
Working Directory:
/path/to your/gitea-rpiz
-
-
-
Run the Customizer and choose
backup:bash gitea-rpiz.sh custom backup
- WARNING: DO NOT USE
./gitea backup. Only use gitea-rpiz to backup. See the notes under Restore Gitea.
-
Run the Customizer and choose
restore:bash gitea-rpiz.sh custom restore
- Please only restore backups created by gitea-rpiz. Current supported versions require manually backing up the working directory (avatars, attachments, etc.) to properly succeed. gitea-rpiz uses
./gogs backupand handles the rest automatically. All data can be backed up and restored.
-
If the working
/giteaor/repositoriesdirectories were changed after installation without using gitea-rpiz, please update thegitea-rpiz.configprior to removal. -
The Gitea
app.iniwill be backed up to the gitea-rpiz working directory.
-
Run the uninstaller and follow the prompts:
bash gitea-rpiz.sh remove -
Remove gitea-rpiz:
sudo rm -r "/path/to your/gitea-rpiz"
Below is a walkthrough (no audio) demonstrating the installation, configuration, backup/restore, and uninstallation processes.
gitea-rpiz_Walkthrough_.Trimmed.Compressed.mp4
- Download and unzip the scripts. (0:00)
- Run the setup and install Gitea. (0:20)
- Configure basic settings. (6:19)
- Install a custom license. (7:21)
- Backup Gitea. (8:38)
- Restore Gitea. (9:19)
- Update Gitea. (9:58)
- Uninstall Gitea. (12:34)
The installation is based on the Official Gitea Installation Guide.