Bootable live-USB of RedSleeve Linux (v7) for the Excito B3 miniserver, with kernel 4.5.0.
To quote Wikipedia (emphasis added):
RedSleeve is a free operating system distribution based upon the Linux kernel. It is derived from the Red Hat Enterprise Linux (RHEL) distribution, ported to the ARM architecture. RedSleeve [...] is not produced, maintained or supported by Red Hat.
This project contains a bootable, live-USB image of RedSleeve v7 for the Excito B3 miniserver. You can use it as a rescue disk, to play with RedSleeve Linux, or as the starting point to install RedSleeve on your B3's main hard drive. You can even use it on a diskless B3. No soldering, compilation, or U-Boot flashing is required! You can run it without harming your B3's existing software; however, any changes you make while running the system will be saved to the USB (i.e., there is persistence).
The image may be downloaded from the link below (or via wget, per the following instructions). (Incidentally, the image is 'universal', and should work, without modification, whether your B3 has an internal hard drive fitted or not.)
| Variant | Version | Image | Digital Signature |
|---|---|---|---|
| B3 with or without Internal Drive | 1.0.0 | redsleeveb3img.xz | redsleeveb3img.xz.asc |
Please read the instructions below before proceeding. Also please note that the image is provided 'as is' and without warranty. And also, since it is largely based on the DreamPlug Kirkwood image from redsleeve.org (fully updated as of 9 Apr 2016), please refer to that site for licensing details of firmware files etc.
To try this out, you will need:
- A USB key of at least 4GB capacity (the compressed (.xz) image is 223MiB, the uncompressed image is 7,358,464 (512 byte) sectors = 3,767,533,568 bytes). Unfortunately, not all USB keys work with the version of U-Boot on the B3 (2010.06 on my device). Most SanDisk and Lexar USB keys appear to work reliably, but others (e.g., Verbatim keys) will not boot properly. (You may find the list of known-good USB keys in this post useful.)
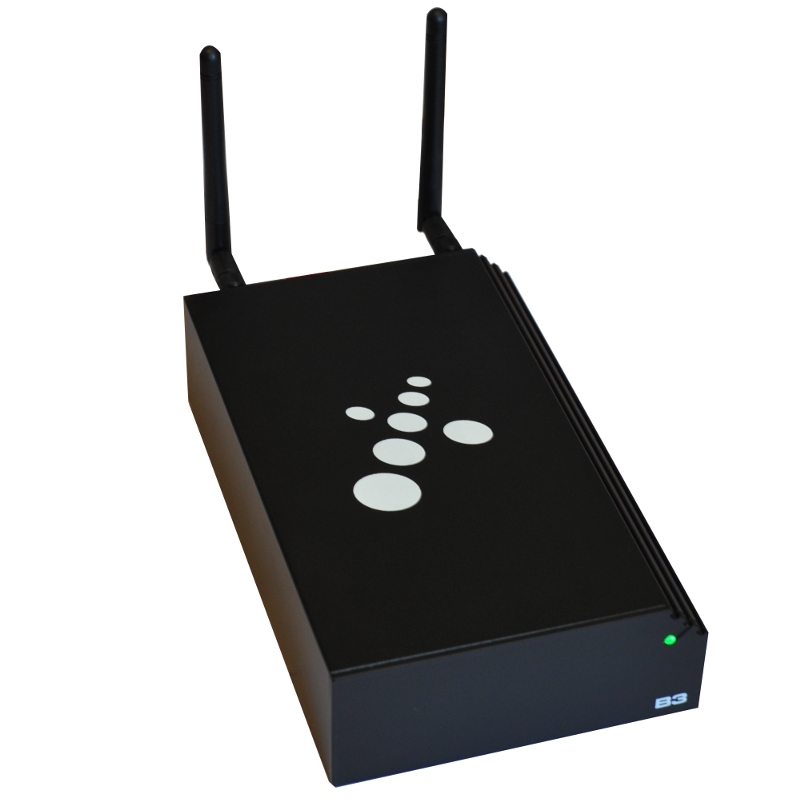
- An Excito B3 (obviously!). The image will boot, without modification, whether or not you have an internal HDD in your B3.
- A PC to decompress the appropriate image and write it to the USB key (of course, you can also use your B3 for this, assuming it is currently running the standard Excito / Debian Squeeze system). This is most easily done on a Linux machine of some sort, but tools are also available for Windows (see here and here, for example). In the instructions below I'm going to assume you're using Linux.
Incidentally, I also have an Arch Linux live USB for the B3, available here; a Gentoo Linux live USB for the B3, available here; and a Gentoo Linux live USB for the B2, available here.
On your Linux box, issue:
# wget -c https://github.com/sakaki-/redsleeve-on-b3/releases/download/1.0.0/redsleeveb3img.xz
# wget -c https://github.com/sakaki-/redsleeve-on-b3/releases/download/1.0.0/redsleeveb3img.xz.asc
to fetch the compressed disk image file (223MiB) and its signature.
Next, if you like, verify the image using gpg (this step is optional):
# gpg --keyserver pool.sks-keyservers.net --recv-key DDE76CEA
# gpg --verify redsleeveb3img.xz.asc redsleeveb3img.xz
Assuming that reports 'Good signature', you can proceed.
Next, insert (into your Linux box) the USB key on which you want to install the image, and determine its device path (this will be something like /dev/sdb, /dev/sdc etc.; the actual path will depend on your system, you can use the lsblk tool to help you). Unmount any existing partitions of the USB key that may have automounted (using umount). Then issue:
Warning - this will destroy all existing data on the target drive, so please double-check that you have the path correct!
# xzcat redsleeveb3img.xz > /dev/sdX && sync
Substitute the actual USB key device path, for example /dev/sdc, for /dev/sdX in the above command. Make sure to reference the device, not a partition within it (so e.g., /dev/sdc and not /dev/sdc1; /dev/sdd and not /dev/sdd1 etc.)
The above xzcat to the USB key will take some time, due to the decompression (it takes between 5 and 15 minutes on my machine, depending on the USB key used). It should exit cleanly when done - if you get a message saying 'No space left on device', then your USB key is too small for the image, and you should try again with a larger capacity one.
Begin with your B3 powered off and the power cable removed. Insert the USB key into either of the USB slots on the back of the B3, and make sure the other USB slot is unoccupied. Connect the B3 to your local network using the wan Ethernet port. Then, while holding down the button on the back of the B3, apply power (insert the power cable). After five seconds or so, release the button. If all is well, the B3 should boot the interstitial kernel off of the USB key (rather than the internal drive), then patch, load and kexec the provided 4.5.0 kernel (see later discussion for why the standard 3.10 RedSleeve kernel is not used), and then proceed to mount the root partition (also from the USB key) and start RedSleeve Linux. This will all take about 60 seconds or so. The LED on the front of the B3 should:
- first, turn green, for about 20 seconds, as the interstitial kernel loads; then,
- very briefly turn purple, and then off for a few seconds, as the 'real' kernel is patched and loaded; then
- turn purple for about 20 seconds, as the real kernel boots, and then
- turn green as RedSleeve Linux comes up.
About 20 seconds after the LED turns green in step 4, above, you should be able to log in, via ssh, per the following instructions.
The image uses a solid green LED as its 'normal' state, so that you can easily tell at a glance whether your B3 is running an Excito/Debian system (blue LED) or a RedSleeve Linux one (green LED).
Also, please note that if you have installed RedSleeve Linux to your internal HDD (per the instructions given later), and are booting from the HDD, that the front LED will be purple, not green, during phase 1.
Once booted, you can log into the B3 as follows (the root password is redsleeveb3).
First, connect your client PC (or Mac etc.) to the lan Ethernet port of your B3 (you can use a regular Ethernet cable for this, the B3's ports are autosensing).
You must use Ethernet to log in when using this image: RedSleeve does not include a build of
hostapdat this time, so WiFi login isn't supported 'out of the box'. The necessary kernel WiFi support is present on the image, however, so once logged in you can build your own copy of hostapd using e.g. the instructions here.
Then, on your client PC, issue:
$ ssh root@rsb3
The authenticity of host 'rsb3 (192.168.50.1)' can't be established.
ECDSA key fingerprint is SHA256:yFDbX//vEJHTZNZaYcWOJfZsL0uVzJW9xlXwxtoW68c.
Are you sure you want to continue connecting (yes/no)? <type yes and press Enter>
Warning: Permanently added 'rsb3' (ECDSA) to the list of known hosts.
root@rsb3's password: <type redsleeveb3 and press Enter>
[root@rsb3 ~]#
and you're in! You may receive a different fingerprint type, depending on what your ssh client supports. Also, please note that the ssh host keys are generated on first boot (for security), and so the fingerprint you get will be different from that shown above.
If you have trouble with
ssh root@rsb3, you can also try usingssh root@192.168.50.1instead.
If you have previously connected to a different machine with the same IP address as your B3 via ssh from the client PC, you may need to delete its host fingerprint (from ~/.ssh/known_hosts on the PC) before ssh will allow you to connect.
As shipped, the image has the
iptablesfirewall service disabled, and does not have forwarding set up between thelanandwanports. As such, while you should be able to access the Internet when logged into your B3 overssh(to install packages etc.), client PCs will not be able to e.g. browse the web via thelaninterface out of the box. Setting up such a configuration is relatively straightfoward however.
The supplied image contains a configured RedSleeve v7 Linux system, based originally on the dreamplug-redsleeve-image.img.xz image from the redsleeve.org repo, so you can immediately perform yum operations (RedSleeve's equivalent of apt-get) etc. See the section "Keeping Your RedSleeve System Up-To-Date" near the end of this document.
Be aware that, as shipped, it has a UTC timezone and no system locale; however, these are easily changed if desired. See e.g. the Red Hat System Administrator's Guide for details.
The drivers for WiFi (if you have the hardware on your B3) are present (and the WiFi interface name is wlan0), but as mentioned briefly above, the hostapd software is currently unavailable as a pre-built ARM binary in the RedSleeve v7 repositories. You can build a copy yourself if you like, following the instructions here.
If you do decide to build your own copy of
hostapd, be sure to set an appropriate system locale (instructions here) and reboot before trying to use it; otherwise, the underlying driver will fail to initialize the adaptor properly since no regulatory domain can be inferred.
Please note that, as shipped, the B3's wan (eth0) interface is set up as a DHCP client, and the lan (eth1) interface is running a simple DHCP server (using dnsmasq). If your local network does not support DHCP, you should still be able to log in via eth1 and then modify the configuration for eth0 (the wan port) appropriately (the file you need to edit is /etc/sysconfig/network-scripts/ifcfg-eth0; alternatively, just use the supplied nmtui tool, as described here).
Please be aware that, because the image uses an interstitial kernel +
kexecas a kind of overqualified bootloader ^-^ to start the 'real' kernel, the MACs of the B3's ethernet adaptors (eth0andeth1) are not set by U-Boot, but by thesetethermacservice (see the file/etc/systemd/system/setethermac@.service). This service must run before your chosen networking subsystem kicks in: on the image, this isNetworkManager, and the appropriate dependency has been already set up for you.
Incidentally, the dnsmasq service for eth1 is controlled by the /etc/systemd/system/dnsmasq@.service file; this service is in turn started (and stopped) by NetworkManager as eth1 comes up (and down) via the etc/NetworkManager/dispatcher.d/99-eth1 script, following the approach described here. The configuration file for dnsmasq on eth1 may be found at /var/lib/dnsmasq/eth1/dnsmasq.conf.
You can change your B3's hostname if you like; for example, to change it to 'hana' (and to reflect the change immediately), issue:
[root@rsb3 ~]# hostnamectl set-hostname hana
[root@rsb3 ~]# exec bash --login
[root@hana ~]#
If you do change the hostname, remember to reflect it also in the /etc/hosts file.
When you are done using your RedSleeve Linux system, you can simply issue:
[root@rsb3 ~]# systemctl reboot
and your machine will cleanly restart back into your existing (Excito) system off the hard drive. At this point, you can remove the USB key if you like. You can then, at any later time, simply repeat the 'power up with USB key inserted and button pressed' process to come back into RedSleeve Linux - any changes you made will still be present on the USB key.
To power off cleanly (rather than rebooting), you have two options. First, as the image includes Tor's bubba-buttond (built statically), you can simply press the B3's rear button for around 5 seconds, then release it (just as you would on a regular Excito system). The front LED will turn from green to purple, then turn off once it is safe to physically remove the power cable.
Second, if you'd rather use the command line, you can issue:
[root@rsb3 ~]# poweroff-b3
which will have the same effect (and follow the same power-down LED sequence).
Have fun! ^-^
- The specific B3 devices (LEDs, buzzer, rear button etc.) are described by the file
arch/arm/boot/dts/kirkwood-b3.dtsin the main kernel source directory (and included in the git archive too, for reference). You can see an example of using the defined devices in/etc/systemd/system/bootled.service, which turns on the green LED as RedSleeve Linux starts up, and off again on shutdown (this replaces the previous approach, which required an Excito-patched kernel). - The live USB works because the B3's firmware boot loader will automatically try to run a file called
/install/install.itbfrom the first partition of the USB drive when the system is powered up with the rear button depressed. In the provided image, we have placed a bootable (interstitial) kernel uImage in that location. Despite the name, no 'installation' takes place, of course! - Unfortunately, at the time of writing, the standard kernel version supplied by RedSleeve (3.10.14) does not have the B3 specific patches included (these hit the mainline in version 3.15), and so is unusable for booting. Accordingly, I have built a 4.5.0 Gentoo kernel + module set, and shipped this with the image (you can see the interstitial kernel config here, and the 'real' kernel config here). It has all the necessary
systemdoptions enabled (for auditing etc.). The 4.5.0 module set has not been stripped, but you can easily do this yourself if you like. The RedSleeve 3.10.14 kernel and module set have been left in place on the image also, for reference. - As mentioned, two kernels are actually used during the boot process. The first, 'interstitial' kernel has an integral initramfs (an archive of which is available here), within which is a simple init script (which you can see here); this script attempts to mount the first partition of the USB key (by UUID, so it will work even on a diskless chassis) and then sources the file
/boot/kexec.shwithin it (which you can see here). This script in turn loads the 'real' kernel zImage from/boot, applies a small workaround patch, sets up the kernel command line, and then switches to this 'real' kernel (usingkexec). You can easily modify the script fragment/boot/kexec.shif you like, for example to change the kernel command line settings, or to run a different kernel (e.g. should RedSleeve release a version >= 3.15 in future, and you wish to use that instead). - The WiFi adaptor interface (if you have the hardware on your B3) is given the name
wlan0via audevrule (see/etc/udev/rules.d/70-net-name-use-custom.rules). Please note that this will not work correctly if you have more than one WiFi adaptor on your B3 (an unusual case). - A workaround for the Marvell tso issue has been implemented, again via a
udevrule (see/etc/udev/rules.d/50-marvell-fix-tso.rules). - If you have a USB key larger than the minimum 4GB, after writing the image you can easily extend the size of the third partition (using
fdiskandresize2fs), so you have more space to work in. See these instructions, for example.
If you like RedSleeve, and want to set it up permanently on the B3's internal hard drive, you can do so easily (it takes less than 5 minutes). The full process is described below. (Note, this is strictly optional, you can simply run RedSleeve Linux from the USB key, if you are just experimenting, or using it as a rescue system.)
Warning - the below process will wipe all existing software and data from your internal drive, so be sure to back that up first, before proceeding. It will set up:
- /dev/sda1 as a 256MiB boot partition, and format it
ext3; - /dev/sda2 as a 1GiB swap partition;
- /dev/sda3 as a root partition using the rest of the drive, and format it
ext4.
Note also that the script
/root/install_on_sda.shwill install using a DOS partition table (max 2TiB); if you'd rather use GPT, then use/root/install_on_sda_gpt.shinstead. All B3s can boot from a GPT-partitioned drive; however, please note that if your HDD has a capacity > 2TiB, then only those B3s with a relatively modern U-Boot will work correctly. The DOS partition table version should work for any size drive (but will be constrained to a maximum of 2TiB).
OK, first, boot into the image and then connect to your B3 via ssh, as described above. Then you can simply run the supplied script to install onto your hard drive:
[root@rsb3 ~]# /root/install_on_sda.sh
Install RedSleeve -> /dev/sda (B3's internal HDD)

WARNING - will delete anything currently on HDD
(including any existing Excito Debian system)
Please make sure you have adequate backups before proceeding

Type (upper case) INSTALL and press Enter to continue
Any other entry quits without installing: <type INSTALL and press Enter, to proceed>
Installing: check '/var/log/redsleeve_install.log' in case of errors
Step 1 of 5: creating partition table on /dev/sda...
Step 2 of 5: formatting partitions on /dev/sda...
Step 3 of 5: mounting boot and root partitions from /dev/sda...
Step 4 of 5: copying system and bootfiles (please be patient)...
Step 5 of 5: syncing filesystems and unmounting...
All done! You can reboot into your new system now.
That's it! You can now try rebooting your new system (it will have the same initial network settings as the USB version, since we've just copied them over). Issue:
[root@rsb3 ~]# systemctl reboot
And let the system shut down and come back up. Don't press the B3's back-panel button this time. The system should boot directly off the hard drive. You can now remove the USB key, if you like, as it's no longer needed. Wait 60 seconds or so, then from your PC on the same subnet issue:
$ ssh root@rsb3
root@rsb3's password: <type redsleeveb3 and press Enter>
[root@rsb3 ~]#
Of course, if you changed root's password in the USB image, use that new password rather than root in the above.
Once logged in, feel free to configure your system as you like! Of course, if you're intending to use the B3 as an externally visible server, you should take the usual precautions, such as changing root's password, configuring a firewall, possibly changing the ssh host keys, etc.
You can update your system at any time (whether you are running RedSleeve Linux from USB or the B3's internal drive).
For more information, please refer to e.g the RedHat yum guide (yum is RedSleeve Linux's package manager, based on rpm), or their yum 'cheat sheet'. However, here are some very brief hints to get you started.
To see which (if any) packages on your system have updates available, issue:
[root@rsb3 ~]# yum check-update
If this displays that updates are available, you can fetch and install them with:
[root@rsb3 ~]# yum update
   (confirm when prompted)
(Equivalent to apt-get update && apt-get upgrade on Debian.)
Or, if you just wish to bring one particular package up to date (e.g. the nano editor), specify it thus:
[root@rsb3 ~]# yum update nano
   (confirm when prompted)
To search for a the package name of some new software you wish to install, you can use yum search. For example, to find the package containing the apache web server, issue:
[root@rsb3 ~]# yum search apache
   (confirm when prompted)
From the list returned, you can see the package name is httpd. Then, to install this (equivalent to apt-get install ... on Debian):
[root@rsb3 ~]# yum install httpd
   (confirm when prompted)
You can install any packages you like using yum, it should not break your system. If working from the USB, any packages you install will still be present next time you boot off the USB (and will also be copied over to the hard drive, should you choose to do that, as described earlier).
Note that even if a kernel upgrade becomes available, your system will not automatically use it unless you edit the
/boot/kexec.shscript, as described earlier. Do not use a 'stock' RedSleeve kernel unless it has a version >= 3.15 however, since that is the point at the B3 patches were merged into the mainline kernel: without these your system will hang during boot. As noted, this image ships with a 4.5.0 kernel for your convenience (built using Gentoo sources, but otherwise 'vanilla').
It is possible to instructyumnot to download and install kernel updates. To do so, add the following lines to/etc/yum.conf:
[main]
exclude = kernel*
If you wish, you can use yum-cron to keep your system up-to-date automatically (this is entirely optional). To set this up, proceed as follows:
[root@rsb3 ~]# yum install yum-cron
   (confirm when prompted)
Then, using your favourite editor, add the following lines to /etc/yum/yum-cron.conf:
apply_updates = yes
[main]
exclude = kernel*
Then:
[root@rsb3 ~]# systemctl enable yum-cron
[root@rsb3 ~]# systemctl start yum-cron
For further information about RedSleeve Linux setup, the best resources are the Red Hat documentation (on whose distribution RedSleeve is patterned) or, similarly, the CentOS wiki.
You may also find it useful to keep an eye on the 'Development' forum at excito.com, as I occasionally post information about this live-USB there.
If you have any problems, questions or comments regarding this project, feel free to drop me a line! (sakaki@deciban.com)