-- img --
See the Customization section at the bottom if you're looking to modify/create something with it.
You'll need the following below, plus a USB-C cable that can plug into a computer.
Search terms:
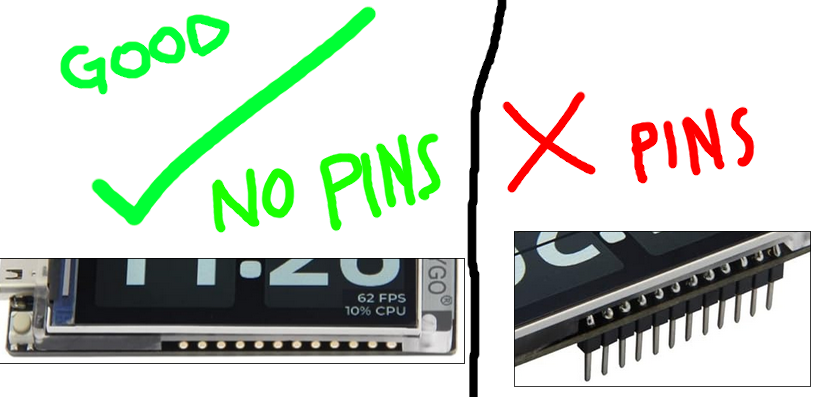
LILYGO T-Display-S3 ESP32-S3 1.9 inch ST7789 LCD Display- Roughly $25
- Make sure it doesn't have soldered pins!
- (you don't want these, and they sell both kinds)
- Example:
- Example:
3.7V Lithium Rechargeable Battery JST1.25 Connector 2pin, 952540 3.7V 1000mAh Battery- Roughly $20 for a 4-pack
- Guaranteed to work and be convenient
- You could probably find it cheaper, see notes below
and some string or a clamp.
I used a Lilygo T-Display-S3 and recommend it.
Specifically, the version without soldered pins sticking out.
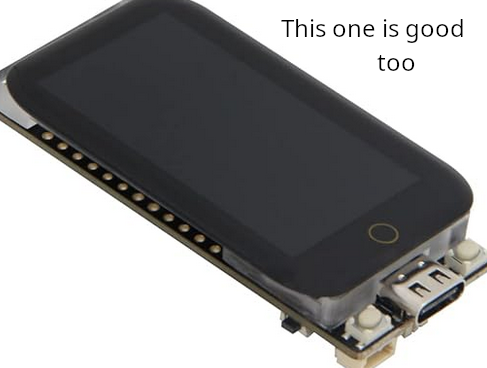
It works with or without the touch screen, so either version will work.
Boards ending in C3 and AMOLED screens have similar names but won't work out of the box.
Anything that's some combo of ESP32-S3 and ST7789 TFT LCD will work if you change the resolution.
Any other ESP32 variant (or ESP8266) or different TFT LCD: your mileage may vary. See the porting notes below.
The recommended batteries above are plug-'n'-play with 0 issues, but they're about $10-15 more than they could be if you do a little work.
Any 3.7V battery should work here, but a few notes. If you go with the recommended board above, ensure that your batteries are JST1.25 rather than JST2.0.
This is the connector size, and a more conveniently sized battery won't work without you soldering on a new connector.
If you're handy soldering, I recommend taking a cheaper battery and replacing the leads -- the board I use above actually comes with a JST1.25 connector.
Ensure the leads match the right polarity!
I have had a number of batteries shipped with the red and black wires in different places in the connector.
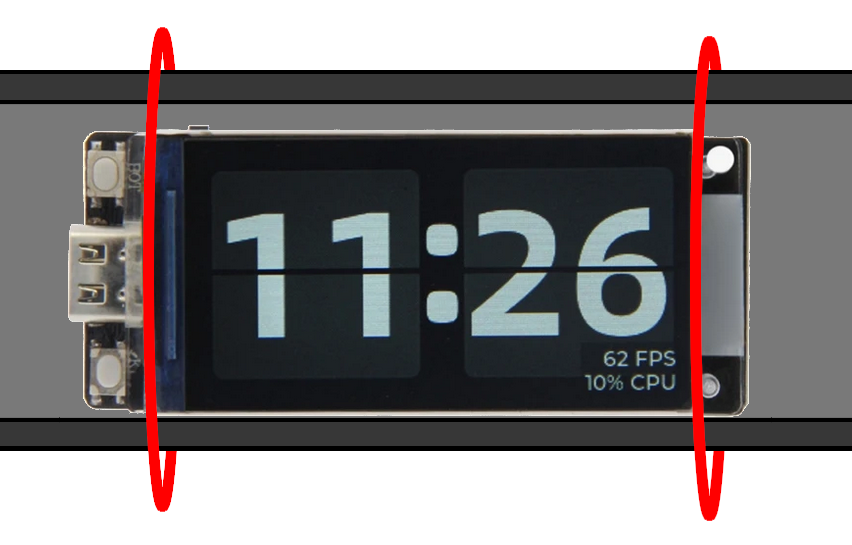
Any collar that's tall enough should work. The recommended display below is 2.5cm tall and sits snug in the middle of mine.
I attached mine with black string as follows, with the battery already plugged in.
and then I tied the strings together with a fisherman's knot, which there are plenty of guides for.
The end result was that it held tight, moves with just a bit of play, and is practically invisible.
I tied the battery on the inside of the collar and barely notice it, but I've also toyed with longer batteries to hide in clothes pockets and/or hanging from the back hook for a leash.
- Download PlatformIO from their website. It's free and open source and runs on just about anything.
- Should work on everything. I haven't tested Windows or MacOS.
- I use Arch personally, and had to do a little extra to get the board to read.
$ pacman -S platformio-core- then fix the udev rules. official documentation
- I threw it in
/lib/udev/rules.d/, added the groupdialoutto my user, and restarted udev and it worked.
- I threw it in
- Plug the board into your computer and it should light up.
- Clone the repository / download it from the GitHub website and unzip it.
- Run
pio run -t uploadfrom the root project folder. - Attach it to the collar. That's it!
Drop me a line if you made one, I'm all ears to hear if it worked as easy as it should.
The general purpose button switches through all the available drawing modes.
The last one is a sleep mode that exists to conserve battery rather than run it down.

Hold the button that isn't the reset or mode buttons, the one close to reset, then tap reset and let go of the other. It should go blank and be in a force-flashing mode. Hopefully this recognizes it.
If on Linux, check udevadm monitor to see if it's mapping to /dev/ttyACMX.
Anything else, throw me a line on Telegram here! I might be able to help.
Customization notes (largely unsorted):
- The TFT library uses RGB565 2-byte colors.
- The fast rendering framebuffer can do 2-color (one pixel per bit / 8 per byte) or 256-color palette (use conversion functions in
framebuffer.h)
- The fast rendering framebuffer can do 2-color (one pixel per bit / 8 per byte) or 256-color palette (use conversion functions in
- The board can't do float division quickly. This is why the curved spiral prerenders all of the frames ahead of time.
- Custom images: png2c -> array of 2 byte RGB565 colors, copy into framebuffer / draw pixels to screen.
- Adding a mode:
- Increment
NUM_MODESinmain.cppand add it to the state machine -- checkmodes.h/cfor examples. - setup and teardown in enter/exit state machine.
- Set framebuffer data to target to draw, set modified to have it be checked when the frame updates.
modifiedis an array of bytes - each one is 8 pixels to check during framebuffer draw. Bitmasking utilities are inframebuffer.h
- Increment
- Modifying the colors of existing modes: check the setup functions in
modes.cpp.