This readme along with an install script will help you get everything running in a few commands. It contains a bunch of configuration for the tools I use. I also have a number of blog posts and videos related to my dev environment.
- View screenshots of the current set up and how to switch themes
- Quickly get set up with these dotfiles
- FAQ
- About the author
Since these dotfiles are constantly evolving and I tend to reference them in videos, blog posts and other places I thought it would be a good idea to include screenshots in 1 spot.
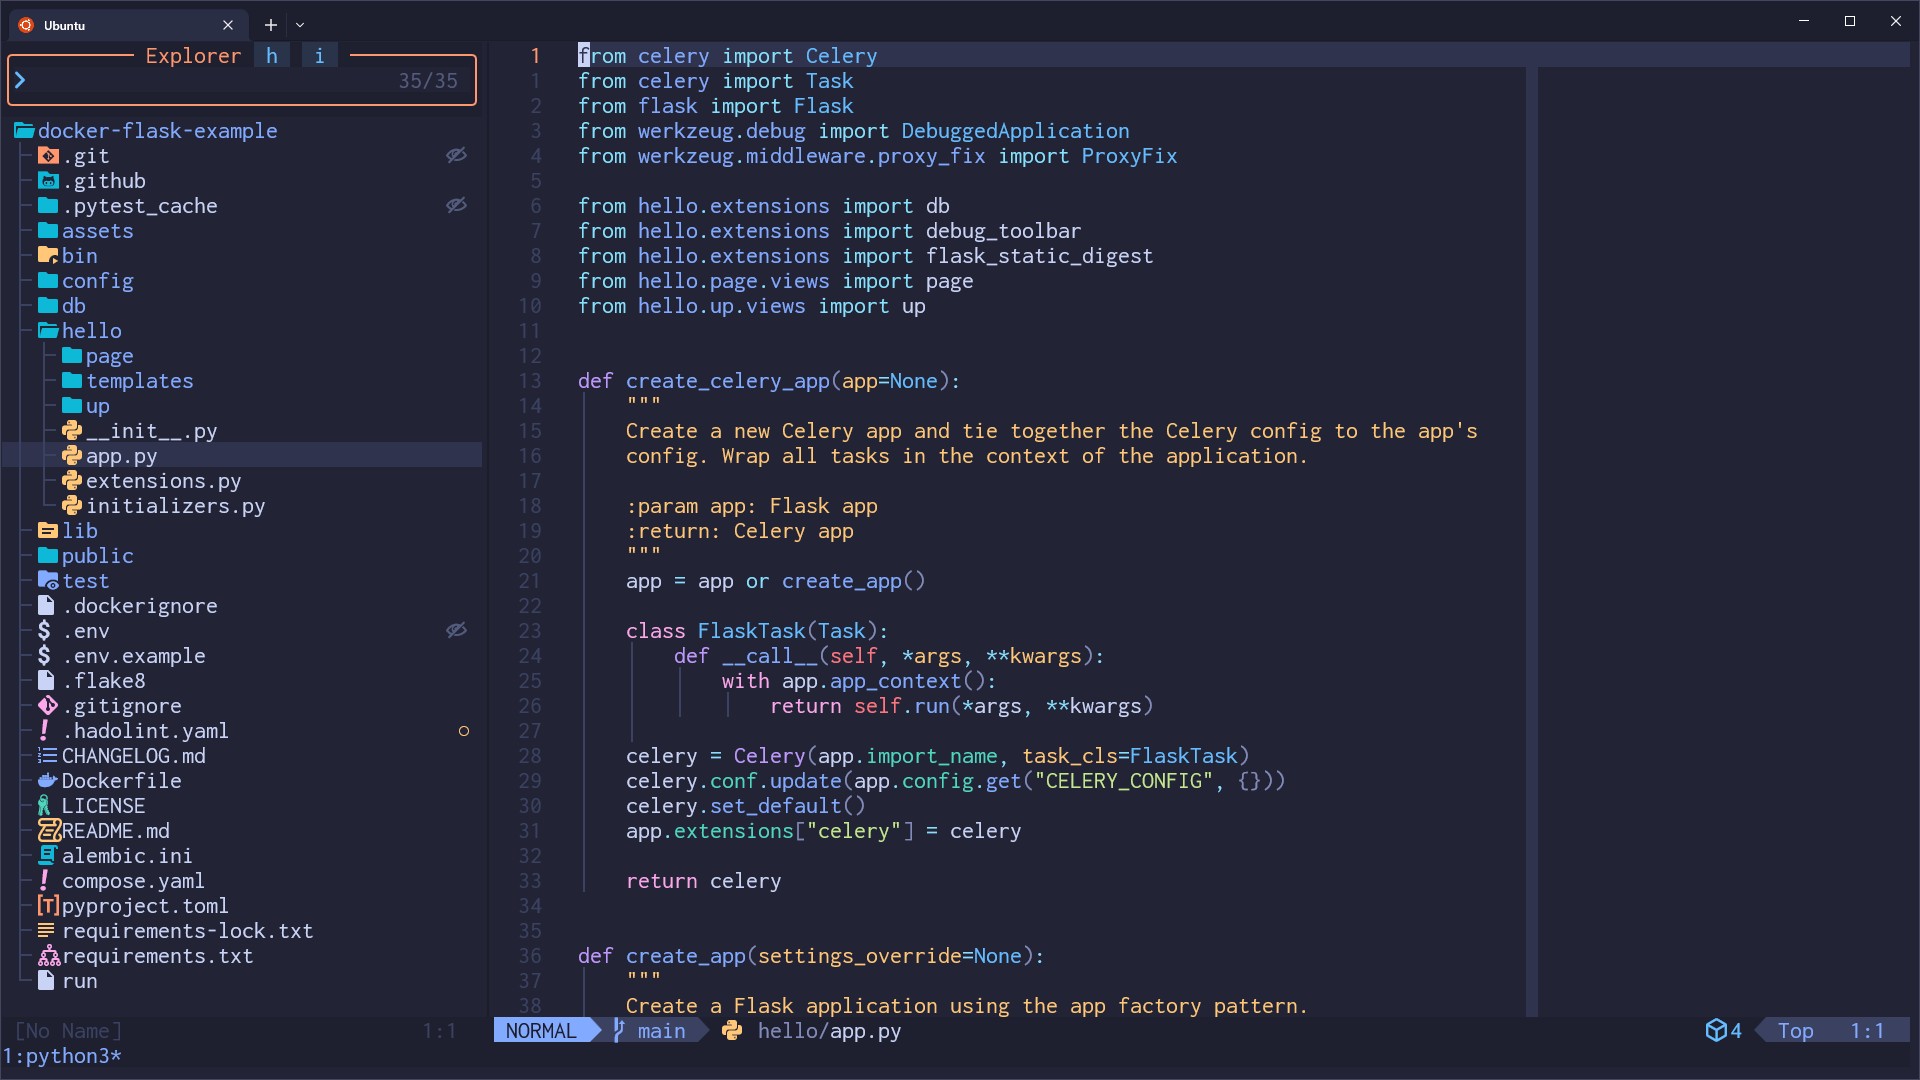
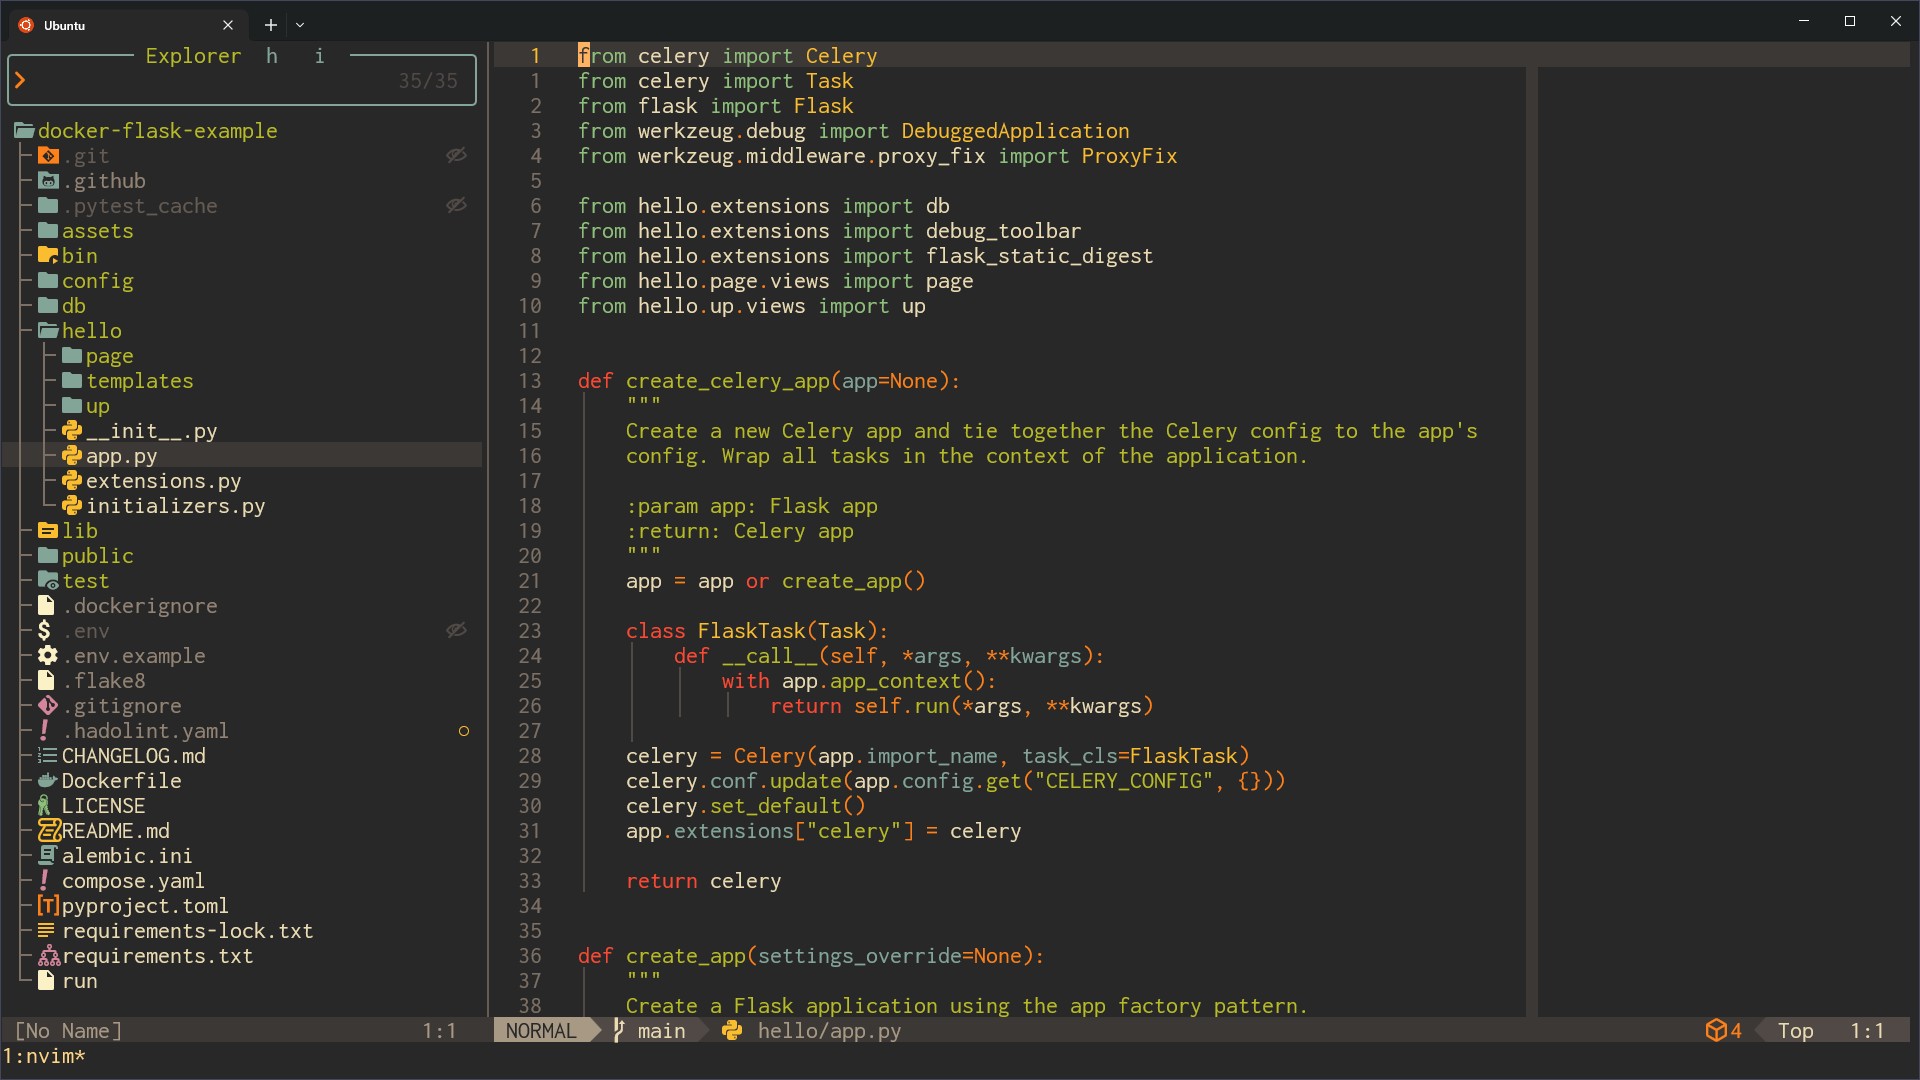
I prefer using themes that have good contrast ratios and are clear to see in video recordings. These dotfiles currently support easily switching between both themes but you can use any theme you'd like.
It's worth pointing out if you want to see icons you'll need a "nerd font". There's hundreds of them on https://www.nerdfonts.com/font-downloads with previews. I personally use "Inconsolata Nerd Font".
These dotfiles include a set-theme script that you can run from your terminal
to set your theme to any of the themes listed above. This script takes care of
configuring your terminal, tmux, Neovim, GitUI and FZF in 1 command.
If you don't like the included themes that's no problem. You can use whatever you want, there's no limitations. You could choose to manually change the colors or adjust the set-theme script to add a custom theme.
After installing these dotfiles you can switch themes with:
# Available themes are: tokyonight-moon and gruvbox-dark-medium
set-theme THEME_NAME
When switching themes your terminal and tmux colors will update automatically, but if you have Neovim already open you'll need to manually close and open it.
If you get a message about your terminal being unknown please review this FAQ item.
There's an ./install script you can run to automate installing everything.
That includes installing system packages such as zsh, tmux, Neovim, etc. and
configuring a number of tools in your home directory.
It even handles cloning down this repo. You'll get a chance to pick the clone location in the script as well as view and / or change any system packages that get installed.
The install script is optimized for:
- Ubuntu 22.04 LTS+ (native or WSL)
- Debian 11+
- macOS 10.15+
It will still work with other distros of Linux if you skip installing system packages (more details are below).
You can download and run the install script with this 1 liner:
bash <(curl -sS https://raw.githubusercontent.com/nickjj/dotfiles/master/install)If you're not comfortable blindly running a script on the internet, that's no problem. You can view the install script to see exactly what it does. Each section is commented. Sudo is only used to install system packages. Alternatively you can look around this repo and reference the config files directly without using any script.
You can also run the script without installing system packages:
bash <(curl -sS https://raw.githubusercontent.com/nickjj/dotfiles/master/install) --skip-system-packagesThat above could be useful if you're using a non-Debian based distro of Linux, in which case you'll need to install the dependent system packages on your own beforehand. Besides that, everything else is supported since it's only dealing with files in your home directory.
This set up targets zsh 5.0+, tmux 3.0+ and Neovim v0.10+. As long as you can meet those requirements you're good to go. The install script will take care of installing these for you unless you've skipped system packages.
Try it in Docker without modifying your system:
# Start a Debian container. We're setting a custom env var because the install
# script will set a few extra things up when it's running in a container.
docker container run --rm -it -e "CONTAINER=1" -v "${PWD}:/app" -w /app debian:bookworm-slim

# [All of the commands below are expected to be run in the container]

# Follow the usual installation steps.
bash <(curl -sS https://raw.githubusercontent.com/nickjj/dotfiles/master/install)

# Since we can't open a new terminal in the container we'll launch zsh and
# manually source a few files. These 2 commands are only needed in Docker.
zsh 2>/dev/null
. ~/.config/zsh/.zprofile && . ~/.config/zsh/.zshrc
Keep in mind with the Docker set up, unless your terminal is already configured to use Tokyonight Moon then the colors may look off. That's because your local terminal's config will not get automatically updated.
Nice!
If you haven't done so already please close your terminal and open a new one, then follow the step(s) below:
One of the things the install script did was copy a git ignored git config file into your home directory. You're meant to put in your name and email address so that your details are used when you make git commits.
nvim ~/.gitconfig.user# Check to make sure git is configured with your name and email.
git config --list
# Sanity check to see if you can run some of the tools we installed.
nvim --version
tmux -V
node --versionBefore you start customizing certain config files, take a look at the personalization question in the FAQ.
In addition to the Linux side of things, there's a few config files that I have
in various directories of this dotfiles repo. These have long Windows paths and
are in the c/ directory.
It would be expected that you copy those over to your system while replacing
"Nick" with your Windows user name if you want to use those things, such as my
Microsoft Terminal settings.json file and others. Some of the paths may
also contain unique IDs too, so adjust them as needed on your end.
Some of these configs expect that you have certain programs or tools installed on Windows. The tools I use blog post has a complete list of those tools so you can pick the ones you want to install.
Pay very close attention to the c/Users/Nick/.wslconfig file because it has
values in there that you will very likely want to change before using it.
This commit
message
goes into the details.
Also, you should reboot to activate your /etc/wsl.conf file (the install
script created this). That will be necessary if you want to access your mounted
drives at /c or /d instead of /mnt/c or /mnt/d.
Chances are you'll want to personalize some of these files, such as various
Neovim settings. Since this is a git repo you can always do a git pull to get
the most up to date copy of these dotfiles, but then you may find yourself
clobbering over your own personal changes.
Since we're using git here, we have a few reasonable options.
For example, from within this dotfiles git repo you can run git checkout -b personalized and now you are free to make whatever changes that you want on
your custom branch. When it comes time to pull down future updates you can run
a git pull origin master and then git rebase master to integrate any
updates into your branch.
Another option is to fork this repo and use that, then periodically pull and merge updates. It's really up to you.
The set-theme script tries to be pretty flexible but it's not super tuned to
support every terminal in every operating system. If it can't find a valid
terminal config it will skip trying to set the theme and try to provide a
helpful message.
These dotfiles have my exact config in
c/Users/Nick/AppData/Local/Packages/Microsoft.WindowsTerminal_8wekyb3d8bbwe/LocalState/settings.json,
you can copy / paste that config to a similar path within your Windows set up.
It comes set up with all supported themes. This is only necessary to do once.
It's not automated because it would be pretty rude if the install script
overwrote your Windows files.
Once you have that set up, running set-theme THEME_NAME will work without
further manual adjustments.
These dotfiles have color presets for all supported themes in
c/Users/Nick/iTerm2. You'll want to import them into your iTerm2 profile.
This is only necessary to do once. Here's the steps to take:
- Open iTerm2
- Goto Settings
- Goto Profiles (tab within settings)
- Goto Colors (tab within profiles)
- Click the Color Presets... drop down box in the bottom right
- Select Import... and choose the theme you want to import
- Repeat these steps for each theme you're interested in
I don't use a Mac full time (only on a work laptop) so I haven't automated much
but iTerm2 appears a little tricky to fully automate with theme switching. When
you run set-theme THEME_NAME to switch themes you will need to manually pick
the theme in iTerm2. You can run through steps 1-5 above and pick it from the
list instead of importing it. If you have a way to automate this reliably
please open a PR!
Also, if you noticed ALT+x keymaps within Neovim aren't working that's because you need to goto your profile (step 3 from above), then the Keys tab and enable "Esc+" for the ALT keys you plan to use (left and / or right). If it's set to "Normal" (the likely default) then they won't work out of the box.
If you're using a popular terminal and want it officially supported please open
a pull request. You'd modify set-theme for the TERMINALS dictionary as well
as the change_terminal_theme function. The basic idea is it tries to find
specific lines within the config file and does a regex find and replace to swap
in the theme name.
Happy to assist in your PR to answer questions.
After installing these dotfiles you'll have a ~/.local/bin/set-theme script.
It's a zero dependency Python 3
script.
- Open the above file
- Check out the
THEMESdictionary near the top of the file - Copy one of the existing themes' dictionary items, such as
tokyonight-moonorgruvbox-dark-medium- If your theme has Neovim variants, copy Gruvbox else copy Tokyonight
- Rename the dictionary's key to whatever your new theme's name is
- If the Neovim theme name is the same as the dictionary key, that will be used
- Create the associated
tmuxtheme in~/.tmux/themes - Create the associated
fzftheme in~/.config/zsh/themes/fzf - Create the associated
gituitheme in~/.config/gitui - Modify any supported terminal configs to add the theme
- Run
set-theme cooltheme, replacingcoolthemewith whatever name you used in step 4
If you added a theme with good contrast ratios please open a pull request to get it added to the script.
It primarily comes down to either VcXsrv not running or a firewall tool blocking access to VcXsrv and it takes a bit of time for the connection to time out.
You can verify this by starting Neovim with nvim -X instead of nvim. This
will prevent Neovim from connecting to an X server. This also means clipboard
sharing to your system clipboard won't work, but it's good for a test.
Neovim will try to connect to that X server by default because DISPLAY is
exported in the .zshrc file. Installing and configuring VcXsrv as per these
dotfiles will fix that issue.
If it still persists, it might be a software firewall issue. You can open TCP port 6000 and also restrict access to it from only WSL 2. This will depend on which tool you're using to configure that but that should do the trick.
I've made dozens of blog posts and videos about Vim. Sometimes I linked directly to a commit so there's a permalink to it but other times I did not.
Before switching to Neovim I made a vim git tag. You can check out the state
of the repo for that tag by going
here. You'll see .vimrc in the
root directory. If you cloned these dotfiles locally you can git checkout vim. Keep in mind that's frozen to that point in time. Future updates
unrelated to Vim will not be included in that tag.
I'm a self taught developer and have been freelancing for the last ~20 years. You can read about everything I've learned along the way on my site at https://nickjanetakis.com. There's hundreds of blog posts and a couple of video courses on web development and deployment topics. I also have a podcast where I talk to folks about running web apps in production.