            _ ___                   _ _
   ____ _  (_)__ \ ____ ___________(_|_)
  / __ `/ / /__/ // __ `/ ___/ ___/ / /
 / /_/ / / // __// /_/ (__  ) /__/ / /
 \__, /_/ //____/\__,_/____/\___/_/_/
/____/___/
Render spatial vector data as ASCII or emoji with Python on the commandline.

A tweet made it seem like an interesting exercise but
the gj2ascii commandline utility has been very useful for previewing multiple files and the API has proven to be
useful for debugging complex geoprocessing operations.
The overall goal of this utility is to provide easy access to ASCII representations of vector geometries and overlapping layers.
- When rendering a single layer an ASCII character is used.
- When rendering multiple layers colors are used with a randomly assigned character underneath and a transparent fill.
There are only 7 colors (black is not used for auto-assignment) so if more than 7 layers
are given the --char flag must be used for each of them to manually assign a character,
emoji, or color.
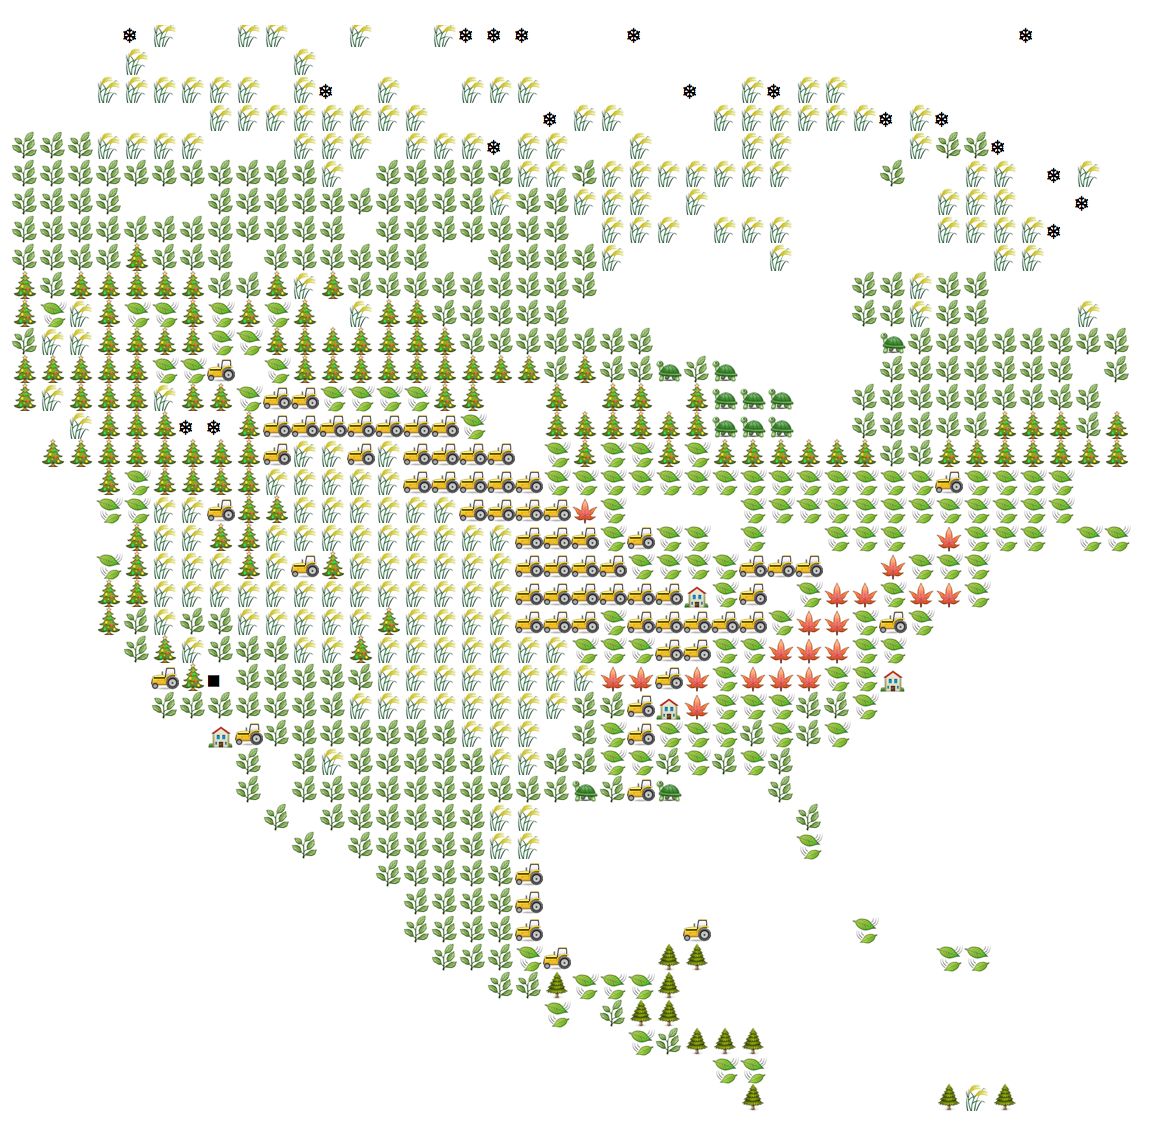
The emoji screenshot was generated by downloading the GeoTIFF version of the
MODIS Landcover dataset, resampling to 25%
of its original, size converted to a vector with gdal_polygonize.py,
and split
into one ESRI Shapefile per class with QGIS, before executing the following
command:
$ gj2ascii \
    --bbox -130 9 -61.5 77 \
    --width 80 \
    0.geojson -c ' ' \
    1.geojson -c :christmas_tree: \
    2.geojson -c :evergreen_tree: \
    3.geojson -c :maple_leaf: \
    4.geojson -c :maple_leaf: \
    5.geojson -c :deciduous_tree: \
    6.geojson -c :herb: \
    7.geojson -c :herb: \
    8.geojson -c :herb: \
    9.geojson -c :herb: \
    10.geojson -c :ear_of_rice: \
    11.geojson -c :turtle: \
    12.geojson -c :tractor: \
    13.geojson -c :house_building: \
    14.geojson -c :leaf_fluttering_in_wind: \
    15.geojson -c :snowflake: \
    16.geojson -c :black_medium_square:
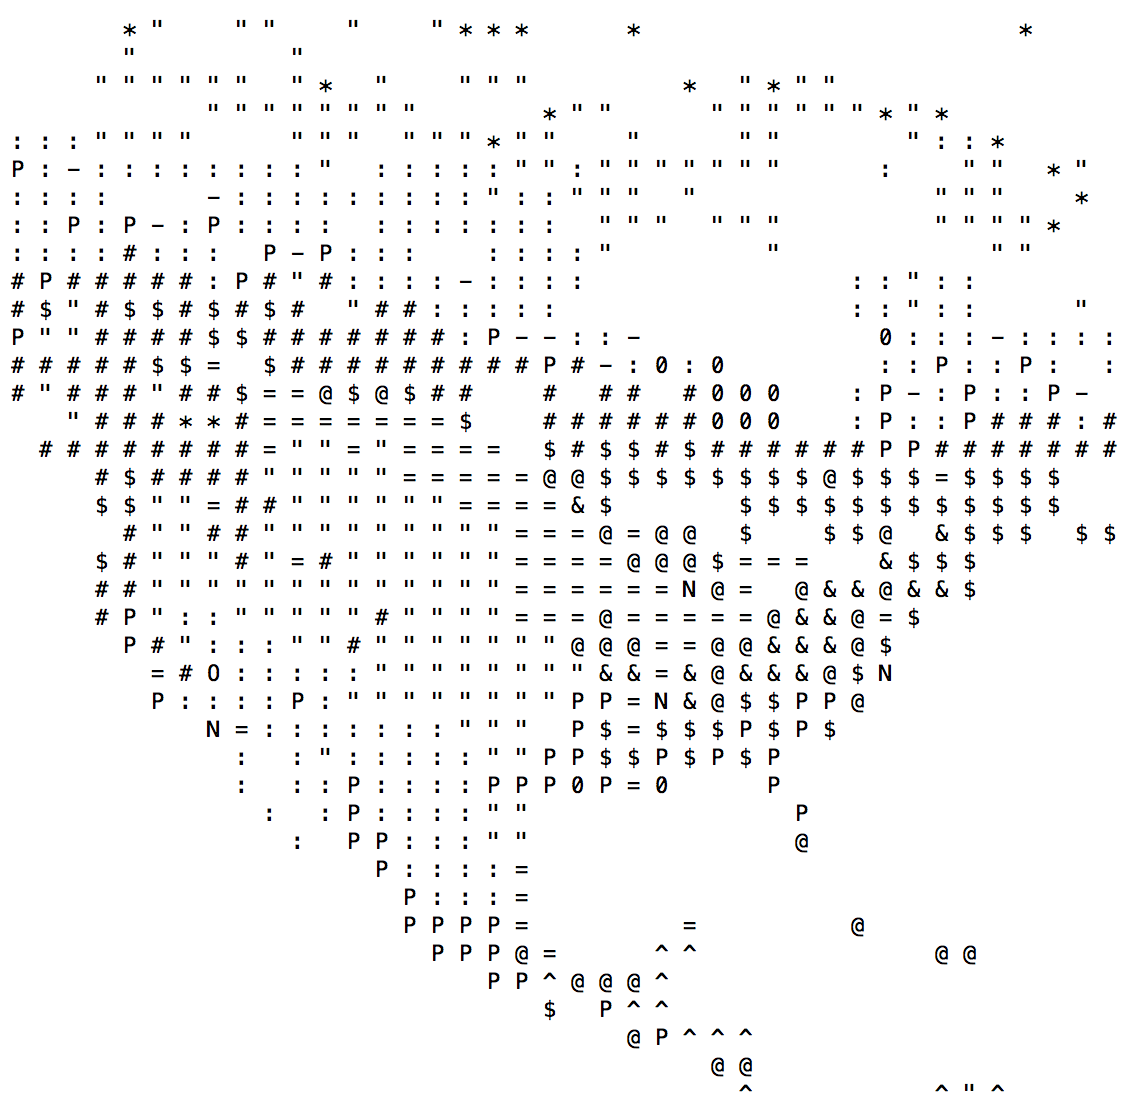
The same data can be rendered with ASCII characters instead:
$ gj2ascii \
    --bbox -130 9 -61.5 77 \
    --width 80 \
    0.shp -c ' ' \
    1.shp -c \# \
    2.shp -c \^ \
    3.shp -c + \
    4.shp -c \& \
    5.shp -c \$ \
    6.shp -c \% \
    7.shp -c \: \
    8.shp -c P \
    9.shp -c - \
    10.shp -c \" \
    11.shp -c 0 \
    12.shp -c = \
    13.shp -c N \
    14.shp -c \@ \
    15.shp -c \* \
    16.shp -c O
See the examples directory for more information and more complex examples but the following are a good place to get started. Some of the examples include output that would be colored if run on the commandline or in Python but RST cannot render the ANSI codes.
Render two layers, one read from stin and one read directly from a file, across 20 pixels while explicitly specifying a character and color for each layer and background fill, and zooming in on an area of interest.
$ cat sample-data/polygons.geojson | gj2ascii - \
    sample-data/lines.geojson \
    --bbox sample-data/small-aoi-polygon-line.geojson \
    --width 20 \
    --char ^=red \
    --char -=blue \
    --fill .=green
. . . . . . - . . . . . . . . . ^ ^ ^ ^
. . . . . - . . . . . . . . . . . ^ ^ ^
. . . . - . . . . . . . . . . . . . - -
. . . . - . . . . . . . . - - - - - . ^
^ ^ . - . . . . . . . . . . . . . . . .
^ ^ - . . . . . . . . . . . . . . . . .
^ - ^ . . . . . . . . . . . . . . . . .
^ - . . . . . . . . . . . . . . . . . .
- ^ . . . . . . - . . . . . ^ . . . . .
. - . . . . . . - - . . . ^ ^ . . . . .
. . - . . . . . - . - . ^ ^ ^ . . . . .
. . . - . . . . - . . - ^ ^ ^ . . . . .
. . . . - . . - . . ^ ^ - ^ ^ . . . . .
. . . . . - . - . ^ ^ ^ ^ - ^ . . . . .
. . . . . . - - ^ ^ ^ ^ ^ ^ - . . . . .
Render individual features across 10 pixels and display the attributes for two
fields, COUNTYFP and NAME.
$ gj2ascii sample-data/WV.geojson \
    --iterate \
    --properties COUNTYFP,NAME \
    --width 10

+----------+---------+
| COUNTYFP |     001 |
| NAME     | Barbour |
+----------+---------+

            + + +
  +   + + + + + + +
  + + + + + + + + +
+ + + + + + + + +
+ + + + + + + + + +
    + + + + + + +
        + + + +
        + + + +

Press enter for the next geometry or ^C/^D or 'q' to quit...There are two ways to recreate the first example with the Python API. If the user does not care about which characters are assigned to which color, use this one:
import fiona as fio
import gj2ascii
with fio.open('sample-data/polygons.geojson') as poly, \
        fio.open('sample-data/lines.geojson') as lines, \
        fio.open('sample-data/small-aoi-polygon-line.geojson') as bbox:
    layermap = [
        (poly, 'red'),
        (lines, 'blue')
    ]
    print(gj2ascii.style_multiple(layermap, 20, fill='green', bbox=bbox.bounds))
0 0 0 0 0 0 1 0 0 0 0 0 0 0 0 0 2 2 2 2
0 0 0 0 0 1 0 0 0 0 0 0 0 0 0 0 0 2 2 2
0 0 0 0 1 0 0 0 0 0 0 0 0 0 0 0 0 0 1 1
0 0 0 0 1 0 0 0 0 0 0 0 0 1 1 1 1 1 0 2
2 2 0 1 0 0 0 0 0 0 0 0 0 0 0 0 0 0 0 0
2 2 1 0 0 0 0 0 0 0 0 0 0 0 0 0 0 0 0 0
2 1 2 0 0 0 0 0 0 0 0 0 0 0 0 0 0 0 0 0
2 1 0 0 0 0 0 0 0 0 0 0 0 0 0 0 0 0 0 0
1 2 0 0 0 0 0 0 1 0 0 0 0 0 2 0 0 0 0 0
0 1 0 0 0 0 0 0 1 1 0 0 0 2 2 0 0 0 0 0
0 0 1 0 0 0 0 0 1 0 1 0 2 2 2 0 0 0 0 0
0 0 0 1 0 0 0 0 1 0 0 1 2 2 2 0 0 0 0 0
0 0 0 0 1 0 0 1 0 0 2 2 1 2 2 0 0 0 0 0
0 0 0 0 0 1 0 1 0 2 2 2 2 1 2 0 0 0 0 0
0 0 0 0 0 0 1 1 2 2 2 2 2 2 1 0 0 0 0 0
If the user cares about which character is assigned to which layer, use this one:
import fiona as fio
import gj2ascii

with fio.open('sample-data/polygons.geojson') as poly, \
        fio.open('sample-data/lines.geojson') as lines, \
        fio.open('sample-data/small-aoi-polygon-line.geojson') as bbox:

    # Render each layer individually with the same bbox and width
    # The fill will be assigned in the next step but must be a single space here
    rendered_layers = [
        gj2ascii.render(poly, 20, char='^', fill=' ', bbox=bbox.bounds),
        gj2ascii.render(lines, 20, char='-', fill=' ', bbox=bbox.bounds)
    ]

    # Overlay the rendered layers into one stack
    stacked = gj2ascii.stack(rendered_layers, fill='.')

    # Apply the colors and print
    colormap = {
        '^': 'red',
        '-': 'blue',
        '.': 'green'
    }
    print(gj2ascii.style(stacked, colormap))
. . . . . . - . . . . . . . . . ^ ^ ^ ^
. . . . . - . . . . . . . . . . . ^ ^ ^
. . . . - . . . . . . . . . . . . . - -
. . . . - . . . . . . . . - - - - - . ^
^ ^ . - . . . . . . . . . . . . . . . .
^ ^ - . . . . . . . . . . . . . . . . .
^ - ^ . . . . . . . . . . . . . . . . .
^ - . . . . . . . . . . . . . . . . . .
- ^ . . . . . . - . . . . . ^ . . . . .
. - . . . . . . - - . . . ^ ^ . . . . .
. . - . . . . . - . - . ^ ^ ^ . . . . .
. . . - . . . . - . . - ^ ^ ^ . . . . .
. . . . - . . - . . ^ ^ - ^ ^ . . . . .
. . . . . - . - . ^ ^ ^ ^ - ^ . . . . .
. . . . . . - - ^ ^ ^ ^ ^ ^ - . . . . .
Paginating through features:
import fiona as fio
import gj2ascii

with fio.open('sample-data/WV.geojson') as src:
    for feature in gj2ascii.paginate(src, 10, properties=['COUNTYFP', 'NAME']):
        print(feature)
+----------+---------+
| COUNTYFP |     001 |
| NAME     | Barbour |
+----------+---------+

            + + +
  +   + + + + + + +
  + + + + + + + + +
+ + + + + + + + +
+ + + + + + + + + +
    + + + + + + +
        + + + +
+ + + +Via pip:
$ pip install gj2ascii --upgradeFrom master branch:
$ git clone https://github.com/geowurster/gj2ascii.git
$ cd gj2ascii
$ python setup.py install
To enable emoji:
$ pip install gj2ascii[emoji]The dependencies are pretty heavy for a utility like this and may require some extra work to get everything installed. All dependencies should install on their own but there are a few potentially problematic packages. Manually installing the following might help:
Some Linux distributions require an additional step before installing rasterio:
apt-get install python-numpy-dev libgdal1h libgdal-dev.
$ git clone https://github.com/geowurster/gj2ascii.git
$ cd gj2ascii
$ virtualenv venv
$ source venv/bin/activate
$ pip install -e .[all]
$ py.test gj2ascii --cov gj2ascii --cov-report term-missingSee LICENSE.txt.