-
Notifications
You must be signed in to change notification settings - Fork 1.2k
Contribution Examples
This page will contain a list of guides on how to add/edit the content in the EnkiApp.
There are 2 ways you can add a link to an insight.
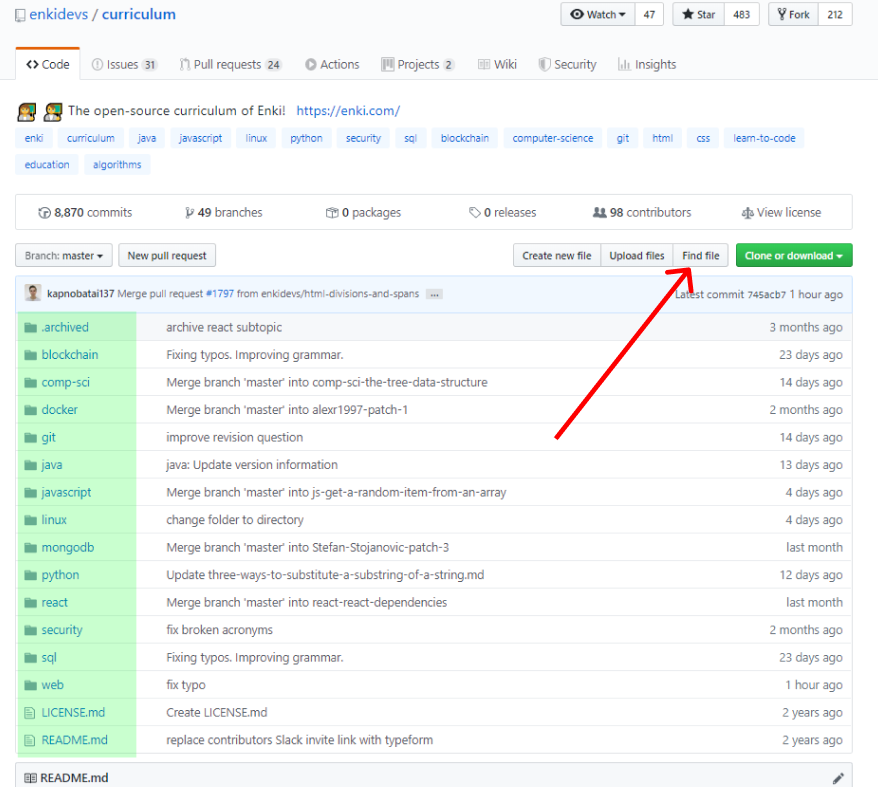
First, go to our curriculum page.
To select the insight you want to add a link to, either navigate by clicking the appropriate folder (highlighted in green) or by clicking the "Find file" button.
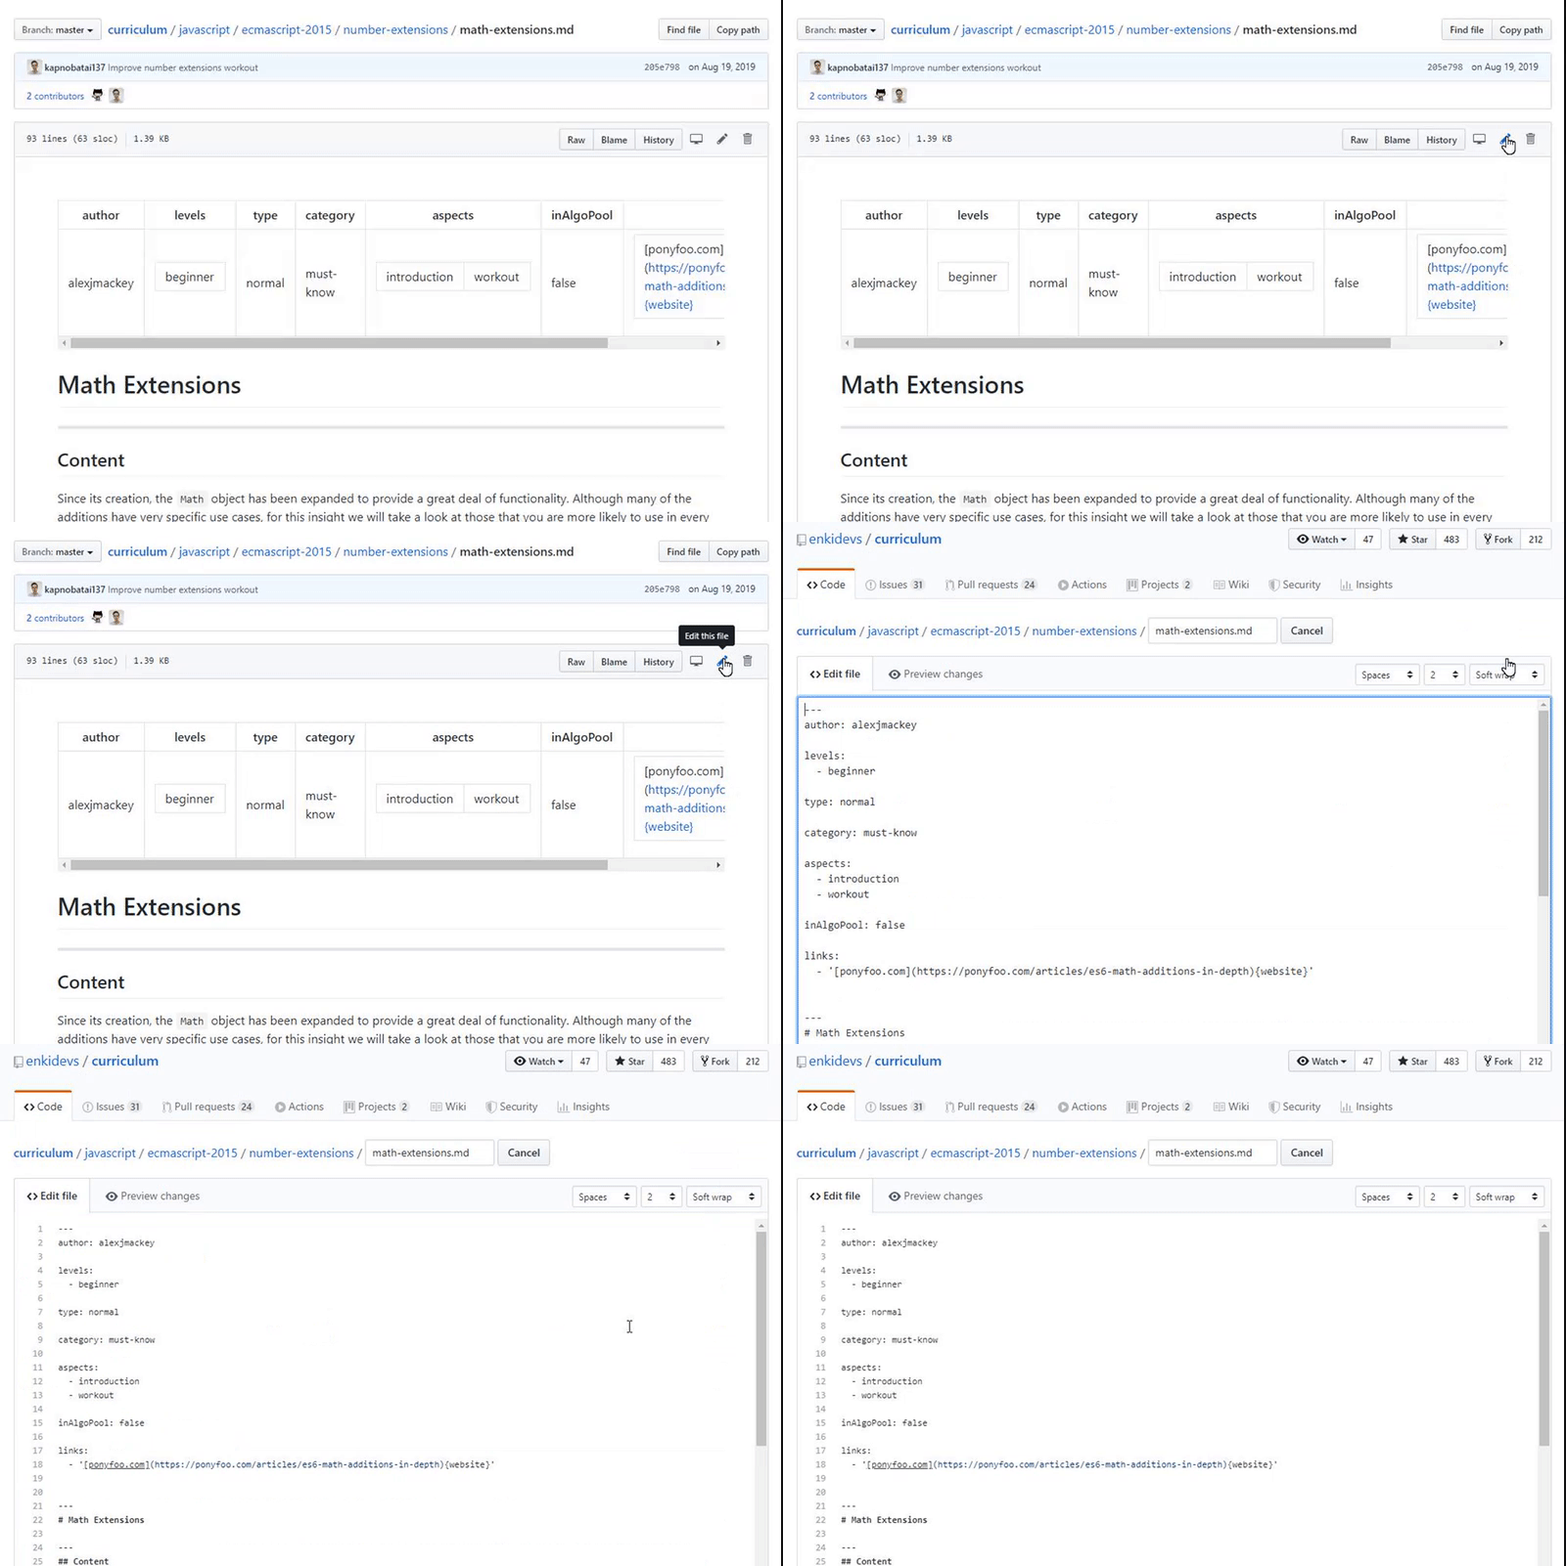
After selecting an insight, press the pencil-shaped button at the top right of the insight to open the editor.
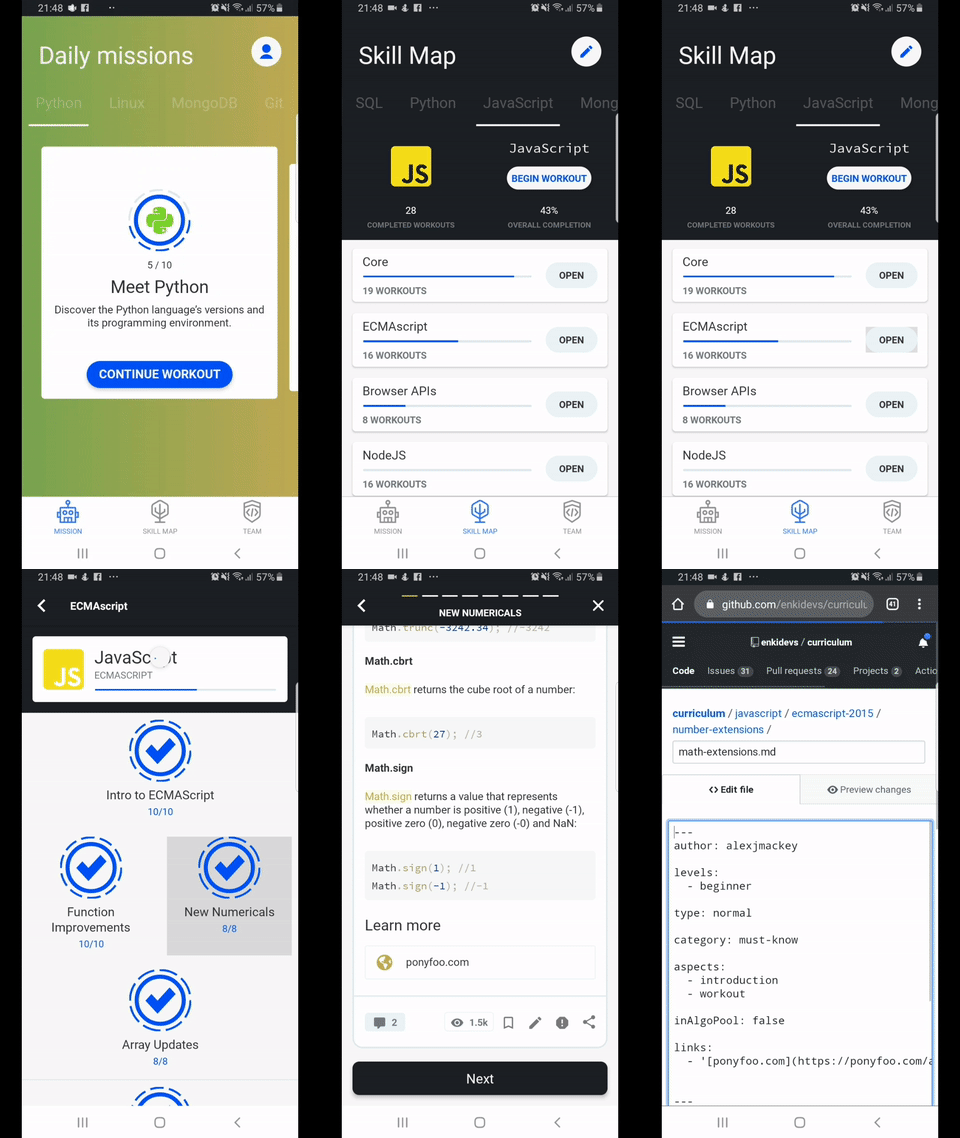
Open the EnkiApp, press the middle SKILL MAP button, select the Topic, then select the Course, next select the Workout, then choose the Insight, scroll to the bottom and press the pencil-shaped button.
This will open the insight page in your default browser ready to be edited.
Now, depending on the insight, some might already have a links section, while others don't.
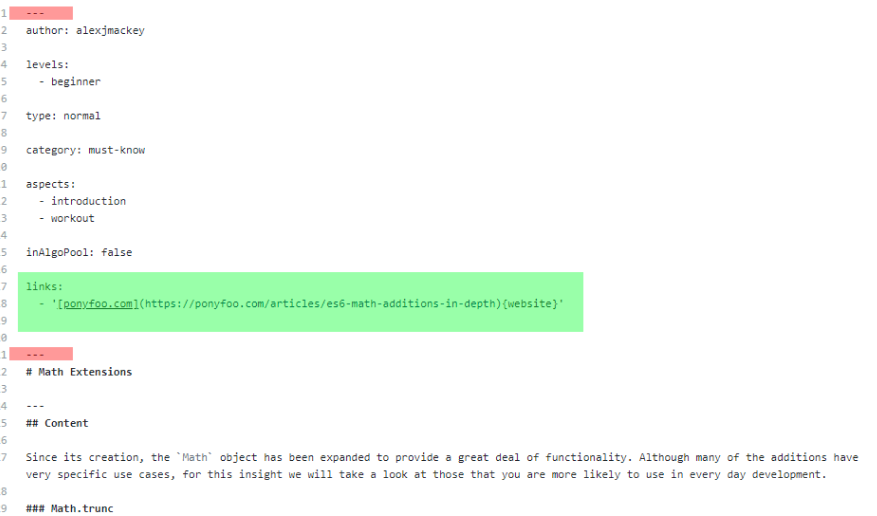
The links section looks like this:
links:
  - '[short-name](full-url){resource-type}'
If an insight doesn't have a links section, you can create one like the one above.
The links section is always located in the top part of the insight between the first and 2nd ---. (Metadata)
Note: Even though the links section is located above the ## Content section, the links are shown under the Learn more section at the end of every insight.
Same insight from above, in the EnkiApp:
To add a new link, put your mouse at the end of a link, hit enter, and add:
- '[](){}'Example link:
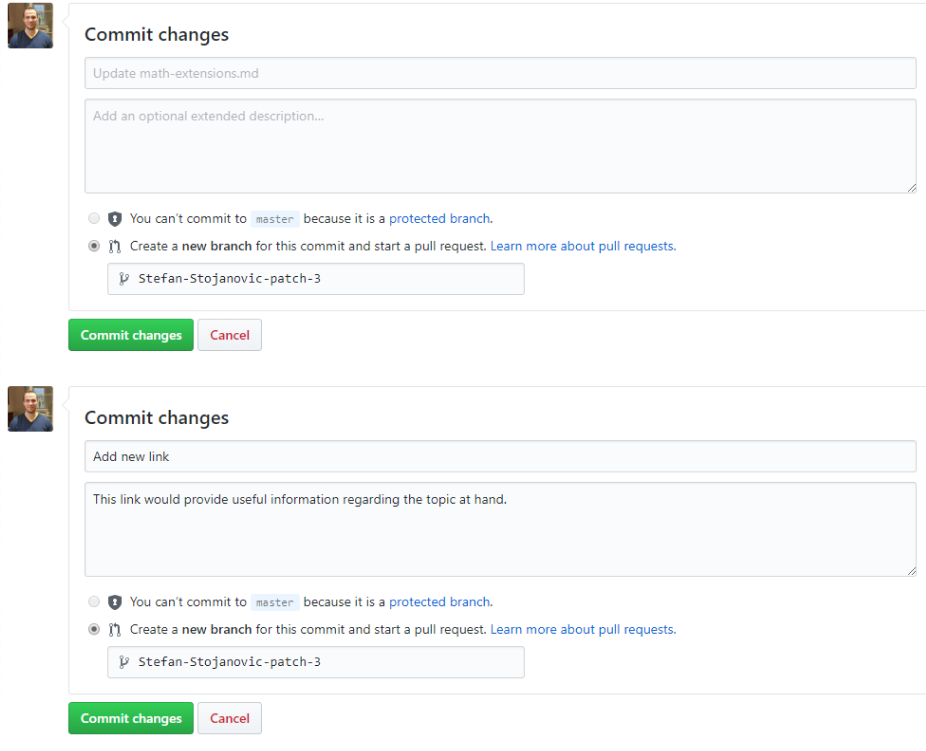
- '[stackoverflow.com](https://stackoverflow.com/questions/11227809/why-is-processing-a-sorted-array-faster-than-processing-an-unsorted-array){website}'After you add a new link, scroll down to the bottom of the page, add a commit message (ex. Add new link), additional description for the change and select "Commit changes`.
Example commit message:
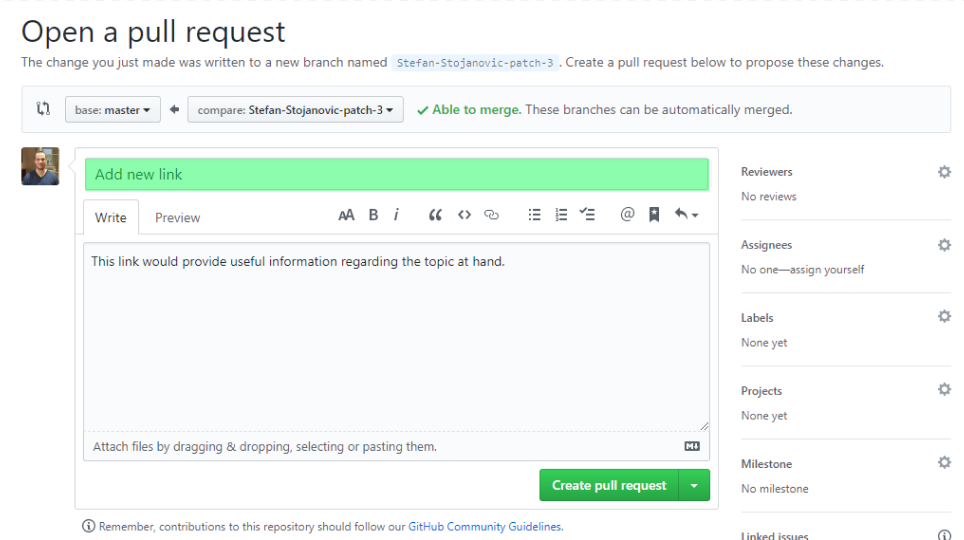
After selecting "Commit changes", you will be transferred to a new window:
The green highlighted area is the name of the PR and should be simple, whereas the area underneath is for any additional information regarding the changes you've made.
After you are done, press the "Create pull request" button to propose the new changes.
Note: You can always edit the PR in case you made a mistake or want to add/remove something.
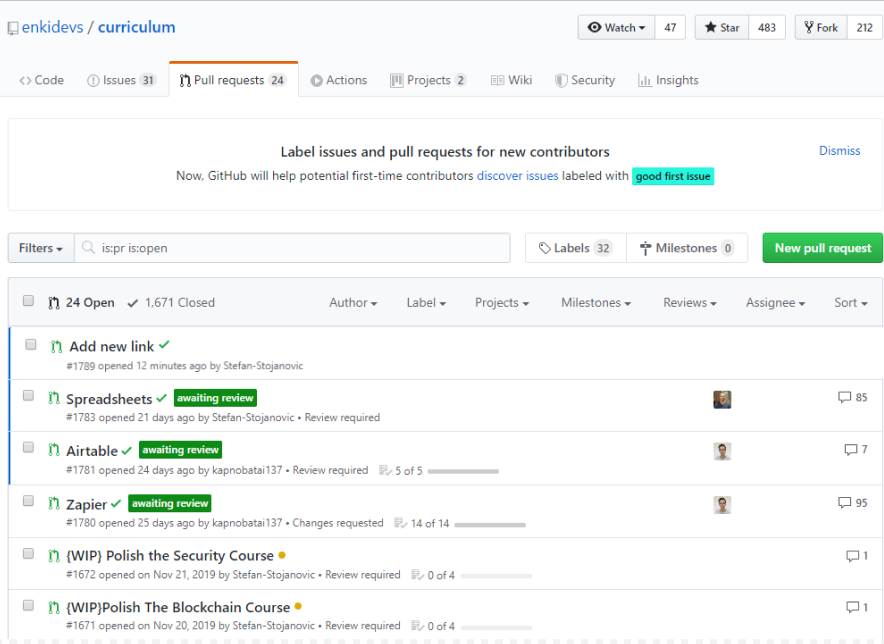
To edit the pr, go to our curriculum page and select "pull requests".
Since we just created our PR, it will be at the top of the list:
Want to contribute to this wiki? Go right ahead! If it has to do with how the Enki software ecosystem works, or editorial guidelines for how to write, let us handle that. Anything else, edit away!
Curriculum Format:
- Topic Documentation
- Course Documentation
- Workout Documentation
- Insight Documentation
- Glossary Documentation
Contributor Resources:
Curriculum overview:
Topic pages:
