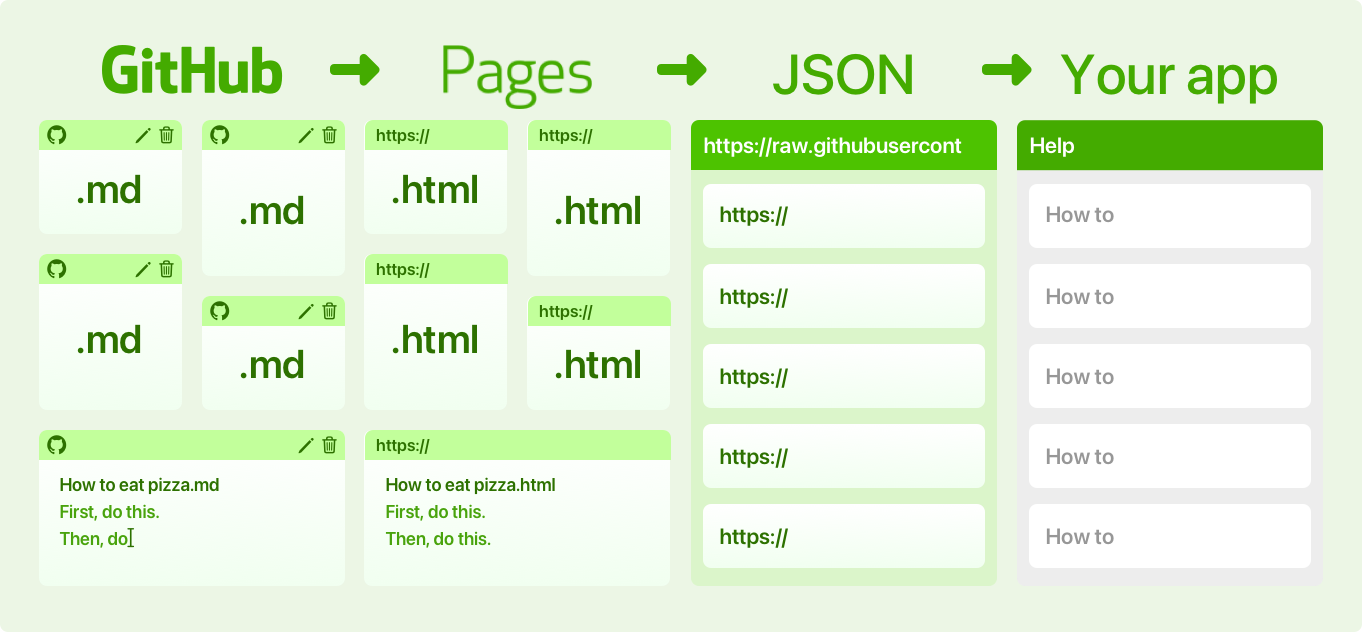
- Write documents in Markdown
- Let GitHub Pages compile the documents into a website
- Wait for the GitHub Action to generate a JSON data source and a README for you
- The SupportDocs library downloads the JSON and compiles it into a customizable format
Installing SupportDocs takes 2 steps:
- Set up the GitHub repo where you write your documents
- Install the library inside your app
This will be where you write your documents. GitHub Pages will translate your Markdown into HTML, and a custom GitHub Action will automatically compile the web pages into a JSON file.
- Scroll up to the top of this page and click Use this template
- Enter a repo name -- this can be whatever you want
- Make sure it's set to
Public(If you haveGitHub free, GitHub Pages only works for public repos) - Make sure to check Include all branches. This is really important.
- Click Create repository from template
- In your brand new repo, click the Settings tab
- Scroll down to the GitHub Pages section, and specify DataSource branch and / (root) folder. Then click Save.
- That's it for the GitHub repo! Now time to install the library in your app.
 |
 |
|---|---|
 |
 |
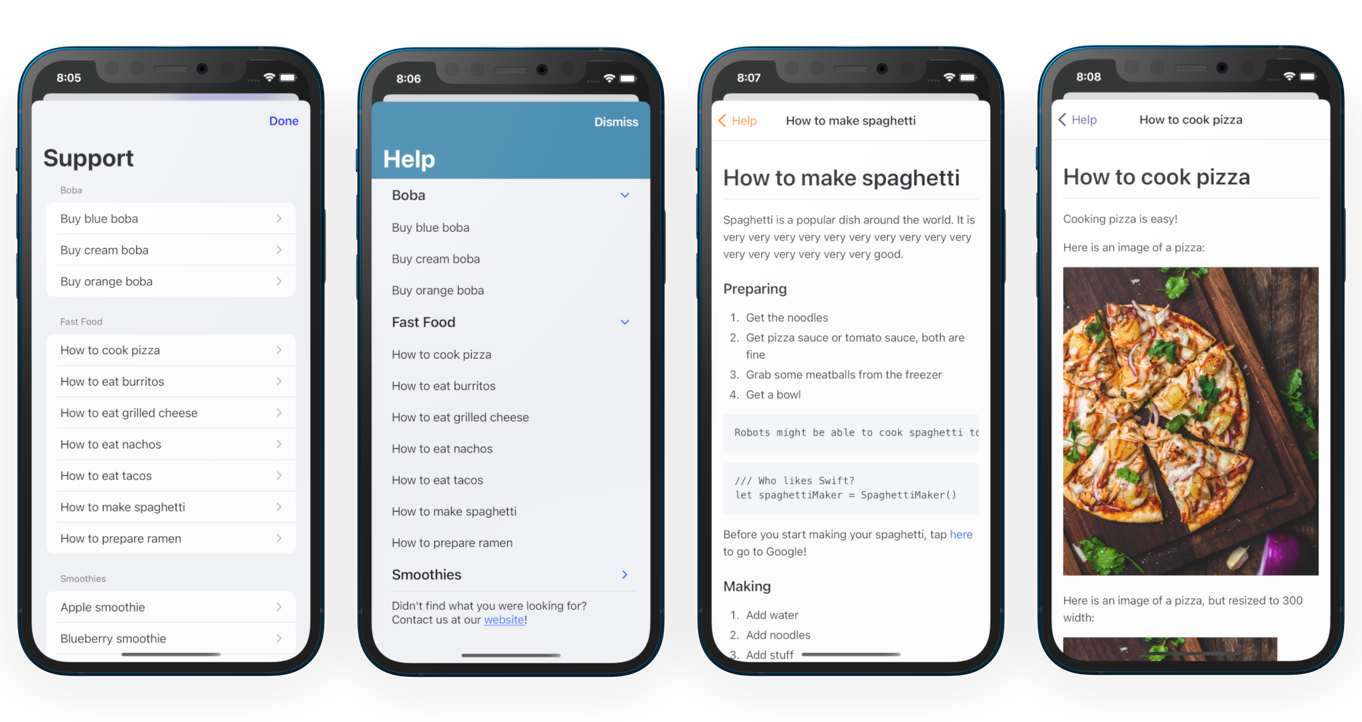
This is the actual interface that your users will see. You can install using CocoaPods or Swift Package Manager, whichever one you prefer.
CocoaPods is a dependency manager for Cocoa projects. For usage and installation instructions, visit their website. To install SupportDocs into your Xcode project using CocoaPods, add it in your Podfile:
pod 'SupportDocs'The Swift Package Manager is built into Xcode, which makes it really easy to use.
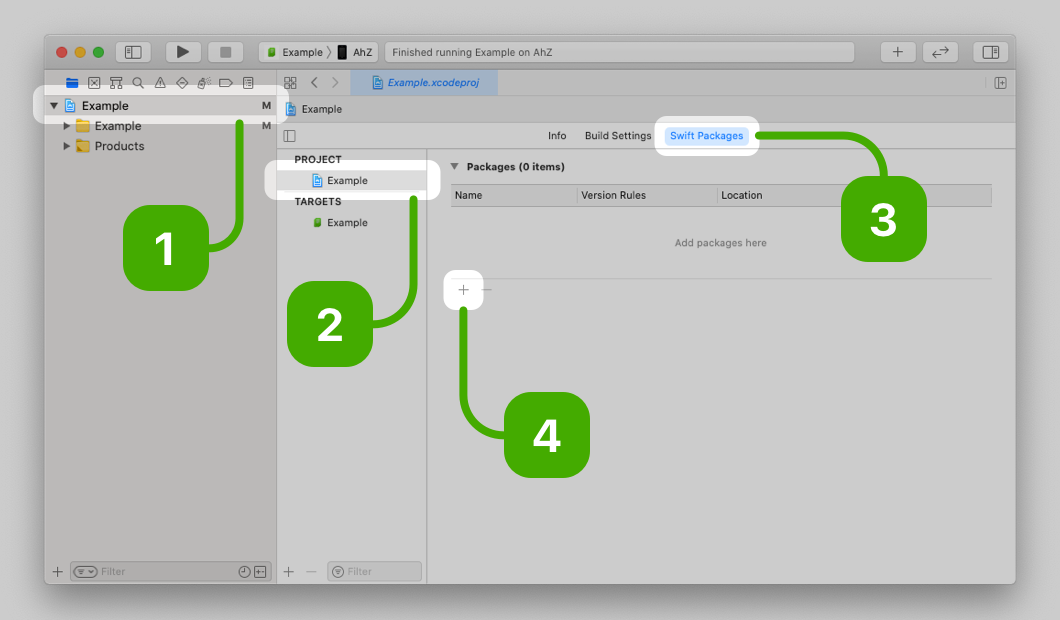
- Go to your project settings
- Click your project
- Click the + button
- Enter
https://github.com/aheze/SupportDocsin the text field - Click Next
- Enter the latest version,
0.0.30, in the text field. Leave Up to Next Major selected. - Click Next
- Click Finish, and you're done!
 |
 |
|---|---|
 |
 |
In your documents, add some front matter which sets the title and tags. Take this example document in the DataSource branch.
---
title: Buy blue boba
tags: boba
---
In this front matter, we have a title and one tag. This title has two purposes. It is the tab title if opened in a browser, and it is the title that SupportDocs shows. The tags can be linked as categories when configuring SupportDocs, and can be used to separate documents.
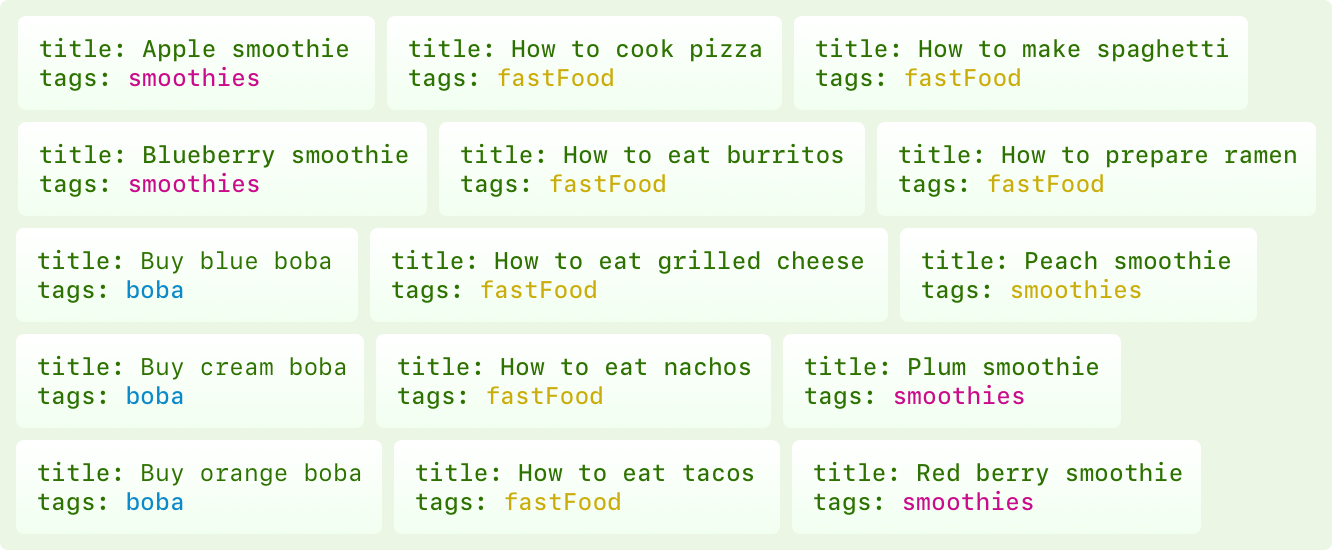
You can see the front matter for the documents in the DataSource branch in this graphic:

Pretty much everything in the SupportDocs library can be customized through the SupportOptions struct.


