-
Notifications
You must be signed in to change notification settings - Fork 54
Getting started with Portofino 5
At the end of this tutorial, we'll have a running Portofino application connected to a SQL database.
Note n° 1: this tutorial is targeted at beginners. Experienced Java developers who use an IDE and Maven might still want to follow along with this, to quickly get a glimpse of what Portofino is about, but their development setup will be quite different. We'll cover that in other tutorials.
Note n° 2: most applications built with Portofino work by connecting to one or more relational databases. However, it's not a requirement. We can build a Portofino application with a NoSQL store or with no persistence at all, even if we'll miss out on some of its key features, in particular, the built-in persistence with Hibernate and the CRUD page. Non-relational applications, however, are out of the scope of this tutorial.
First, let's ensure that Java 8+ (JRE or JDK) is installed on our system. We can check it by typing at a command prompt:
java -version
We should get back something along the lines of:
java version "1.8.0_171"
Java(TM) SE Runtime Environment (build 1.8.0_171-b11)
Java HotSpot(TM) 64-Bit Server VM (build 25.171-b11, mixed mode)
Note that Java 8 is the minimum supported release, but it's quite old, and the long-term supported Java 11 is recommended.
First, let's download it from SourceForge using the button below:
We should have downloaded a file named portofino-5.1.4.zip. Note that 5.1.4 is the latest version at the time of writing, but a new version might be available now. Let's simply extract the archive to a place of our choice. It's better to avoid paths with spaces in them, if possible, especially on Windows.
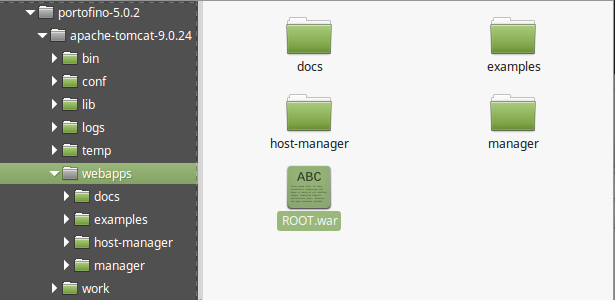
This is the layout of the extracted package:

It's a basic Apache Tomcat installation with the Portofino all-in-one webapp pre-installed and JDBC drivers for major open-source database systems available.
To connect to certain commercial database systems such as Oracle, we need to add the corresponding JDBC driver to the lib directory of Tomcat. Each database vendor has its drivers and licenses. If you have trouble connecting to a certain database or find that it's not supported by Portofino, please write to the mailing list.
Let's locate the file portofino-5.x.y/apache-tomcat-9.z/bin/startup.sh (on Linux/OSX; on Windows, it's startup.bat) and execute it by double-clicking on it.
Tomcat should start writing to the logfile portofino-5.x.y/apache-tomcat-9.z/logs/catalina.out. We can make sure that Tomcat has started by looking for a line containing ... INFO [main] org.apache.catalina.startup.Catalina.start Server startup in ...; however, it should take just a few seconds to start up.
Note: on Windows, the log file is saved elsewhere. Please consult the Tomcat documentation.
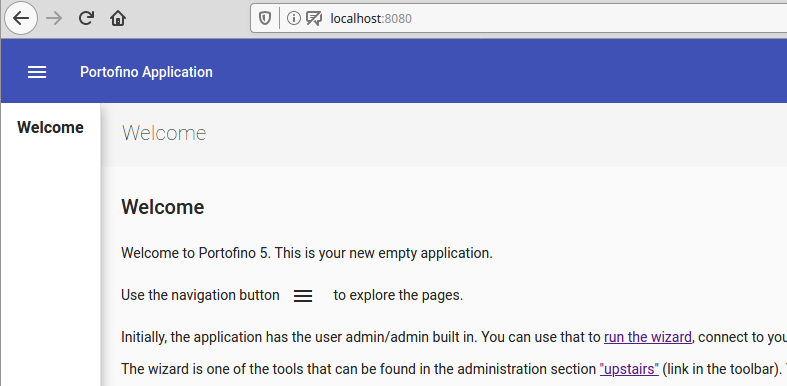
Point your browser to the following URL: http://localhost:8080/
Click on the "Sign In" link in the top right corner and use "admin" both as the username and the password.

We'll now use the wizard to connect to a database and create some CRUD pages for our tables.

Let's click on the "run the wizard" link.
Enter the following information:
- connection type: leave JDBC selected;
- a database name of your choice;
- the JDBC driver to use (select from the picklist);
- the connection URL (Portofino suggests a typical format based on the driver, but YMMV);
- the connection username;
- the connection password.
Click on "Next".
If the connection cannot be established, an error message will be presented and we'll be able to correct any mistakes. It may be necessary to consult the log file to see the exact nature of the error, as each database system has its way of reporting it.
If the connection is successful, Portofino will read the structure of the database and proceed with the next step.
Select the database schemas that contain the tables you want to import.
Note: databases use different terminologies for the same concept. For example, on MySQL/MariaDB, the schema and the database/catalog are the same thing. On Oracle, each schema corresponds to a user, etc.
Click on "Next".
In general, authentication and authorization are implemented through code. However, the wizard can use a specific model to configure user management for us. That's a common model that dates back to Portofino 3, structured as follows:
- a table for user accounts, with at least an id, a username, and a password;
- a table for groups of users (also known as roles), with an id and a name;
- a table joining users and groups: each user can belong to multiple groups and each group can of course contain multiple users.
If our database has this kind of structure, we can fill the relevant fields and click on "Next". A brief explanation of each field:
- user id: the identifier of the user (might be a numeric auto-increment column, the username, the email, a UUID, etc.)
- username: the name that the user types to be recognized by the system;
- password: the credentials that the user needs to provide to be recognized as who he/she's telling to be;
- encryption algorithm: how to encrypt the password on the database;
- email (optional): where to send password reset emails;
- token (optional): where to store the one-time token needed to authorize a reset of the password.
If our database has a different structure or we're not sure about which tables to use, we'll leave the fields blank and just click on "Next".
We're close! Portofino will create the application after this step. We just have to tell it which pages to create.
- We'll select "Automatic" to let Portofino analyze the parent-child relationships in our database and decide which pages to generate. This option is recommended for beginners.
- We'll select "Manual" to pick the top-level pages to generate from a list, precompiled as the "automatic" option would create them.
- We'll select "Don't generate anything" we're more expert users and would like to create the pages by ourselves.
Let's click on "Next".
We can now explore the application. If anything goes wrong and we can't log back in, or we can't log in with administrator privileges, the wizard backs up the "Security.groovy" file, so we can restore it from the backup and get the admin/admin user back.
You may want to read more about how Portofino works because its real strength lies in its extensibility. Autogenerated pages are useful and cool, but a real application will contain a fair amount of customized pages and logic. Have a look at:
- the Wiki page Developing applications with Portofino 5;
- our video tutorials and at the other pages in this wiki.
Also, the documentation center contains some useful resources. It still refers to Portofino 4, however, despite the change in UI and in some internal plumbing, most of Portofino's core design has stayed the same. We'll gradually port that to GitHub.
If you can't find what you're looking for or you feel stuck, we invite you to ask a question on the community forum:
https://groups.google.com/forum/?fromgroups#!forum/manydesigns-portofino