-
-
Notifications
You must be signed in to change notification settings - Fork 350
Flysky Hall Sticks Mod
FlySky FS-HZCZ03-ADJ is a high quality digital hall-effect gimbal set that can be integrated into numerous EdgeTX supported radios. The gimbals feel very solid due to CNC milled aluminum parts.
The position sensing of the gimbal axes is based on Melexis MLX90393 Triaxis magnetometer. This hall-effect sensor IC uses digital SPI interface to output 16-bit values, proportional to the magnetic flux density sensed along the X, Y, and Z axes.
The gimbal set employs two MLX90393 sensors, one for each stick. The SPI signals are routed to a microcontroller in the circuit board that provides a firmware that transform the 3D signal from the sensors to 4 channels output with 16-bits precision each. The transformation algorithm will combine the 3D signal with factory calibrated settings to ensure the channel outputs are linear and without temperature drifts.
The channel outputs are sent to the radio transmitter via UART serial communication with 921.6 kbps transfer speed to ensure minimum latency. The sticks have a resolution of ca. 4500 discretization levels per gimbal axis.
The code includes an automatic detection of FlySky digital hall gimbals on power-up of TX16S/T16/T18 radios and no special build-time option is required. If after initial 70 ms the FlySky gimbals are not detected, the code reverts to sampling analog sticks.
The original author of FlySky digital gimbal support in EdgeTX, Richard Li, developed in addition a mechanical adapter ring set to easily mount the FlySky digital hall gimbals to various radios: TX16S, T16, T18 and TX18S. He donated the design to his friend at Hawk-RC, who's business was greatly impacted COVID-19. If you are planning to integrate the gimbals into the radio, Richard kindly asks you to consider purchasing the adapter ring set from Hawk-RC:
TX16/18/16S/18S M.O.D FLYSKY Hall Sensor Assembly Kit
The adapter ring set comes with 4 plastic parts and a cable. First, the thicker set of plastic rings are mounted into the radio, using the 4 original gimbal screws:
The adapter ring set is a perfect fit for RadioMaster and Eachine TX16S. For T16/T18 and TX18S, a small plastic protrusion needs to be removed first - for further details, please see the Hawk-RC product page.
In a second step, the thinner adapter rings are mounted on top, with two M2x6 screws each:
In a third step, the FlySky gimbals are mounted using two M2x6 screws (outside) and two M2x14 screws (inside) each onto the adapter rings. And finally, the included cable needs to be attached to the left gimbal connector on the TX16S mainboard, circled green on next image:
Two options of hooking up the FlySky digital hall gimbals to TX16S will be presented below - the first option is simpler and requires no soldering, but will cause slight ripple on the analog power rail. The second option does not use analog power rail to supply the electronics of FlySky gimbals, but will require soldering. The second option is highly recommended, as this will not inject the digital noise from the gimbals into the analog rail of the radio.
With this option, the FlySky gimbals will be powered from the 3.3V analog rail, provided on the gimbal plug, making the wiring easy. All you need to do is to make a 4 wires cable to connect the Flysky Hall Stick to a gimbal plug and the firmware mod will works. Do note that this option, although more easy to wire, will cause some noise to your radio analogs - pots, sliders and also audio.
The plug required for the gimbal is a 4P JST ZH 1.5mm plug as shown in the following figure:
The plug required for the PCB of TX16S is a 6P Molex Picoblade 1.25mm plug as shown in the following figure:
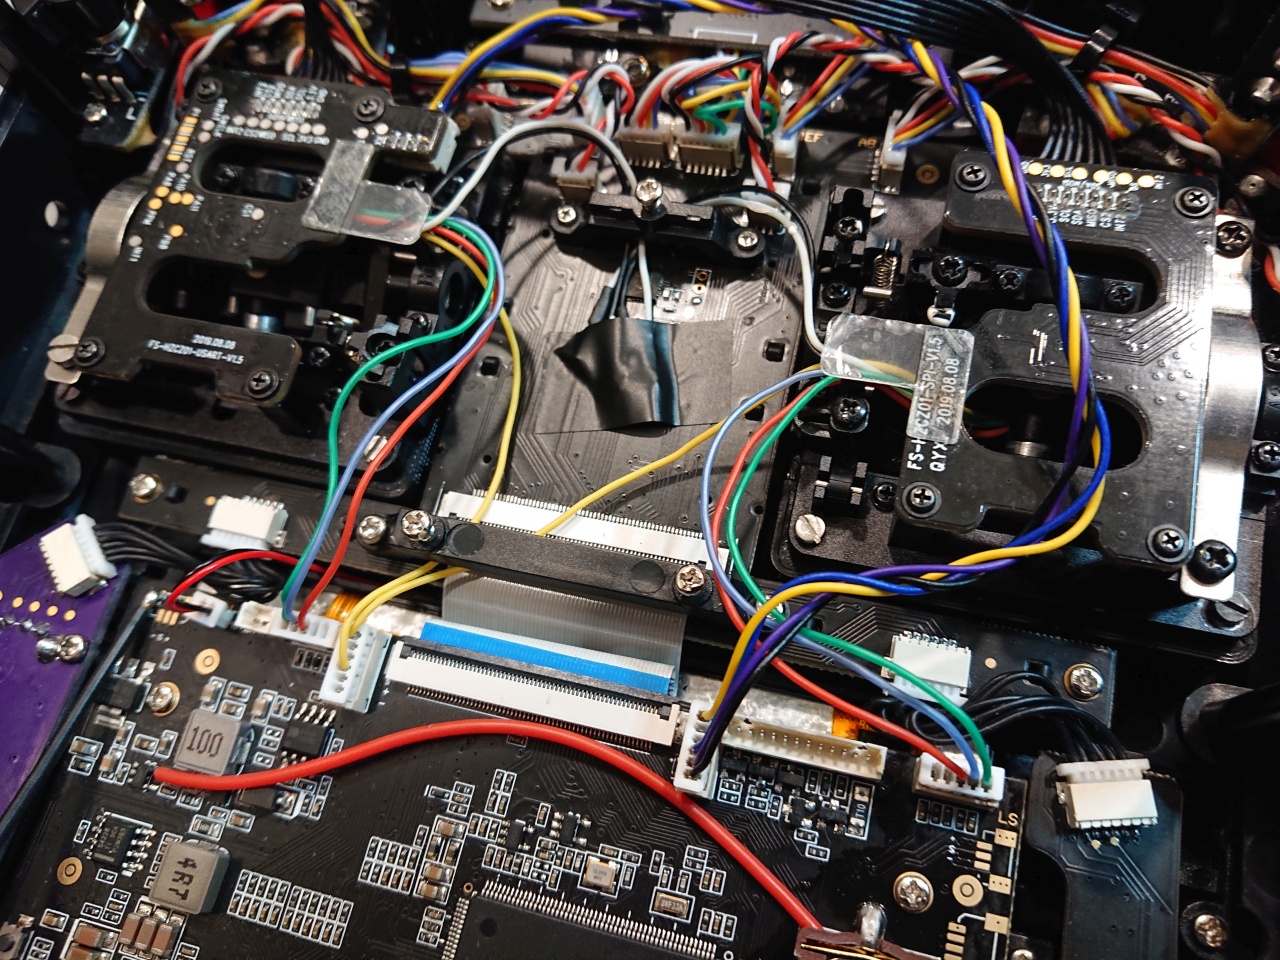
After installation the TX16S is shown in the following figure:
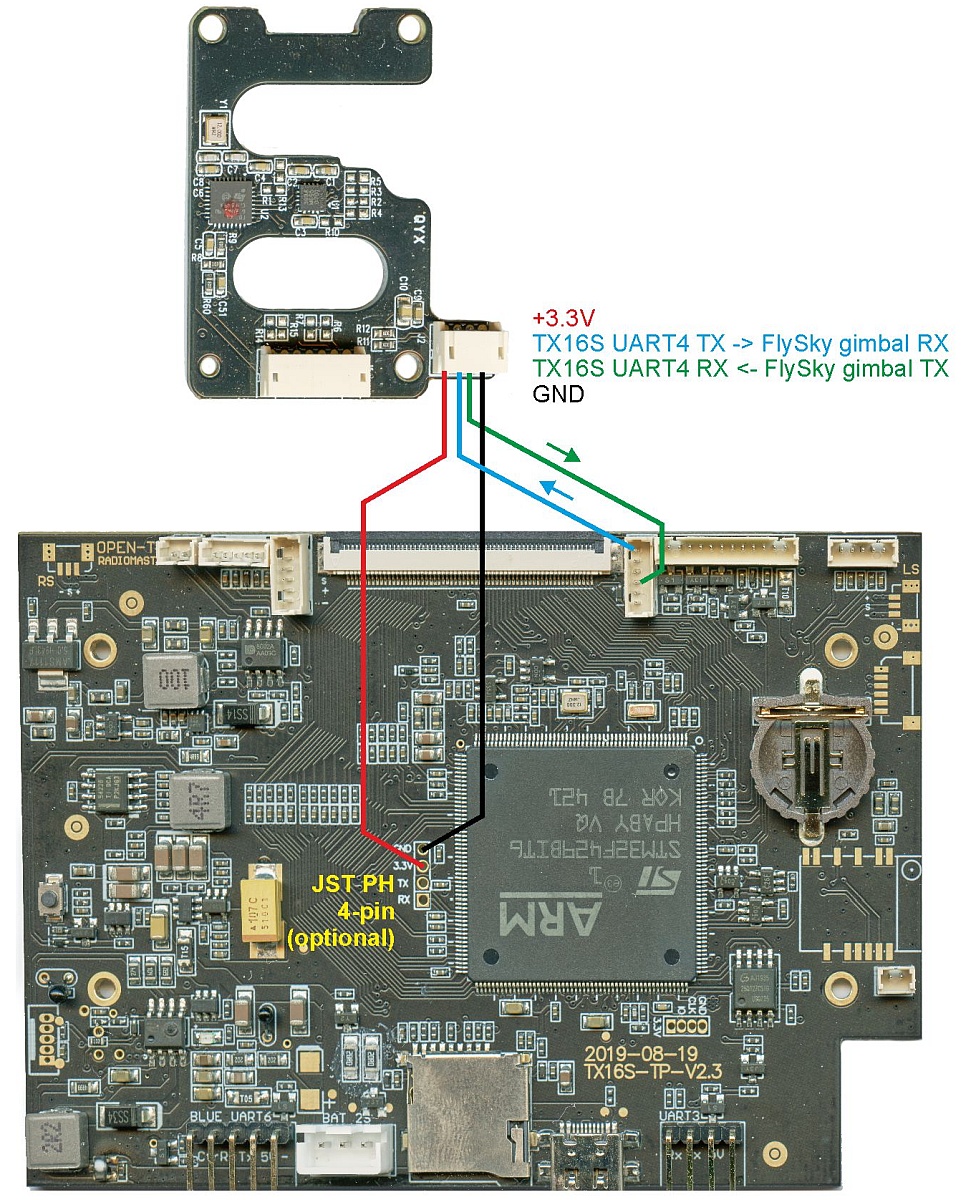
The preferred way of powering FlySky digital hall gimbals on TX16S is from digital +3.3V power rail. This requires either soldering a JST PH 4-pin socket onto TX16S mainboard (recommended) or soldering the gimbal hookup wires directly to the mainboard. Hookup plan:
The final outcome with FlySky FS-HZCZ03-ADJ on RadioMaster TX16S Max:
Another example, showing the usage of FlySky Paladin EV gimbals with TX16S and EdgeTX:
EdgeTX includes extended channel support for X10 family radios (this includes T16, TX16S, T18, TX18S) in the form of EX3 and EX4 inputs at right analog stick connector together with Flysky digital hall gimbals. EX3 and EX4 can be used, in addition to EX1 and EX2, to connect e.g. the Paladin EV gimbal stick end pots and stick end switches. Here the hookup of stick ends shown in detail:
The T16/T18 gimbals use 3V for A/D conversion, and it should work as per the specifications of the gimbal.
The boxer mod support starts from EdgeTX 2.9.0.
The connector is similar to the TX16S mod, just need to swap the TX and RX.

Installation of Flysky digital hall gimbals into RadioMaster Boxer, using the Hawk-RC Adapter ring set:
Step 1: mounting the bottom rings using stock RadioMaster analog gimbal screws:

Step 2: mounting top rings using 2x2 M2x6 screws:

Step 3: mounting Flysky digital hall gimbals HZCZ03-ADJ (here HCZC03 from an EL18) with 2x2 M2x6 and 2x2 M2x14 screws to the adapter rings and attaching the gimbal connection cable:

Do note that the RX and TX lines of the gimbal connection cable need to be swapped for Boxer, when compared with T16/TX16S/T18 cable, that comes with Hawk-RC adapter rings.
Here a close-up of the correct cable for Boxer - note especially the white (Gimbal RX) and yellow (Gimbal TX) data lines:

Further, please do note that on Boxer, the UART4 serial connection for digital gimbals is on the right gimbal header (when radio is looked from the back, then left side, as in the above picture), whereas on T16/TX16S/T18 the digital gimbals need to be connected to the left gimbal header.
End-result:

To mod Jumper T20 with Flysky gimbals, you can use the same 3D printing kit for TX16S, however you may need to cut the plastic rods in the casing, the corners of the 3D printing kit and the corners of the gimbals as well in order to fit in the T20.
Step 1: Remove the filtering caps, Jumper T20 uses 100nF caps for gimbal noise filtering, this will affect the serial communication for the flysky mod, so the cap need to be removed (2 caps marked as red in the following photo):

Step 2: Cut the casing plastic rods and corners of 3d print kit and gimbal, only a little cut is necessary showing in the following photo:

Step 3: Wiring, you need to make a wire to connect the gimbal to the main PCB using the pin outs marked in the following photo:

Step 4: Put everything back together, and done!

The mod for X9D+ 2019 is contributed by a user in China, he open-sourced what he did in the following link https://github.com/HIT-bangbang/Flysky-Hall-Sticks-Mod-for-X9D2019
Getting started with Git
- Workflow for GitHub noobs
Building and debugging EdgeTX
- In a webbrowser with Gitpod
- Windows 10 (MSYS2)
- Docker with Windows 10
- Ubuntu in a WSL2 under Win10
- Ubuntu 20.04
- MacOS 10.15
- Qt Creator IDE
- In Circuit Debugging radio firmware
Modifications:
- Flysky Hall Sticks Mod
How to unbrick your radio with STM32CubeProgrammer
DMA mappings of radios:
- RadioMaster TX16S
- FlySky NV14
Interrupt usage of radios:
- RadioMaster TX16S
Deprecated:
- Windows 10 (Visual C++)


