-
Notifications
You must be signed in to change notification settings - Fork 11
/
Copy path一键搭建Brook.md
226 lines (117 loc) · 12.9 KB
/
一键搭建Brook.md
1
2
3
4
5
6
7
8
9
10
11
12
13
14
15
16
17
18
19
20
21
22
23
24
25
26
27
28
29
30
31
32
33
34
35
36
37
38
39
40
41
42
43
44
45
46
47
48
49
50
51
52
53
54
55
56
57
58
59
60
61
62
63
64
65
66
67
68
69
70
71
72
73
74
75
76
77
78
79
80
81
82
83
84
85
86
87
88
89
90
91
92
93
94
95
96
97
98
99
100
101
102
103
104
105
106
107
108
109
110
111
112
113
114
115
116
117
118
119
120
121
122
123
124
125
126
127
128
129
130
131
132
133
134
135
136
137
138
139
140
141
142
143
144
145
146
147
148
149
150
151
152
153
154
155
156
157
158
159
160
161
162
163
164
165
166
167
168
169
170
171
172
173
174
175
176
177
178
179
180
181
182
183
184
185
186
187
188
189
190
191
192
193
194
195
196
197
198
199
200
201
202
203
204
205
206
207
208
209
210
211
212
213
214
215
216
217
218
219
220
221
222
223
224
225
226
## 什么是Brook
Brook 是一款新兴的代理软件,其版本横垮 Windows、安卓、iOS、MacOS、Linux 等多个系统平台,功能类似于我们经常使用的 Shadowsocks/ShadowsocksR。Brook 的目标是简单易用、傻瓜化、速度快(新协议)。通过在服务器端安装 Brook 服务器端,同时在本地设备中使用 Brook 客户端,两者成功连接之后,可以为我们提供科学上网服务。如果你想在 SS/SSR/V2ray 之外,尝试一种新的代理软件,那么 Brook 是一个不错的选择!
> ### 搭建Brook服务的教程分四步:
>
> 1、购买VPS服务器
>
> 2、连接VPS服务器
>
> 3、一键部署Brook服务
>
> 4、一键加速VPS服务器
## 1、购买VPS服务器
#### [Vultr VPS](https://www.vultr.com/?ref=8169051-4F)主机官网账户注册
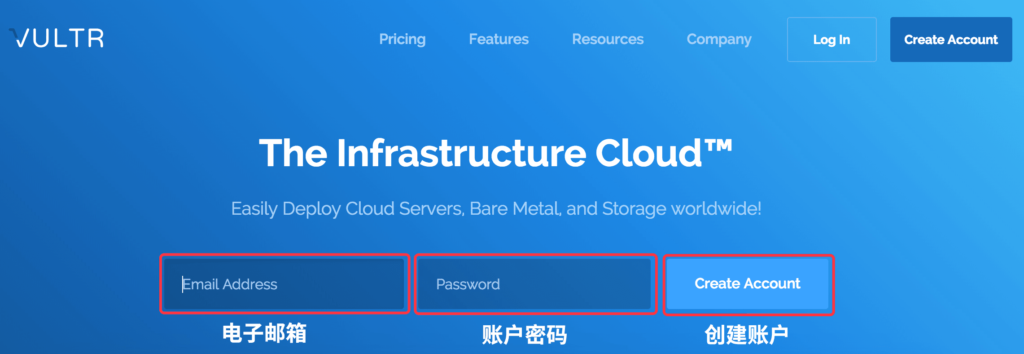
Vultr 官网账户注册,我们打开官网后输入邮箱和密码进行点击 Create Account 进行账户创建!限时活动,**通过文中链接注册并在 30 天内充值 25美金可获赠 50 美金额度**。
访问 Vultr 活动官网地址:[Vultr活动官网](https://www.vultr.com/?ref=8169051-4F)
[](https://user-images.githubusercontent.com/52620310/62409248-0a93de80-b607-11e9-9da8-99182bb51016.png)
##### **账户注册注意问题**
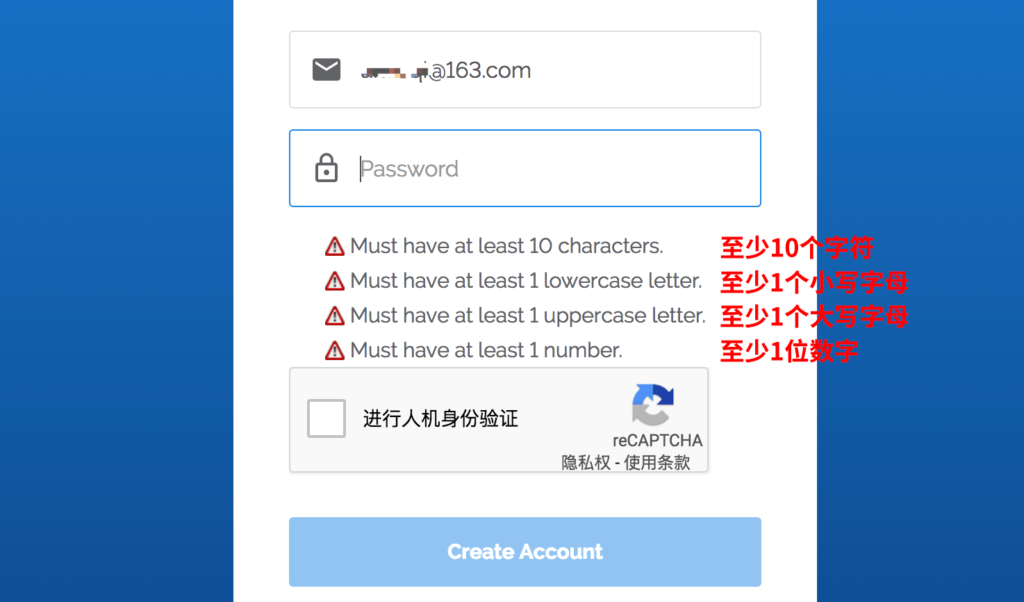
账户注册密码要求至少十位,而且必须至少包含一个大写字母、一个小写字母和一个数字,如果提示注册成功需要邮箱验证的话,请到注册邮箱查看邮件并点击 Verify Your E-mail 验证邮箱(收件箱如果没有收到,查看下垃圾箱)!
[](https://user-images.githubusercontent.com/52620310/62409253-11baec80-b607-11e9-8e85-7eb324fefa60.png)
#### 2. Vultr 账户充值
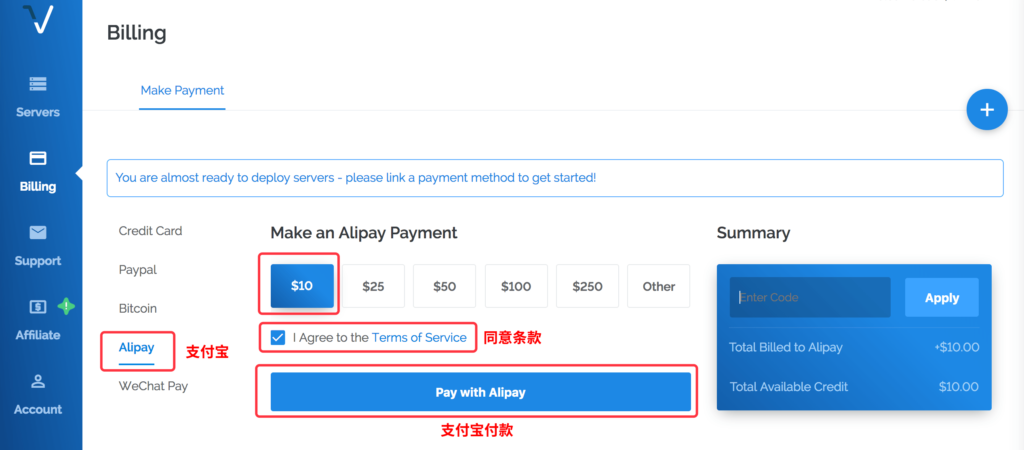
我们将 Vultr 账户注册好之后登录到 Vultr 官网后台景象账户充值。目前 Vultr 支持信用卡(Credit Card)、PayPal、比特币(Bitcoin)、支付宝(Alipay)和微信支付(WeChat Pay)五种付款方式。我们可以选择常用的支付宝和微信来进行充值即可。我们选择支付宝付款,确定首次充值额度(**最低 10 美金**),并且勾选同意条款后,点击按钮 **Pay with Alipay** 即可。
***PS:**如果我们有优惠码的话还可以在 Enter Code 输入优惠码并点击 Apply 进行应用,目前暂无官方优惠码!*
[](https://user-images.githubusercontent.com/52620310/62409255-167fa080-b607-11e9-9117-bfb89b19d4fd.png)
我们稍等片刻后便会跳转到我们熟悉的支付宝付款页面,直接扫一扫或者登录账户付款就可以了,我们付款成功后可以在 Vultr 后台查看余额。
***PS:**为防止滥用账号重复申请,Vultr 会检测支付帐号,如果使用了同一个 PayPal 或信用卡去支付,会被 vultr 封号。*

#### 3.Vultr 创建服务器
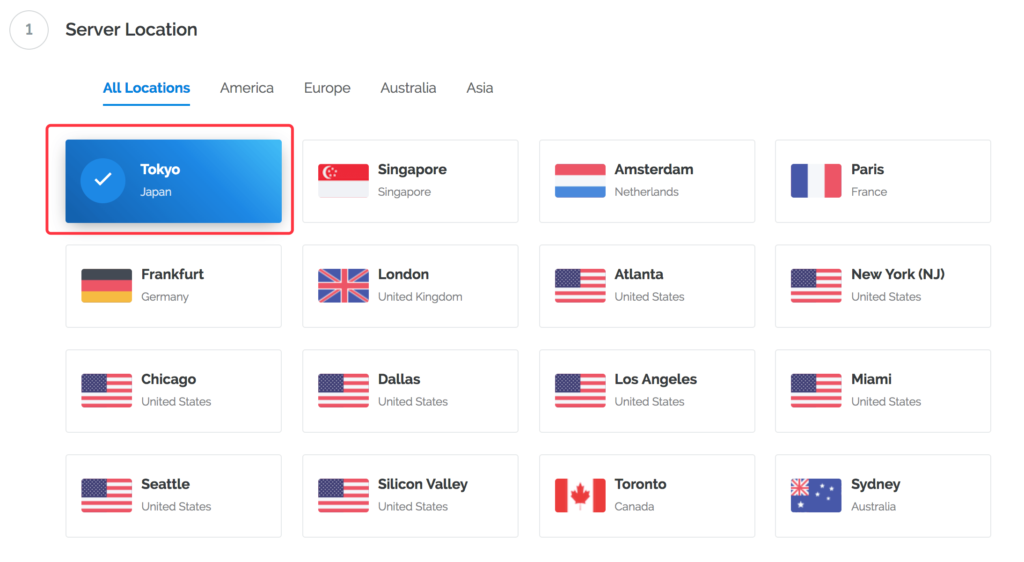
我们将左侧栏菜单切换到 Servers 进行服务器创建,我们首先选择服务器机房位置地址。这里我们搭建 SS 或 SSR 的话推荐日本东京(Tokyo,Japan)和美国洛杉矶(Los Angeles,United States)。
Vultr VPS 主机操作系统我们选择 Ubuntu。

我们选择 Vultr 套餐计划,套餐计划的最低价格根据主机位置的不同而不同,目前选择的日本东京最低套餐计划每月 5 美元,每小时 0.007 美元,配置是 1 个 CPU,1G 内存和 1000GB 流量。这个最低套餐计划完全可以满足我们个人需要了。
[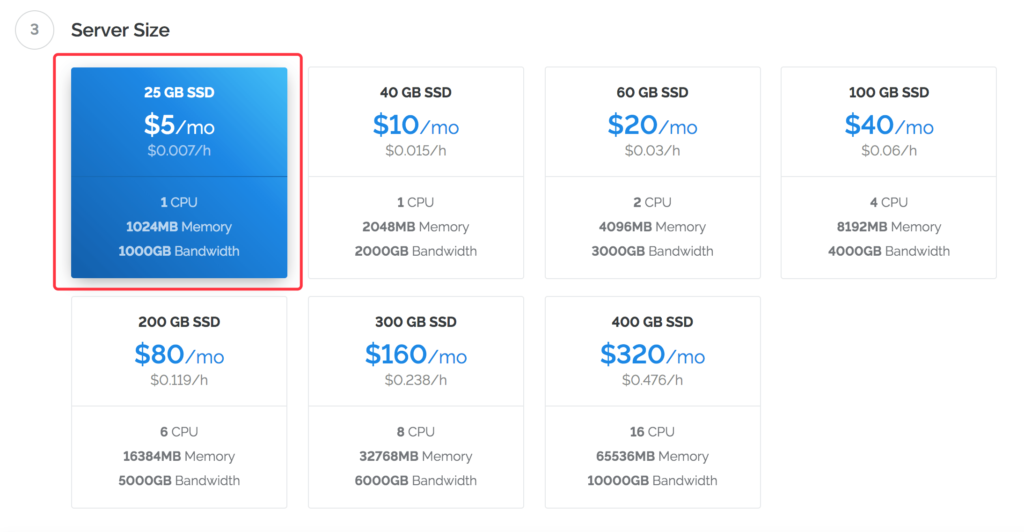](https://user-images.githubusercontent.com/52620310/62409262-26978000-b607-11e9-961e-375ef9c7e782.png)
***PS:****我们根据自己的需求去选择相应的 VPS 主机配置,Vultr 采用小时计费,如果我们不想继续使用或创建新的 VPS 的时候,可以销毁多余的 VPS,扣除的费用是已使用小时数乘以小时单价,而不是按月扣费!*
我们如果对 IPv6 有需求的话可以勾选一下,其余的就保持默认就可以了,配置完成后我们直接点击 **Deploy Now** 进行 VPS 部署。
[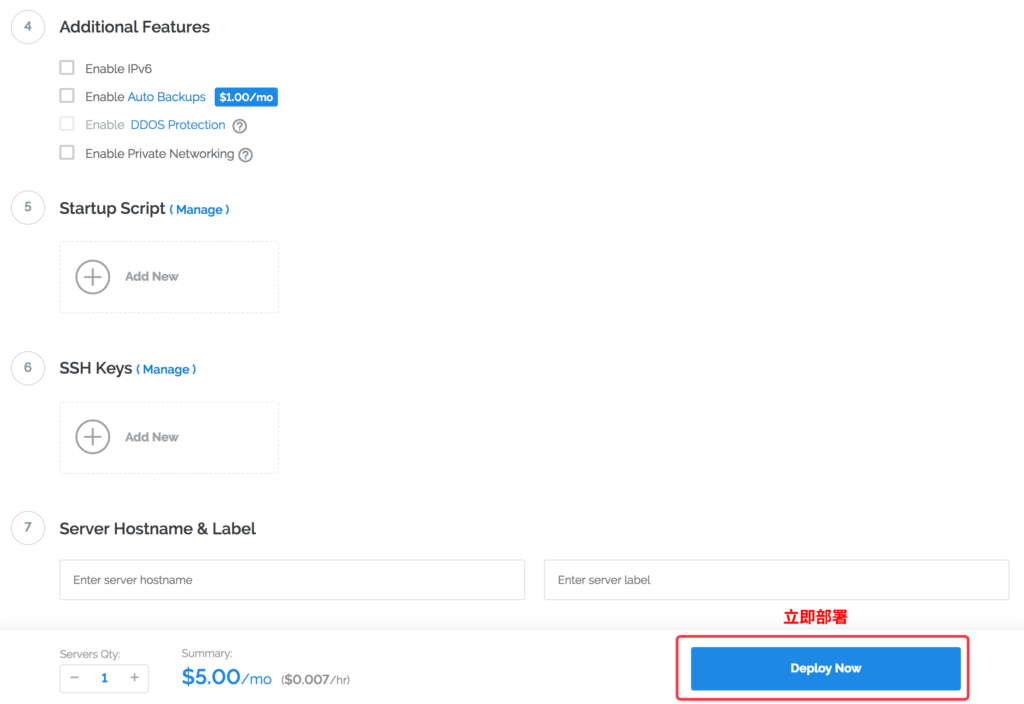](https://user-images.githubusercontent.com/52620310/62409265-2b5c3400-b607-11e9-950f-766539fe587e.png)
我们大约等待一分钟后就可以成功部署,当显示 **Running** 时,就表示部署已完成。之后你可以随时停用、重启或销毁它。
[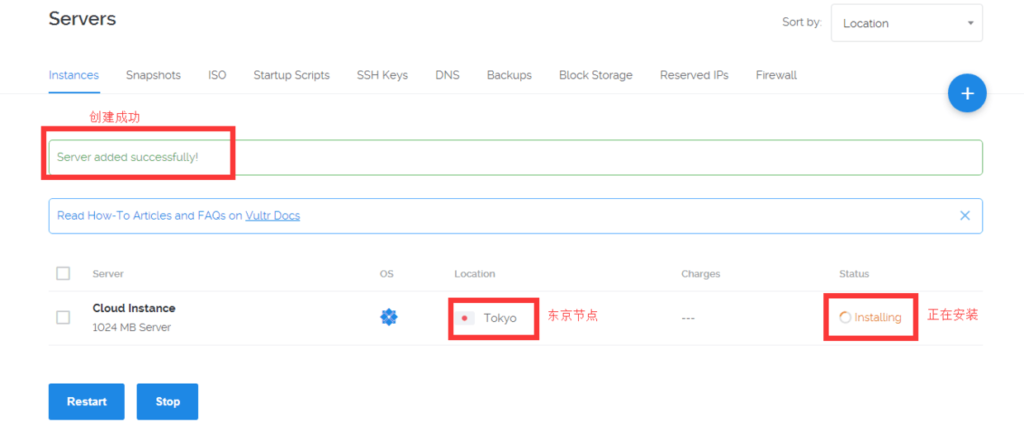](https://user-images.githubusercontent.com/52620310/62409267-2f885180-b607-11e9-9b16-cb89e92448ee.png)
我们将 VPS 部署成功后就可以看到服务器的基本信息:ROOT 密码、IP 地址、内存、硬盘和带宽等相关信息,这样我们就成功部署了 VPS,接下来就要进行 WireGuard 的搭建了。

> *注意:*如果你用的也是 Vultr,且你本地没有 IPv6 地址,那就不要勾选 **Enable IPv6** ,否则可能客户端链接时可能会出错。
**另外,请确保你的系统是纯净的,建议重装系统后直接开始本教程!**
## 2、SSH连接VPS服务器
首先你需要通过 SSH 连接 [Vultr](https://www.vultr.com/?ref=8169051-4F) 的 Linux VPS,连接 Linux VPS 需要使用 SSH 工具,这里推荐使用 Xshell 可以复制粘贴命令,Xshell 本身是需要付款的,作为中国人当然是使用 XX 版了,这里提供下载包如下所示:
Xshell 下载地址:<https://pan.baidu.com/s/1v7RCM0IjZGn_q5aWS1WXWg>,提取码: q3jw
下载后解压安装即可。
#### 使用 Xshell 连接 Linux VPS
1、打开 Xshell,点击左上角“文件”-“新建”,打开连接弹出库。
[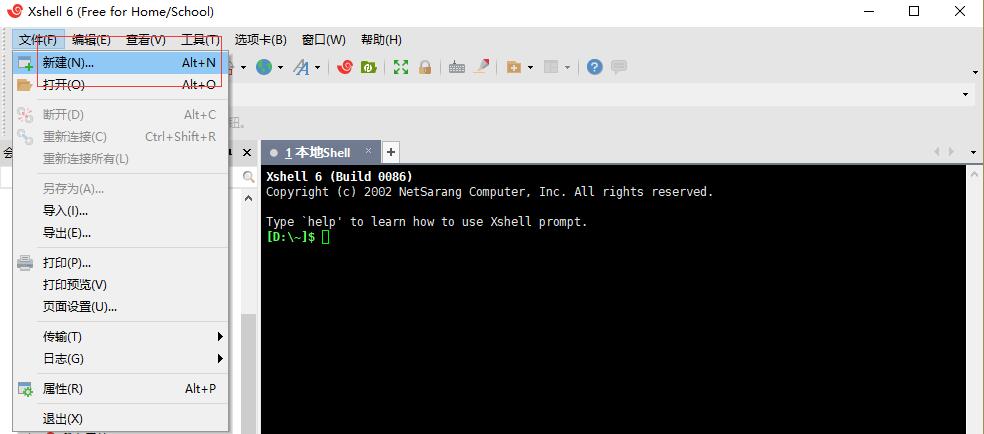](https://user-images.githubusercontent.com/52620310/62409274-3b741380-b607-11e9-86f4-6841945da8f2.jpg)
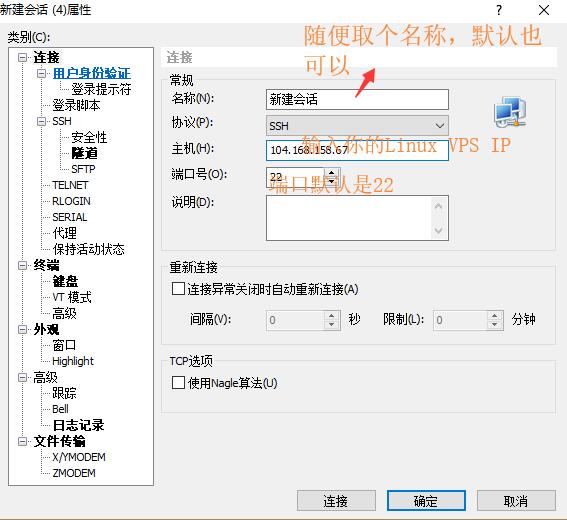
2、在 Xshell 弹出框中输入 IP 和端口,端口一般是 22 默认,然后点击确认按钮,如下图所示:
[](https://user-images.githubusercontent.com/52620310/62409279-3f079a80-b607-11e9-829a-dc6db2d6ce8e.jpg)
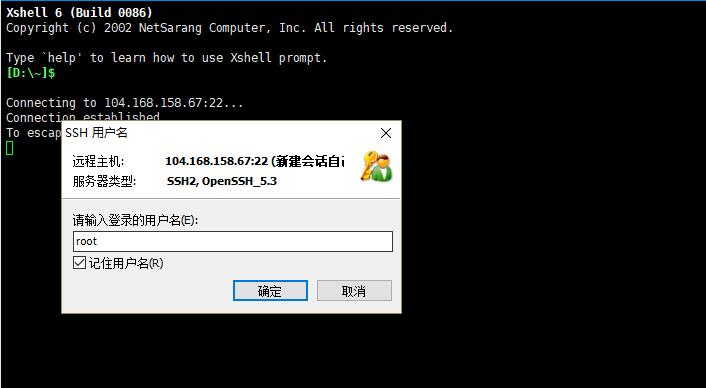
3、然后输入用户名 root,勾选记住用户名。
[](https://user-images.githubusercontent.com/52620310/62409280-429b2180-b607-11e9-8438-48451de0dbaf.jpg)
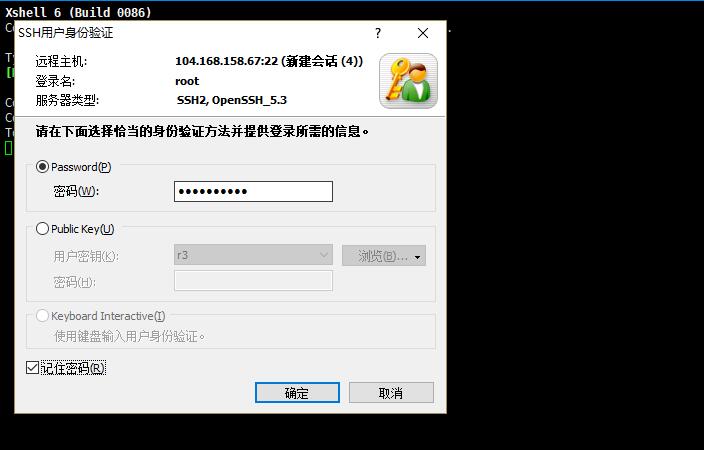
4、然后输入密码,勾选记住密码,点击确定。
[](https://user-images.githubusercontent.com/52620310/62409282-462ea880-b607-11e9-9da0-68ddc4f05bc0.jpg)
完成以上步骤后就可以看到连接成功的界面,如下图所示:
[](https://user-images.githubusercontent.com/52620310/62409283-49299900-b607-11e9-86be-f16913c9fcf3.jpg)
## 3、一键部署Brook服务
在上图的待输入内容处,粘贴下面的命令(复制下面的命令,然后在 Xshell 待输入内容处“鼠标右键”/“粘贴”即可):
```
# 安装wget
sudo yum -y install wget
wget -N --no-check-certificate wget -N --no-check-certificate https://raw.githubusercontent.com/ToyoDAdoubi/doubi/master/brook.sh
chmod +x brook.sh
./brook.sh
```
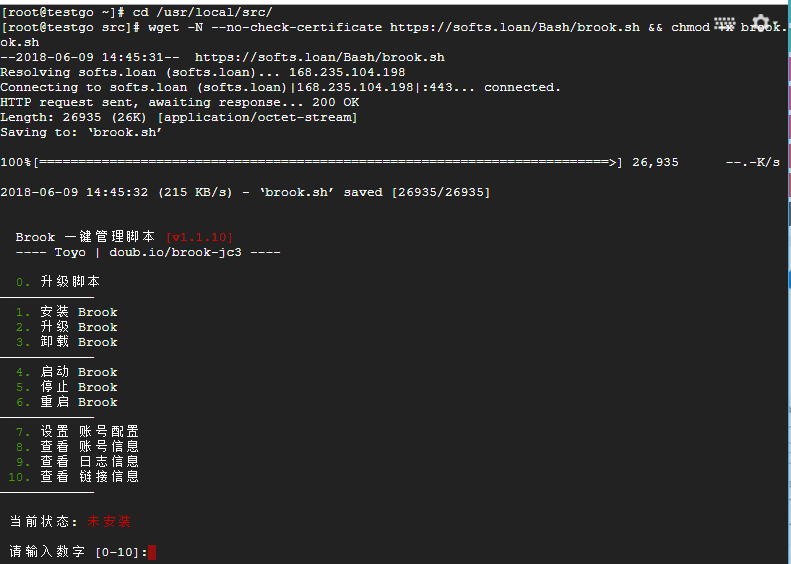
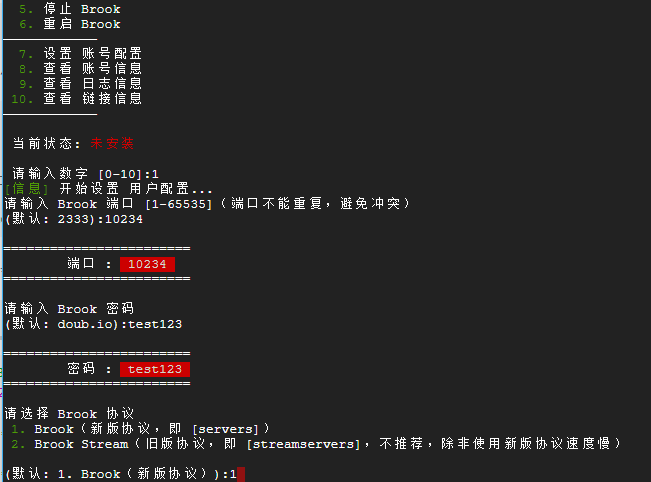
然后跟着提示一步一步往下走就可以了,会有 0-10 这个 11 个选项,因为我们是要安装 Brook, 所以输入数字**1**,然后按回车开始进入下一步。
接着会提示输入端口号,你可以按默认的端口来,这里我输入 10234 。
接着会提示你输入 Brook 密码,这里输入你自己心仪的密码即可。
最后会叫你输入 Brook 协议,按默认的来,这里我输入 1,整个步骤截图如下:
然后按下回车开始安装:
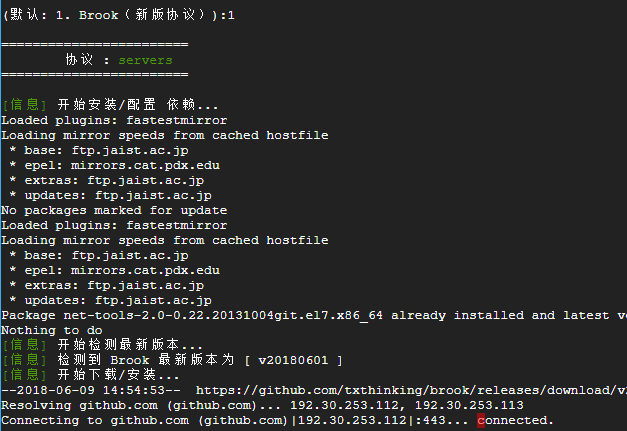
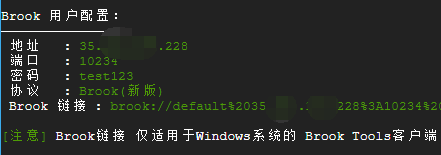
整个安装过程很快,花不了多长时间,安装成功后界面会提示你的 Brook 连接地址、端口、密码与及使用的协议,如下:
## 4、一键加速VPS服务器
BBR 是 Google 的一款 VPS 加速产品,使用下面的命令就可以实现 BBR 加速,只有 [Vultr](https://www.vultr.com/?ref=8169051-4F) 等少数 KVM VPS 才支持 BBR 加速,这也是我们推荐选择 Vultr 的原因。
在 xShell 连接端输入,如下命令,然后回车:
```
yum -y install wget
wget –no-check-certificate https://github.com/teddysun/across/raw/master/bbr.sh
chmod +x bbr.sh
./bbr.sh
```
[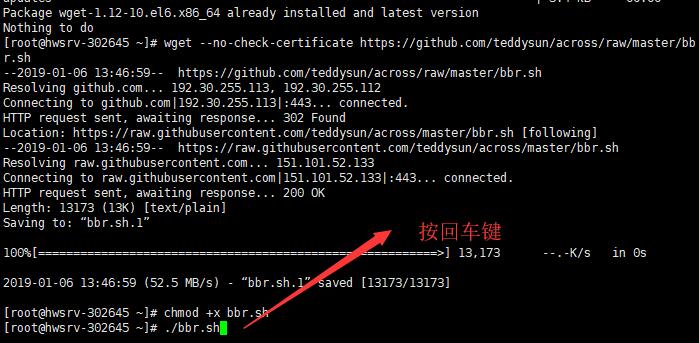](https://user-images.githubusercontent.com/52620310/62406006-18317000-b5d7-11e9-8146-b9b05d4240d7.jpg)
然后按任意键进行部署
[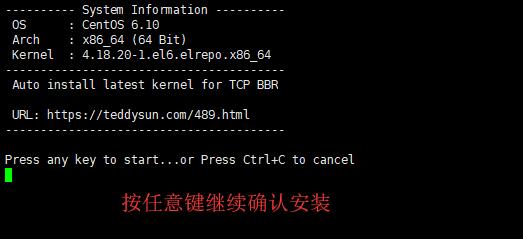](https://user-images.githubusercontent.com/52620310/62406007-1c5d8d80-b5d7-11e9-822f-fd9ed195a88b.jpg)
然后需要等待命令执行,大约5分钟,如下图所示:
[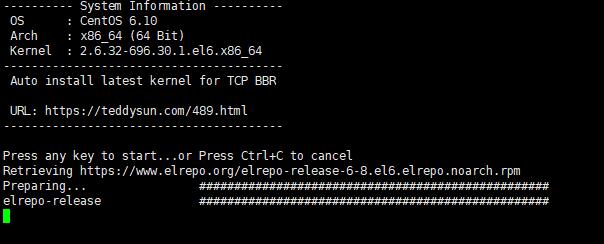](https://user-images.githubusercontent.com/52620310/62406009-22536e80-b5d7-11e9-826b-e1f1b0774db9.jpg)
会在下面的图片过程中等待一会儿
[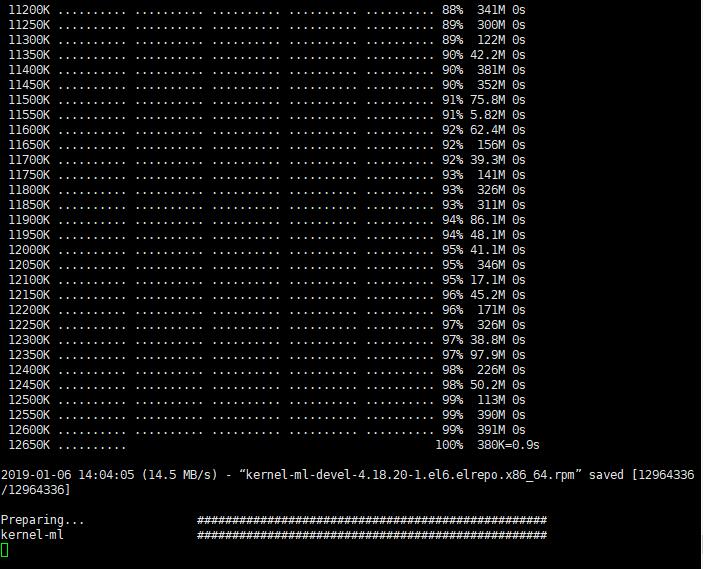](https://user-images.githubusercontent.com/52620310/62406011-267f8c00-b5d7-11e9-8ac1-67599ff1facb.jpg)
最后完成后需要重启,根据提示输入:y,重启服务器即可生效
[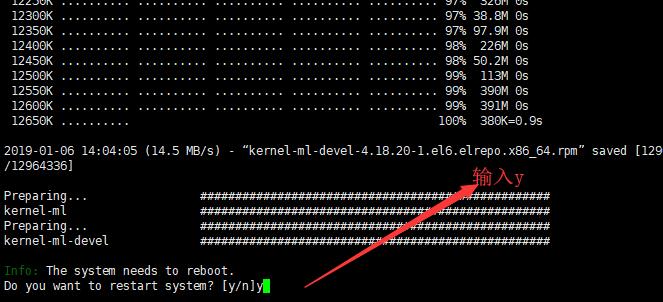](https://user-images.githubusercontent.com/52620310/62406015-2bdcd680-b5d7-11e9-9aec-fdf762a5f191.jpg)
如果错过了重启步骤,直接输入重启命令命令:
```
reboot
```
[](https://user-images.githubusercontent.com/52620310/62406018-31d2b780-b5d7-11e9-819b-baa65e585c47.jpg)
然后耐心等待,待服务器重启后即可自动开启 VPS 加速。
## Brook客户端下载及使用方法
搭建完成后,就可以下载安装客户端,然后愉快的使用代理了。
Brook 客户端最新版下载地址: https://github.com/txthinking/brook/releases 如:
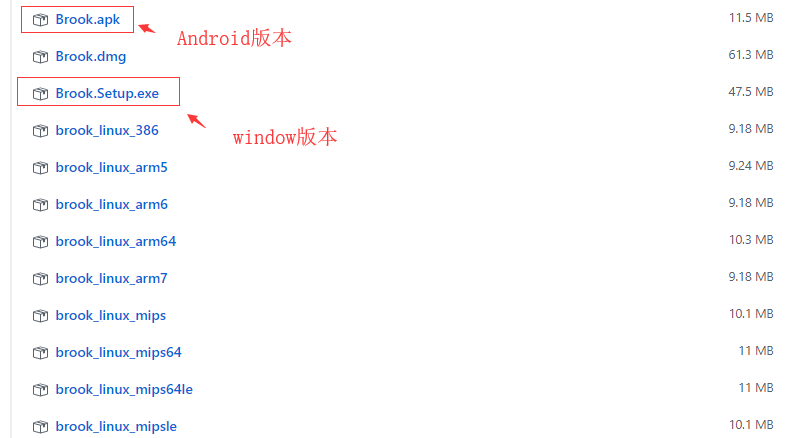
这里以 window 客户端为例,下载完后,直接解压然后打开 Brook.Setup.exe 即可开始安装:

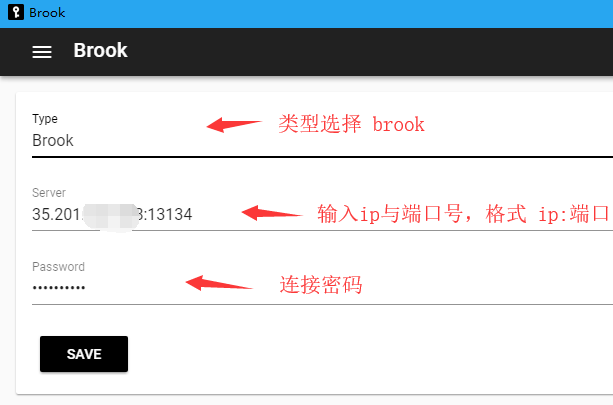
安装成功后,打开客户端,然后输入连接类型、连接地址和端口、连接密码,按 save 即可保存连接。如下:
#### 启动Brook
你用鼠标右击 Brook 右下角管理栏的小图标(一个黑钥匙的图标),会有一个 Toggle 选项:
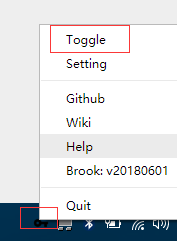
Toggle 代表启动/停止 Brook 代理。当你启动 Brook 后,你把鼠标移动到右下角管理栏的小图标,会提示:Brook:started,如下:

连接成功后,就可以开始愉快的使用外网了。
## 总结
以上就是美国 VPS Vultr 搭建 Brook 服务的教程,通过教程可以轻松实现 Vultr 搭建 Brook,希望可以帮助需要使用 Vultr 搭建 Brook 的朋友。
[**通过本链接注册并在30天内充值25美金可获赠50美金额度**](https://www.vultr.com/?ref=8169051-4F),支持支付宝付款,欢迎购买注册。