

Table of Contents
This project is meant to run as a plugin within a Nebari deployment. To learn how to get started with Nebari, check out the docs here.
In order to install this plugin as part of a Nebari deployment:
- Create a conda environment for your Nebari deployment
- Install the self registration plugin with
pip install nebari-plugin-self-registration - Continue the initialization and deployment of Nebari per your provider instructions.
NOTE: When running
nebari renderandnebari deploy, Nebari will detect and install any extensions which are installed in your Python environment. When managing multiple Nebari deployments, be sure to manage your conda environments to ensure the correct extensions and versions are installed in your target deployment.
The configuration of your self registration app can be customized in several ways within your nebari-config.yaml file under the key self_registration.
Configuration options include:
- account_expiration_days (optional): Days an account remains active after the user registers. Defaults to 7. Note that the calculated end date is saved in Keycloak user attribute
account_expiration_dateand can be manually overridden by a Keycloak administrator. - approved_domains (required): List of approved email domains that can register accounts using the self registration service. (supports names like
gmail.comand wildcards such as*.eduor even*) - coupons (required): List of coupon codes that can be used by individuals during the self registration process.
- registration_group (required): Keycloak group where all registering users will be added. This group can then be used to assign user properties such as available JupyterLab instance types, app sharing permissions, etc.
- name (optional): Name for resources that this extension will deploy via Terraform and Helm. Defaults to
self-registration - namespace (optional): Kubernetes namespace for this service. Defaults to Nebari's default namespace.
- registration_message (optional): A custom message to display on the landing page
/registration - values (optional): Any additional values that will be passed to the Helm chart as
overrides - affinity (optional): Set a custom Kubernetes affinity for the app and/or job. Defaults to the
generalnode group.
NOTE: The
registration_groupmust have been created in the Nebari realm in Keycloak prior to deploying the extension.
provider: aws
namespace: dev
nebari_version: 2024.4.1
project_name: my-project
# ...
# More Nebari configurations
# ...
self_registration:
  namespace: self-registration
  coupons:
    - abcdefg
  approved_domains:
    - gmail.com
    - '*.edu'
  account_expiration_days: 30
  registration_group: test-group
  affinity:
    enabled: true
    selector:
      app: nodegroup_a
job: nodegroup_bThe approved_domains feature of this self registration app is intended as an additional security feature to prevent unauthorized users from running up compute costs. We recommend enabling email validation in conjunction with this extension. However, the extension itself does not enforce user email validation nor configure Nebari's Keycloak instance to send emails as those are both core Nebari settings.
In order to require email validation for your Nebari deployment, you must:
- Enable email validation in the Keycloak administration console under the Nebari Realm. Go to "Realm Settings" and under the "Login" tab set "Verify Email" to ON.
- Configure outgoing email as described in Nebari's How-To Guide for Configuring SMTP.
NOTE: As of May 2024, neither requiring email validation nor specifying outgoing SMTP are configurable within your
nebari-config.yamlfile. However, these settings once configured manually will not be overridden by subsequentnebari deployactions.
This extension's registration web pages will use Nebari's default styles out of the box. It will also apply any styles which are applied to your main JupyterHub theme in your config file's theme.jupyterhub. See Customize JupyterHub Theme in Nebari docs for more details.
Note: running locally requires a config.yaml file to be present within the self-registration directory. Please create a copy of the sample.config.yaml, rename, and update as needed before proceeding:
- Navigate to the
self-registrationdirectory - To build the docker image, run the following:
docker build . --file Dockerfile.local -t self-registration
- To run the app, run the following:
docker run -p 8000:8000 --name self-registration self-registration
- Navigate to http://0.0.0.0:8000/registration
Steps for self registration:
- Navigate to your Nebari domain.
- You may have a hyperlink on the welcome page that takes you to the user registration form. If not, navigate to https://{your-domain-name}/registration
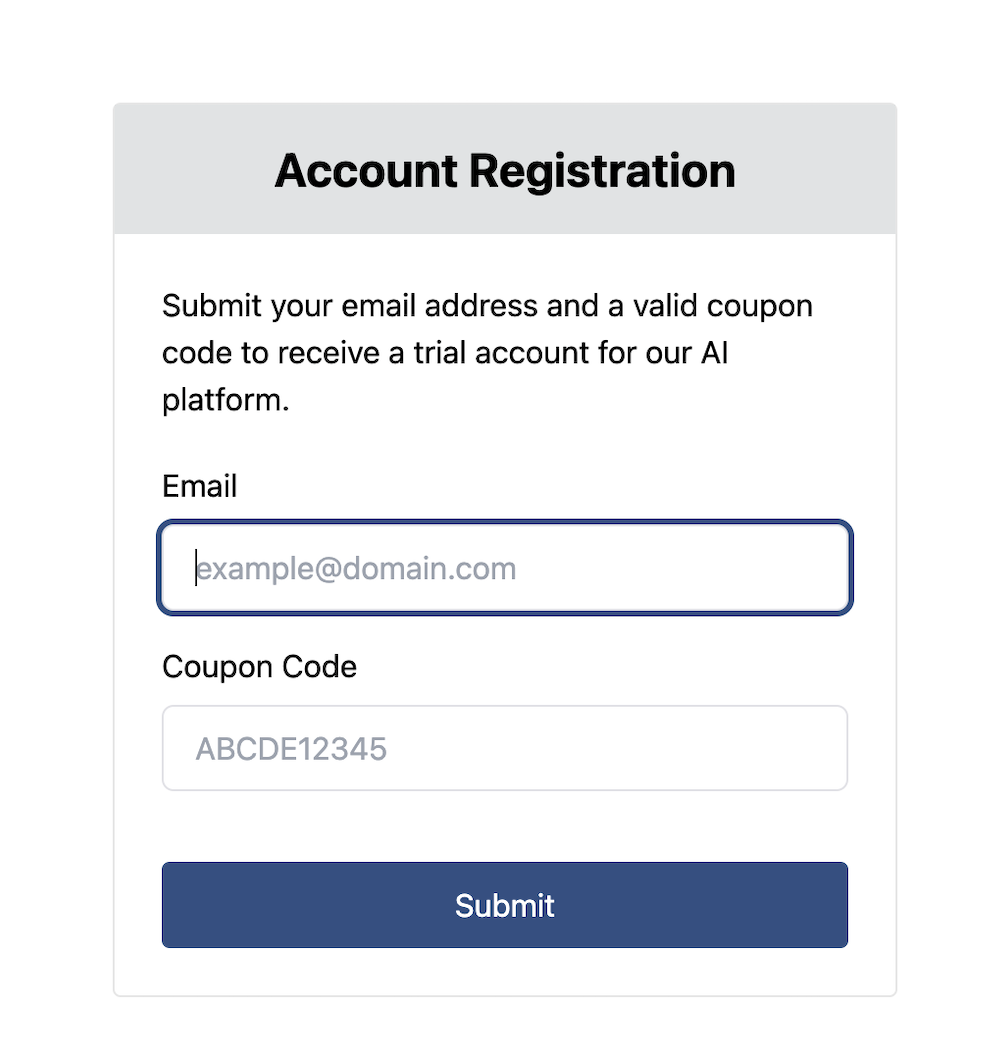
-
Enter your email address and coupon code.
-
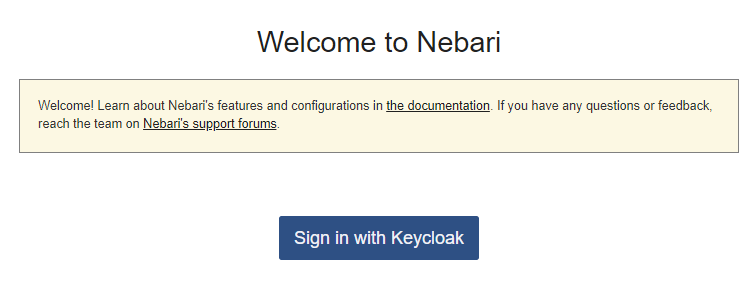
After clicking "Submit" follow the instructions to login with your temporary password. By clicking the "Login" button, it will take you to a Welcome page where you can sign in with Keycloak.
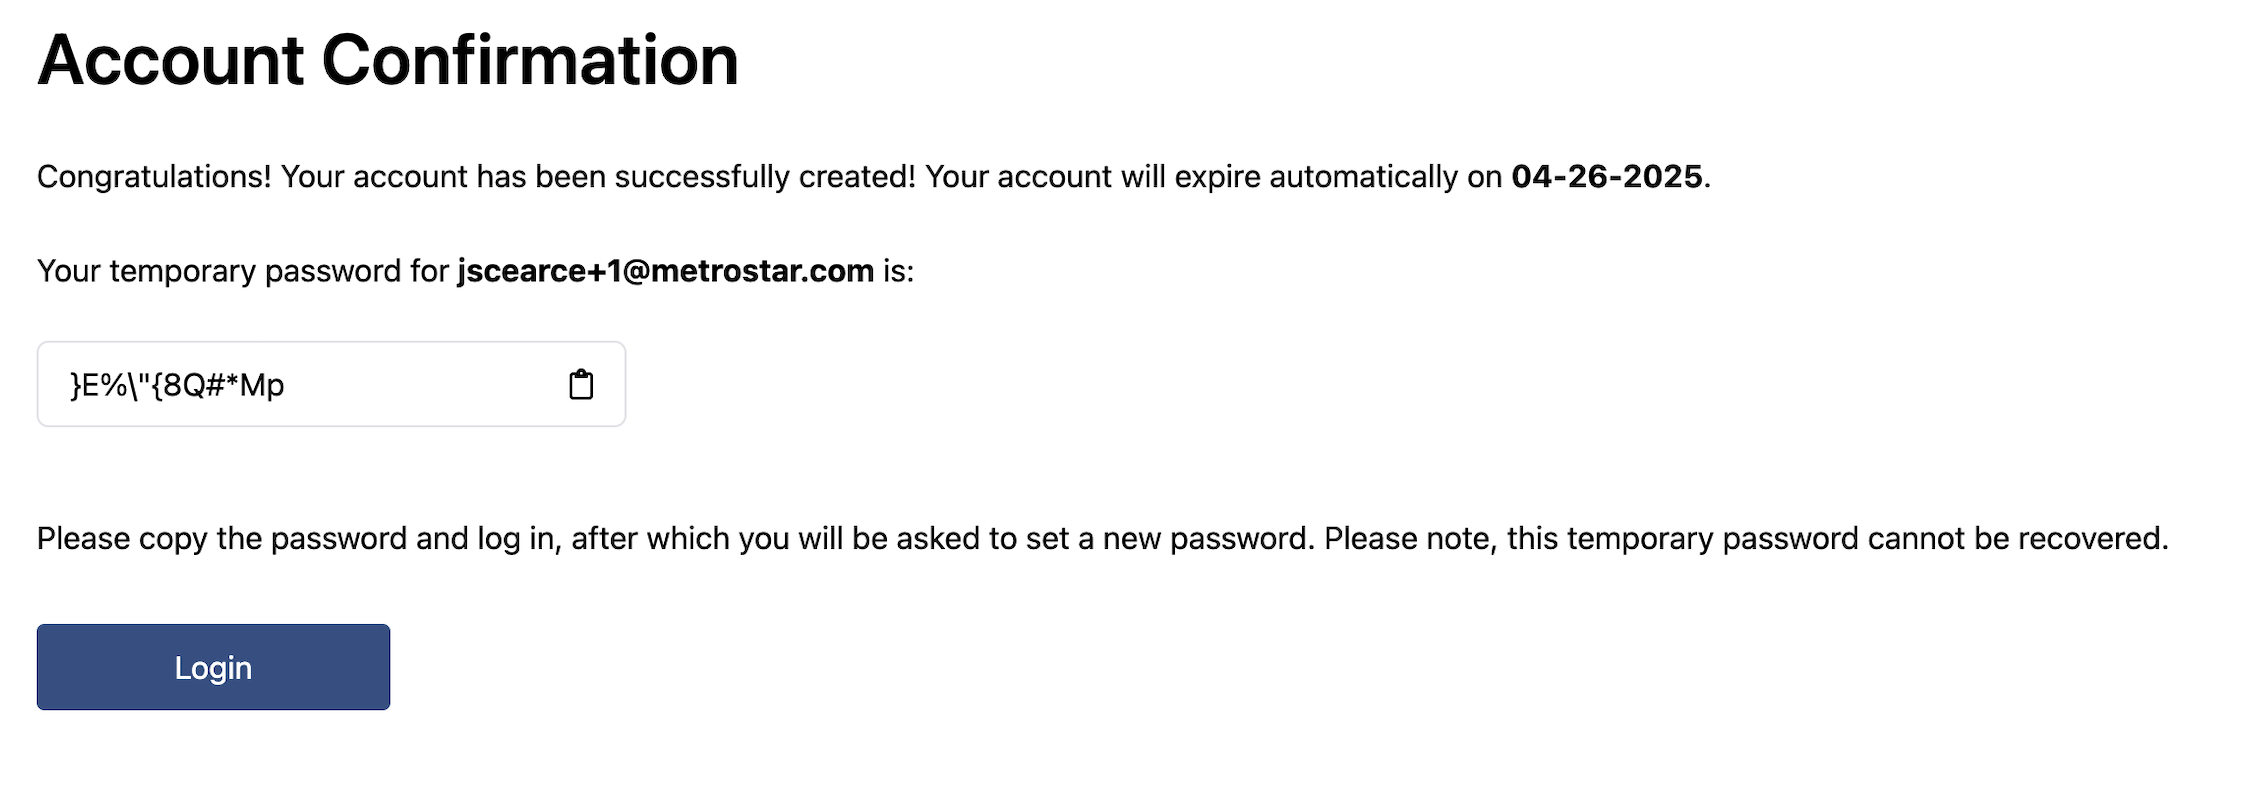
- If email validation is configured, the system will now send your email account a validation link at this step, and you then must follow email validation link you receive in order to complete your initial login.
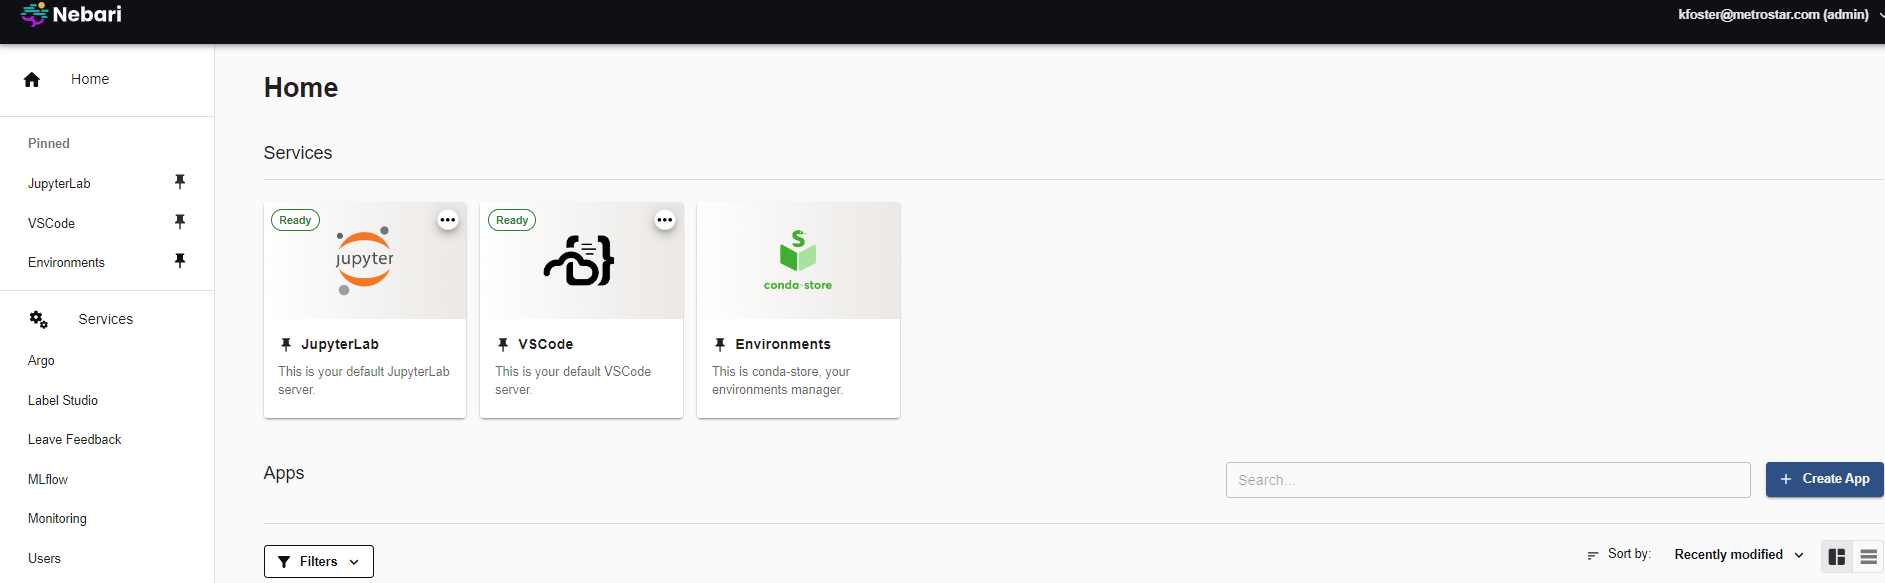
- After you login you will see the Nebari landing page.
nebari-plugin-self-registration is distributed under the terms of the Apache license.