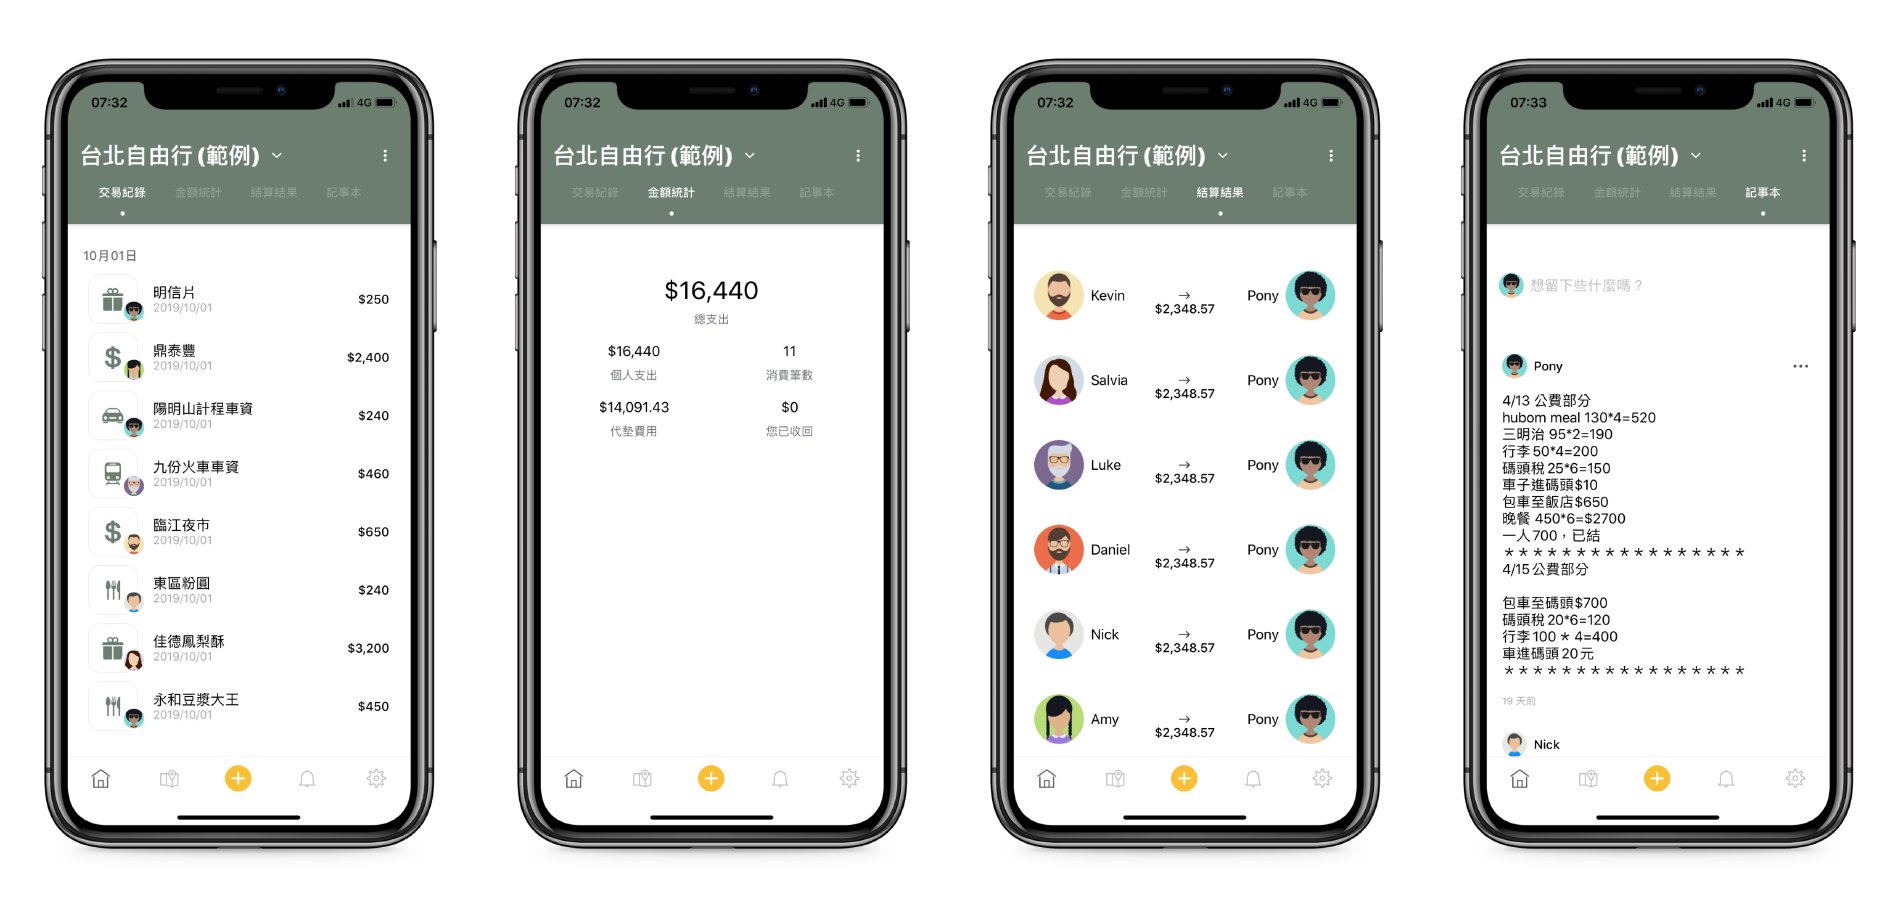
一款與好友出遊時便利的線上分帳 App,並提供記事本、留言、推播通知等便利功能
- 群組管理
- 新增群組
- 新增 / 移除成員
- 消費資訊
- 瀏覽詳細內容
- 地圖瀏覽
- 關鍵字搜尋
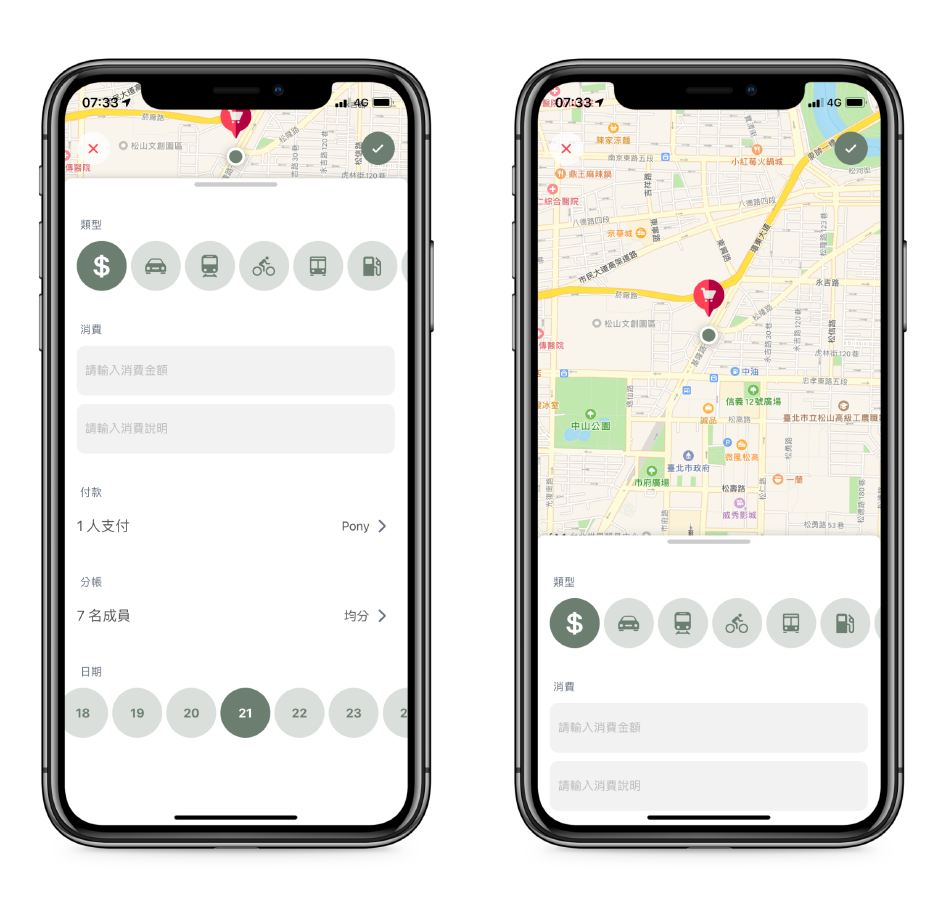
- 新增消費
- 提供消費類型、金額、說明
- 支援均分、比例、金額等分帳方式
- 消費地點
- 活動紀錄
- 群組邀請
- 新增消費通知
- 群組可提供消費紀錄、金額統計、結算結果與筆記本四種資訊,並可透過橫滑切換不同呈現內容
- 點選群組名稱,可新增群組並邀請成員,或透過名稱右側功能鍵,編輯既有群組成員
- 可透過滑動調整顯示完整消費資訊與快速消費資訊內容
- 當群組內其他使用者新增消費或有其他使用者邀請加入群組時,活動紀錄將顯示未讀訊息數量,點擊分頁後未讀取訊息具有背景色
- 地圖可呈現該群組消費記錄,並可透過搜尋關鍵字尋找消費說明,並點擊消費時顯示詳細內容
- 筆記本頁可點選後留言,支援文字或 GIF 貼圖
- Used Data Bainding by Closure in MVVM
於 ViewDidLoad 呼叫 setupVMBinding 設定 ViewModel Closure
class HomeViewController: UIViewController {
    ...
    func setupVMBinding() {

        viewModel.reloadTableViewHandler = { [weak self] in

            self?.tableView.reloadData()
        }

        viewModel.loadingHandler = { isLoading in

            switch isLoading {

            case true:

                LKProgressHUD.showLoading(view: self.view)

            case false:

                LKProgressHUD.dismiss()
            }
        }
    }
    ...
}
使用 Closure 當 ViewModel 狀態改變時
class HomeExpenseViewModel {
    ...
    private var cellViewModels = [[HomeExpenseCellViewModel]]() {
        didSet {
            reloadTableViewHandler?()
        }
    }

    var isLoading = false {
        didSet {
            updateLoadingHandler?(isLoading)
        }
    }

    var reloadTableViewHandler: (() -> Void)?

    var updateLoadingHandler: (() -> Void)?
    ...
- 建立 Controller 物件減輕 ViewController 中 TableView 使用多種不同 Cell 使 ViewController 龐大問題
建立 AddExpenseItem protocol,並其 conform UITableViewDelegate UITableViewDataSource
protocol AddExpenseItem: UITableViewDelegate, UITableViewDataSource {}主要的 AddExpenseViewController 中建立四個子 controller,並分別注入 TableView,分別負責該 Section 內容。並建立一個 items 陣列將四個 controller 放在其中
class AddExpenseViewController: UIViewController {
    ...
    var tableView: UITableView

    var amountTypeController = AmountTypeController(tableView: tableView)

    var expenseController = ExpenseController(tableView: tableView)

    var payerController = PayerController(tableView: tableView)

    var splitController = SplitController(tableView: tableView)

    var payDateController = PayDateController(tableView: tableView)

    var items: [AddExpenseItem] = [amountTypeController,
                                   expenseController,
                                   payerController,
                                   splitController,
                                   payDateController]
    ...
}
由 conform AddExpenseItem 的 controller 負責實作 numberOfRowsInSection
class AmountTypeController: AddExpenseItem {
    ...
    func tableView(_ tableView: UITableView, cellForRowAt indexPath: IndexPath) -> UITableViewCell {

        let cell = tableView.dequeueReusableCell(withIdentifier: SelectionTableViewCell.identifier, for: indexPath)

        return selectionCell
    }
    ...
}
最後 AddExpenseViewController 在實作 TableView 的 cell 的時候即可達到簡化 ViewController 的效果
extension AddExpenseViewController: UITableViewDataSource {
    ...
    func tableView(_ tableView: UITableView, numberOfRowsInSection section: Int) -> Int {

        return items[section].tableView(tableView, numberOfRowsInSection: section)
    }
    ...
}- SwiftLint
- SwiftIconFont
- IQKeyboardManagerSwift
- Firebase/Auth
- Firebase/Storage
- Firebase/Firestore
- Firebase/Messaging
- FBSDKLoginKit
- GoogleSignIn
- CodableFirebase
- Kingfisher
- JGProgressHUD
- Fabric
- Crashlytics
- iOS 13
- Xcode 11


