Build a Low Cost PAPR
Last updated 2020/03/21
NOTE: This is currently an independent project not affiliated with any commercial institution.

Building a DIY ventilator is fairly controversial and carries a high risk to yourself, the patient, and others around you. However, a safe reasonable Powered Air Purifying Respirator (PAPR) can be created using the same off the shelf parts. PAPRs are effective pieces of Personal Protective Equipment (PPE) that could be helpful to caregivers and will also be in extremely short supply. You may be able to save many more lives by building a PAPR that protects a caregiver than a mediocre ventilator for one patient.
Letter to Makers - Grete and Ian Porteus Requesting PAPR hoods/designs (Seattle, WA)
As another indicator of the urgency and lack of PPE, CDC Crisis/Alternate Strategies guidance includes a reference to research on the effectiveness of sweatshirts, T-shirts, towels, scarves as respirators. PAPRs are regulated by National Institute for Occupational Safety and Health (NIOSH) rather than the FDA and therefore seem much easier to realistically achieve test requirements by a DIY community.
Here is a Youtube video outlining the components as of 2020/03/21

For details on the base build, see the main page. The software and hardware are currently the same with the exceptions below. A 12V/142Wh battery should be able run this pump for about 24 hours at low speed. Minimum flow rate measurement is TBD.
- Easy way to make a PAPR hood aligned with Letter to Makers - Grete and Ian Porteus
- A 3D model for an inline air filter with link to common filter supply such as this to put the filtration AFTER the pump.
- Test other filtration material when CBRN or N95 filters is not available. One untested suggestion are AC HEPA rated filter materials.
- Test with a simple inflator pump and achieve the same pressure control.
- audible low battery warning or flow problem
A PAPR should have protection of the mouth and nose, so a full face CPAP mask is one solution. It also requires protection of the eyes. Swimming googles are an option that provide an airtight seal. I use prescription glasses so I ordered a pair of prescription swimming goggles. To protect against projectile liquids, a face shield is highly advised. Here is a 3D printable face shield. The pump, filter, and battery can be placed into a backpack to make a mobile unit.


A full hood is likely better than the above setup since it will be safer to clean without runoff getting into your mouth and eyes as you take it off. All the cracks and crannies around the mask and goggles could trap droplets of virus. I don't happen to have a hood since buying one now would compete for the same supplies that healthcare workers need.

An interesting alternative to a face mask/shield or a hood is a full face scuba mask. I don't have one of these, so I can't test it. Though this video suggests it works pretty well for a PAPR.
To avoid blowing contaminated air into the airway, requires adding a filter.
NOTE: The original design puts the filter, before the pump. Due to air leakage, this runs the risks of pulling contaminated air into the airway. It would better to put the filter AFTER the pump, using something like below. See ToDo about requests for help.
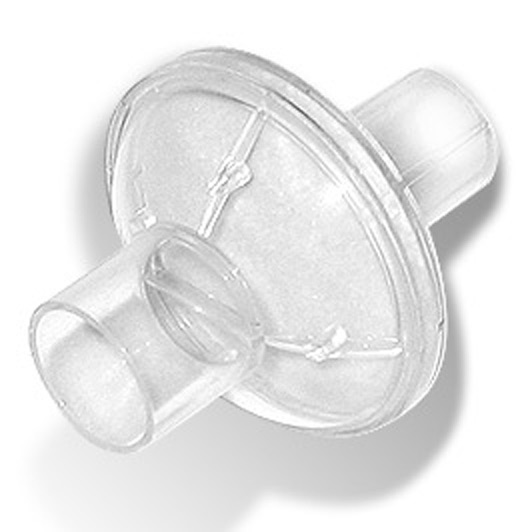
These are adapters plates for a filter before the pump (which is less preferred): This is an adapter plate for a NATO 40mm gas mask filter cartridge. These filters are available with CBRN ratings which are needed for viral and bacterial defense similar to those approved by the CDC/NIOSH. A 38mm rubber washer can help improve the air seal. Download [3D model] [Fusion 360 link]


This is an adapter plate for a 3M P100 or N95 face mask filter cartridge. These are more commonly available than the above filters. The brown rubber washer is pulled from a 3M mask. Download [3D model] [Fusion 360 link]


Attaching the filter adapter to the blower easily in a way that minimizes air leakage is a bit tricky. An approach I found that seems decent is what I call "the Wrapping". Bundle the ESC and the Arduino around the intake of the blower; secure the bundle with a few pieces of electrical tape. Since you will be squeezing the electronics between the blower and the adapter, spread things out and don't overlap parts. The Arduino Nano has a reset button. Make sure there will be enough clearance when the adapter is pressed on such that the button will not be pressed down keeping the board in a reset state.
Use some hot glue around the outside rim of the blower intake. I would first recommend using just a little hot glue to practice first. Make sure not to get glue into the blower, otherwise it will jam the blower. Press the adapter plate down on the blower, aligning the intake port and the circular opening on the adapter. The hot glue will create an airtight seal between the blower and the adapter. Check to make sure that glue hasn't been squeezed into the blower intake. Use a tool to scrape out excess glue that may have squeezed into the intake area.

At this point, before you do anything else, I would highly recommend testing the blower and Arduino to make sure everything still powers up correctly. Check that you didn't short out any wires or break anything so far. Debugging issues afterwards may be very difficult.
Now that you've tried it once, seen how everything will fit together, and verified it still works ... pull it apart and do it again with more glue to ensure that a good airtight seal will be formed. Pulling it apart again after this may be difficult.
Now take a new-ish roll of electrical tape and begin wrapping tape around the entire pump in one long continuous strip as if you are rolling a ball of twine. Use a crossing pattern going over the bottom of the pump and the rim of the adapter. Try to cover every gap and opening as you go. The goal is to try to create an airtight seal around the entire device with the exception of the blower output and the wires. Keep the electrical tape taut as you go. It will stretch and conform creating decent air seal.

Don't be shy with the tape. I used about half of a new roll of electrical tape to make sure I covered any gaps. Keep going until you can't see any gaps/holes. In the end you should have a reasonably air tight pack. You can put your finger over the intake port and blow into the output port to get a sense of how well you did. It should be difficult to blow as you hear air hiss from small leaks. The easier it is to blow, the more unfiltered air could get into the pump. If you feel no resistance to blowing, you should continue wrapping more tape.

Now you can attach the filter and the battery. You now have a functional filtered air pump.

Attach the hose, put it in a backpack, attach your headgear/face protection, and you have a PAPR!