This is a demo of the XAgent-Server frontend and backend. The backend communication is mainly implemented using fastapi's websocket, supplemented with essential restful APIs. The frontend service is deployed locally.
First, we ran web ui docker when build ToolServer network.
This will start an instance of XAgent-Server listening to port 8090 on the local machine. The configuration details can be found in the XAgentServer/docker-compose.yml file.
After completing the image compilation and startup, you need to start the nginx service. Execute the following command on another command line:
docker exec XAgent-Server systemctl start nginx
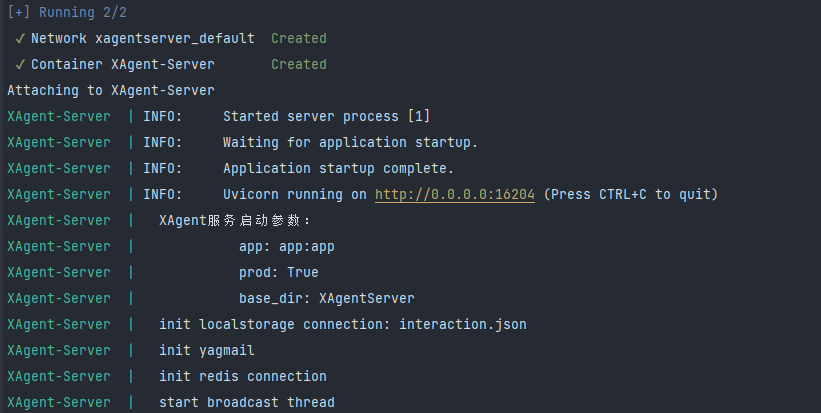
When you see the following output, it means the image has been successfully compiled and launched:
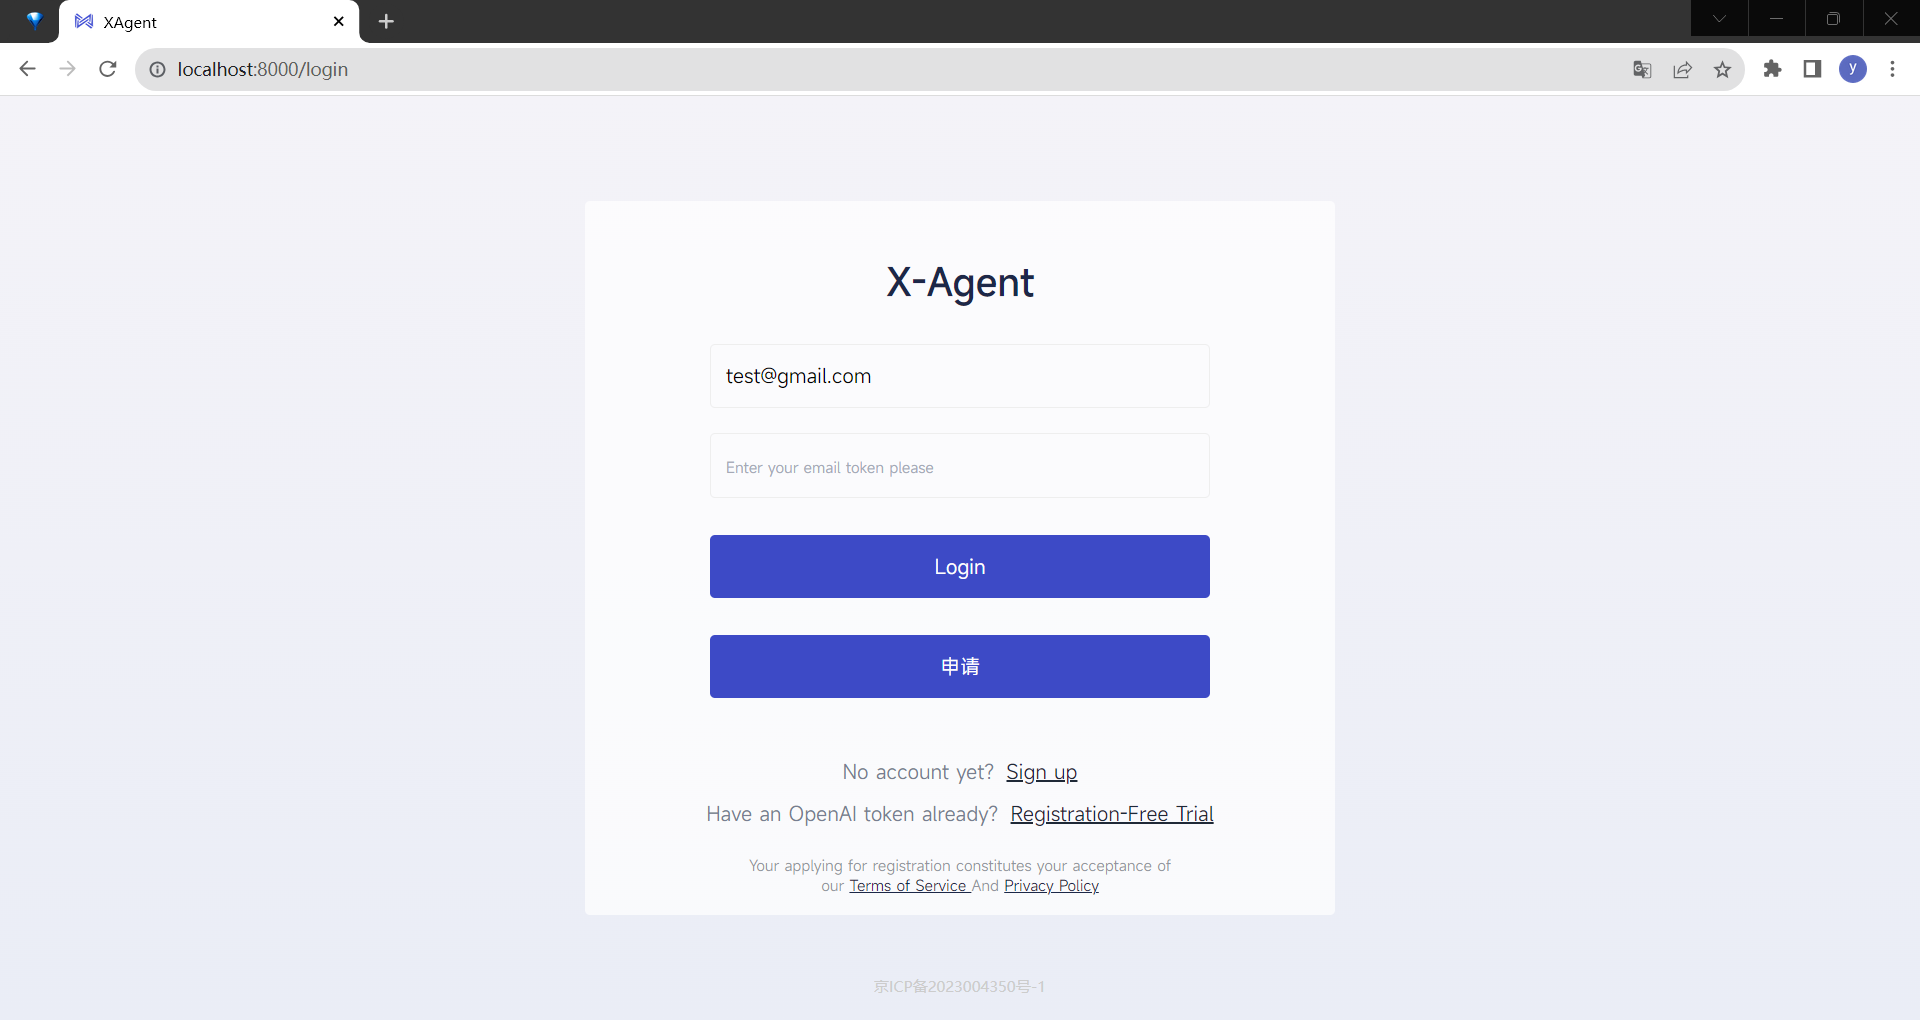
After completing the above steps, you can access the frontend interface by visiting http://localhost:5173 in a web browser. Default user: admin, token: xagent-admin, you can use it to login. An example of the interface is shown below:
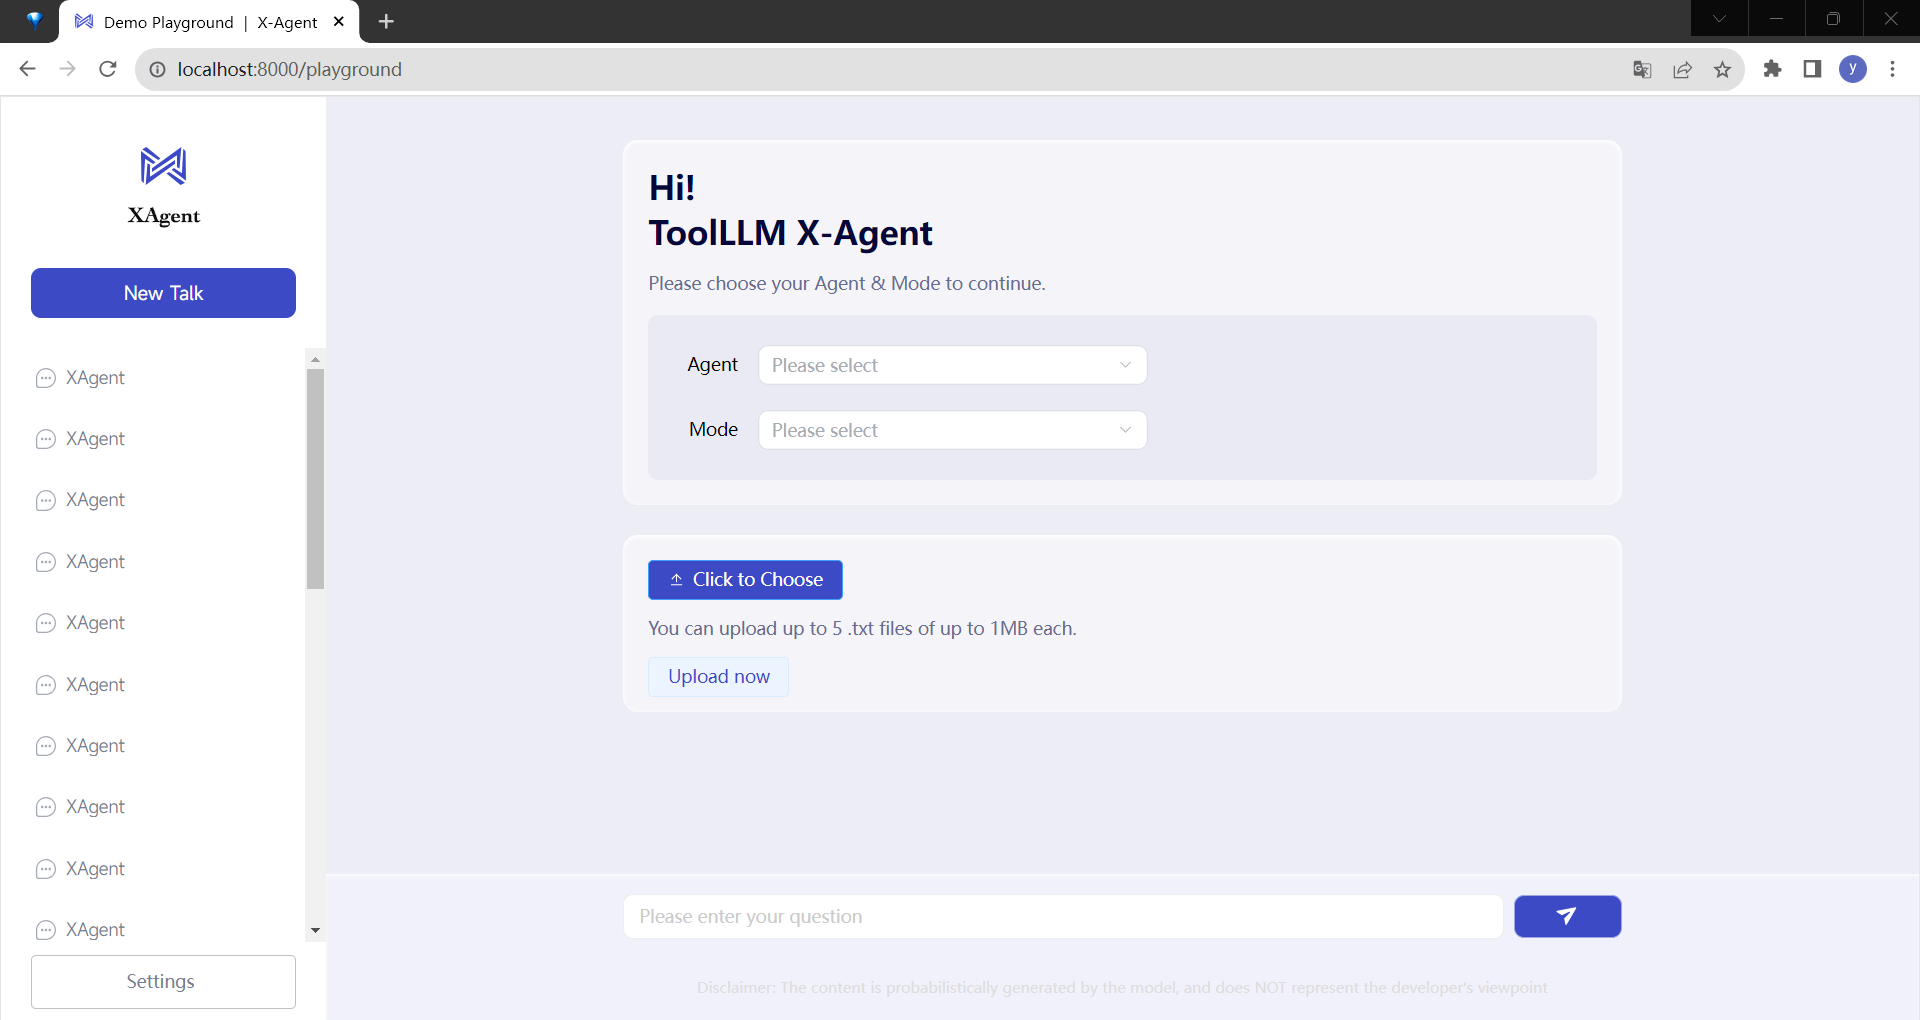
Once you're inside the XAgent-Server, you can start using it as demonstrated:
If you are running this in a Windows environment, you might encounter an error while building the image, which looks like this: XAgentServer/dockerfiles/build.sh: line 2: cd: $'XAgentServer/dockerfiles\r': No such file or directory as shown below:
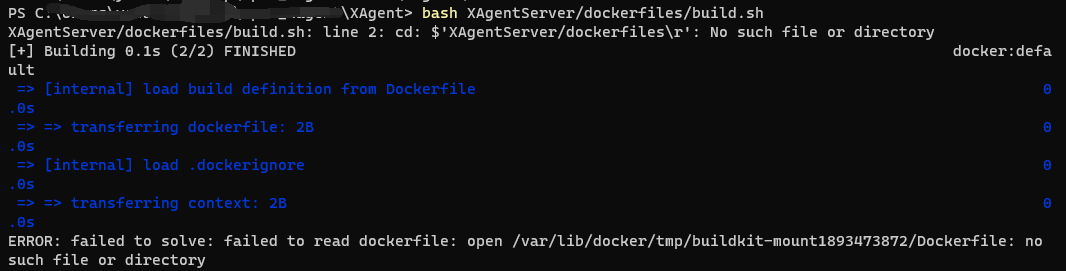
To resolve this, you can navigate to the directory first, then proceed with the compilation. Use the following commands:
cd XAgentServer/dockerfiles/
bash build.sh