


BugSplat's com.bugsplat.unity package provides crash and exception reporting for Unity projects. BugSplat provides you with invaluable insight into the issues tripping up your users. Our Unity integration collects screenshots, log files, exceptions, and Windows minidumps so that you can fix bugs and deliver a better user experience.
In order to use this package please make sure you have completed the following checklist:
Additionally, you can check out our my-unity-crasher sample that demonstrates how to use com.bugsplat.unity.
BugSplat's com.bugsplat.unity package can be added to your project via OpenUPM or a URL to our git repository.
Information on how to install the OpenUPM package for node.js can be found here.
openupm add com.bugsplat.unityInformation on adding a Unity package via a git URL can be found here.
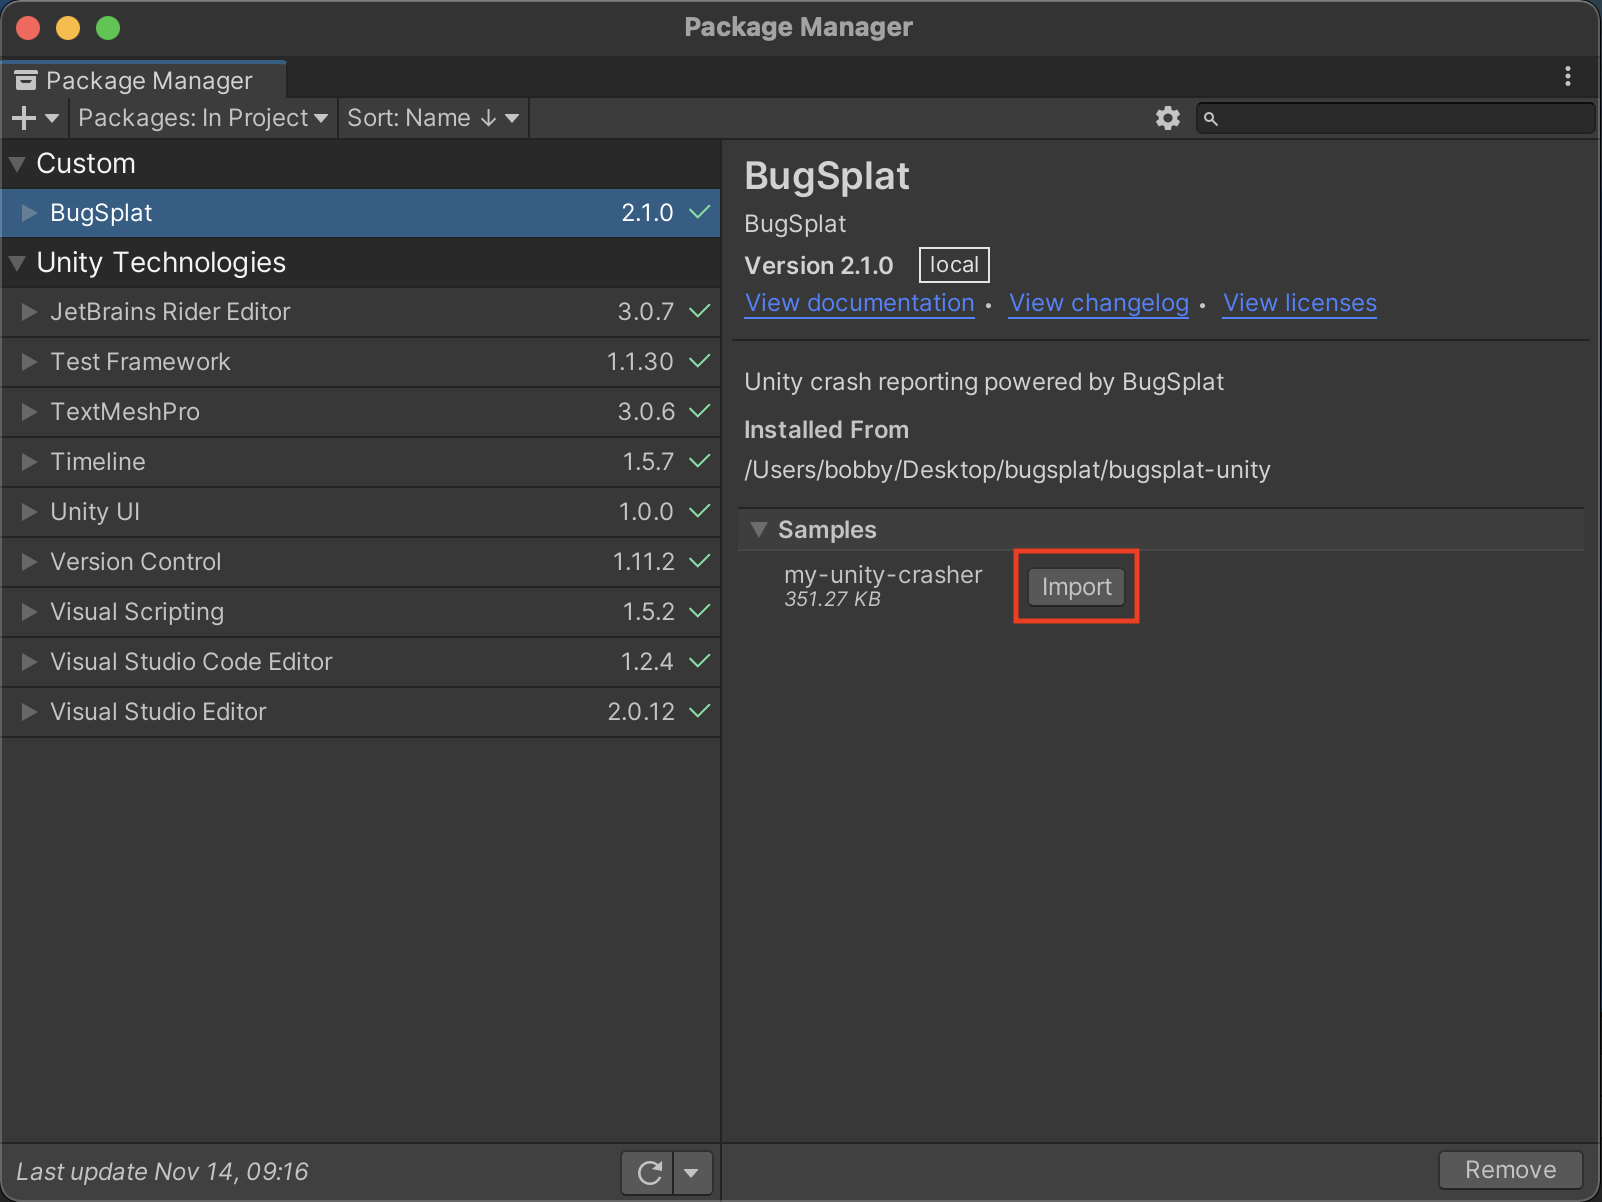
https://github.com/BugSplat-Git/bugsplat-unity.gitAfter installing com.bugsplat.unity you'll have the opportunity to import a sample project that's fully configured to post error reports to BugSplat. Click here if you'd like to skip the sample project and get straight to the usage instructions.
To import the sample, click the carrot next to Samples to reveal the my-unity-crasher sample. Click Import to add the sample to your project.
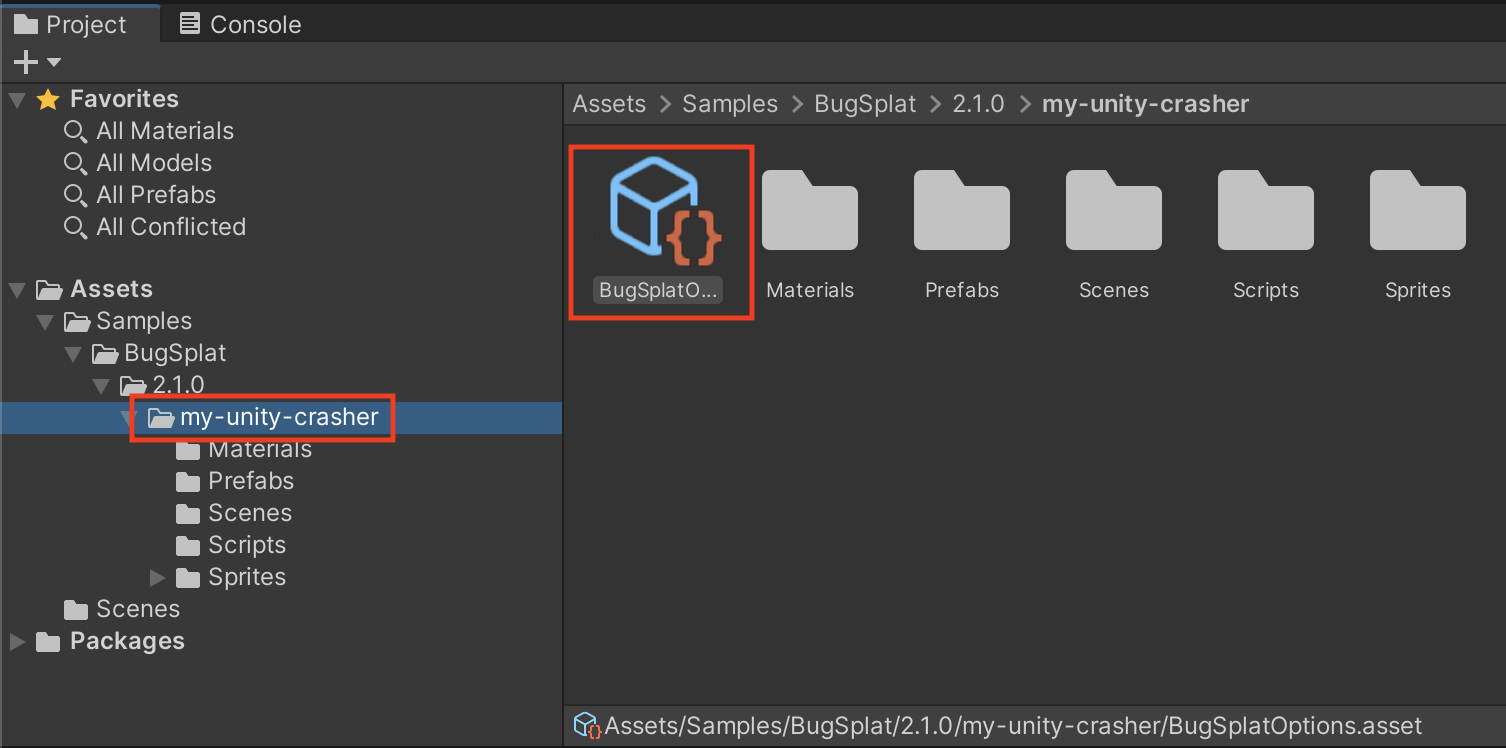
In the Project Assets browser, open the Sample scene from Samples > BugSplat > Version > my-unity-crasher > Scenes.
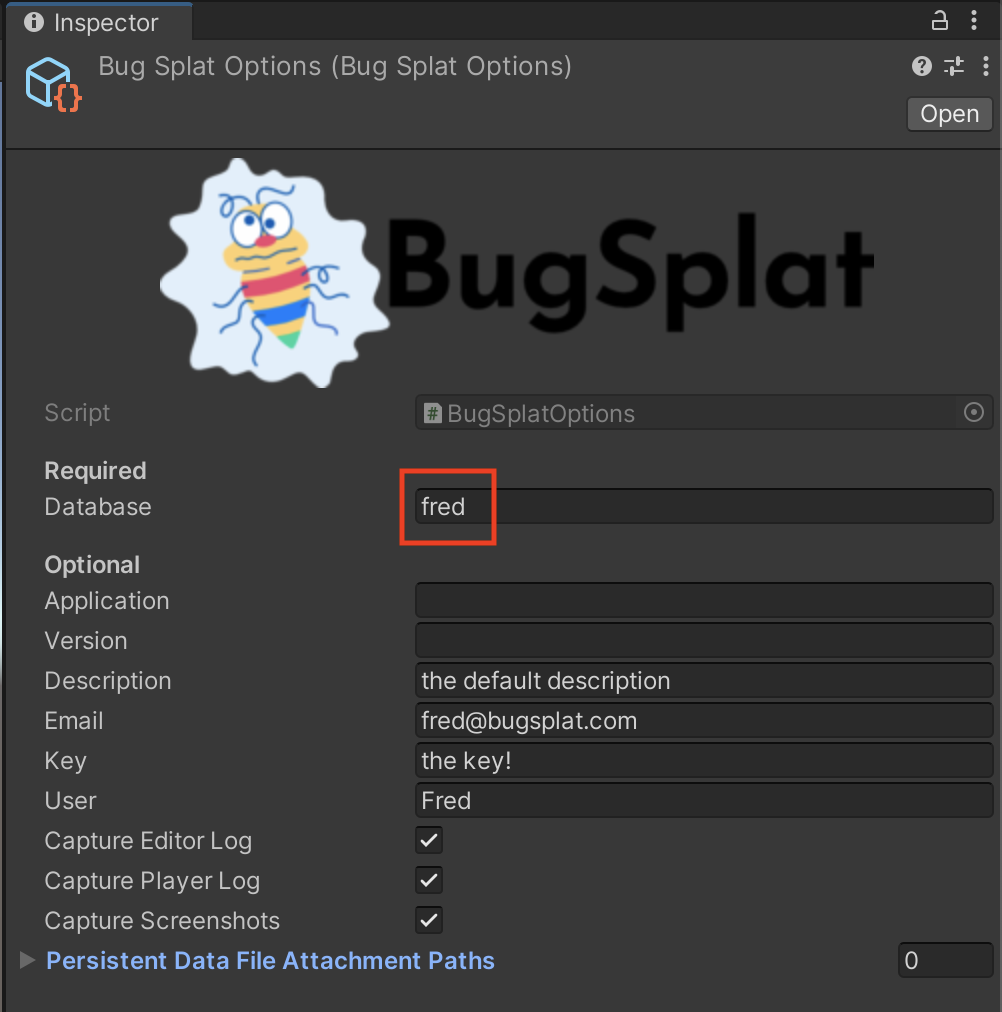
Next, select Samples > BugSplat > Version > my-unity-crasher to reveal the BugSplatOptions object. Click BugSplatOptions and replace the value of database with your BugSplat database.
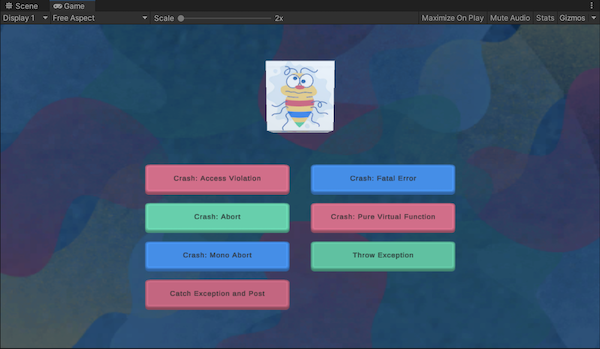
Click Play and click or tap one of the buttons to send an error report to BugSplat. To view the error report, navigate to the BugSplat Dashboard and ensure that you have the correct database selected.
BugSplat's Unity integration is flexible and can be used in a variety of ways. The easiest way to get started is to attach the BugSplatManager Monobehaviour to a GameObject.
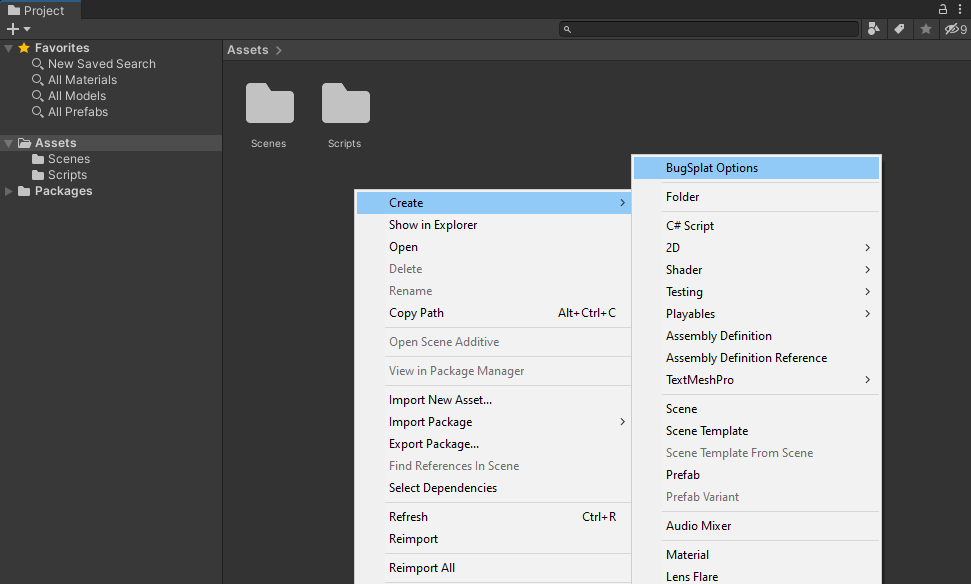
BugSplatManager needs be initialized with a BugSplatOptions serialized object. A new instance of BugSplatOptions can be created through the Asset create menu.
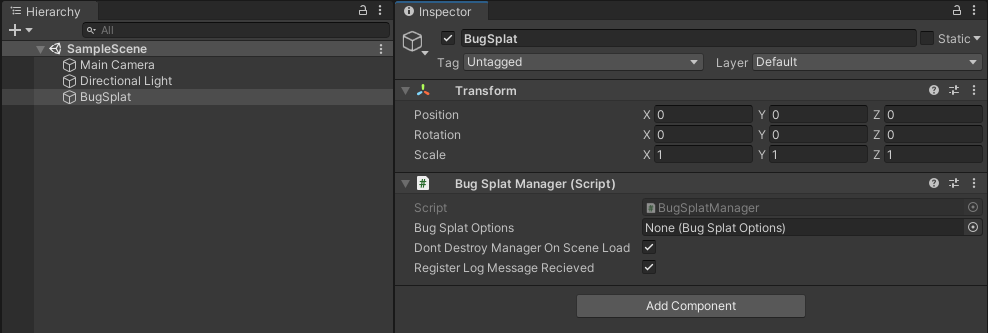
Configure fields as appropriate. Note that if Application or Version are left empty, BugSplat will by default configure these values with Application.productName and Application.version, respectively.

Finally, provide a valid BugSplatOptions to BugSplatManager.

| Setting | Description |
|---|---|
| DontDestroyManagerOnSceneLoad | Should the BugSplat Manager persist through scene loads? |
| RegisterLogMessageRecieved | Register a callback function and allow BugSplat to capture instances of LogType.Exception. |
| Option | Description |
|---|---|
| Database | The name of your BugSplat database. |
| Application | The name of your BugSplat application. Defaults to Application.productName if no value is set. |
| Version | The version of your BugSplat application. Defaults to Application.version if no value is set. |
| Description | A default description that can be overridden by call to Post. |
| A default email that can be overridden by call to Post. | |
| Key | A default key that can be overridden by call to Post. |
| Notes | A default general purpose field that can be overridden by call to post |
| User | A default user that can be overridden by call to Post |
| CaptureEditorLog | Should BugSplat upload Editor.log when Post is called |
| CapturePlayerLog | Should BugSplat upload Player.log when Post is called |
| CaptureScreenshots | Should BugSplat a screenshot and upload it when Post is called |
| PostExceptionsInEditor | Should BugSplat upload exceptions when in editor |
| PersistentDataFileAttachmentPaths | Paths to files (relative to Application.persistentDataPath) to upload with each report |
| ShouldPostException | Settable guard function that is called before each BugSplat report is posted |
| SymbolUploadClientId | An OAuth2 Client ID value used for uploading symbol files generated via BugSplat's Integrations page |
| SymbolUploadClientSecret | An OAuth2 Client Secret value used for uploading symbol files generated via BugSplat's Integrations page |
If you're using BugSplatOptions and BugSplatManager, BugSplat automatically configures an Application.logMessageReceived handler that will post reports when it encounters a log message of type Exception. You can also extend your BugSplat integration and customize report metadata, report exceptions in try/catch blocks, prevent repeated reports, and upload windows minidumps from native crashes.
First, find your instance of BugSplat. The following is an example of how to find an instance of BugSplat via BugSplatManager:
var bugsplat = FindObjectOfType<BugSplatManager>().BugSplat;You can extend BugSplat by setting the following properties:
bugsplat.Attachments.Add(new FileInfo("/path/to/attachment.txt"));
bugsplat.Description = "description!";
bugsplat.Email = "fred@bugsplat.com";
bugsplat.Key = "key!";
bugsplat.Notes = "notes!";
bugsplat.User = "Fred";
bugsplat.CaptureEditorLog = true;
bugsplat.CapturePlayerLog = false;
bugsplat.CaptureScreenshots = true;
You can use the Notes field to capture arbitrary data such as system information:
void Start()
{
    bugsplat = FindObjectOfType<BugSplatManager>().BugSplat;\
    bugsplat.Notes = GetSystemInfo();
}

private string GetSystemInfo()
{
    var info = new Dictionary<string, string>();
    info.Add("OS", SystemInfo.operatingSystem);
    info.Add("CPU", SystemInfo.processorType);
    info.Add("MEMORY", $"{SystemInfo.systemMemorySize} MB");
    info.Add("GPU", SystemInfo.graphicsDeviceName);
    info.Add("GPU MEMORY", $"{SystemInfo.graphicsMemorySize} MB");

    var sections = info.Select(section => $"{section.Key}: {section.Value}");
    return string.Join(Environment.NewLine, sections);
}Exceptions can be sent to BugSplat in a try/catch block by calling Post.
try
{
    throw new Exception("BugSplat rocks!");
}
catch (Exception ex)
{
    StartCoroutine(bugsplat.Post(ex));
}
The default values specified on the instance of BugSplat can be overridden in the call to Post. Additionally, you can provide a callback to Post that will be invoked with the result once the upload is complete.
var options = new ReportPostOptions()
{
    Description = "a new description",
    Email = "barney@bugsplat.com",
    Key = "a new key!",
    Notes = "some new notes!",
    User = "Barney"
};

options.AdditionalAttachments.Add(new FileInfo("/path/to/additional.txt"));

static void callback()
{
    Debug.Log($"Exception post callback!");
};

StartCoroutine(bugsplat.Post(ex, options, callback));By default BugSplat prevents reports from being sent at a rate greater than 1 per every 60 seconds. You can override the default crash report throttling implementation by setting ShouldPostException on your BugSplat instance. To override ShouldPostException, assign the property a new Func<Exception, bool> value. Be sure your new implementation can handle a null value for Exception!
The following example demonstrates how you could implement your own time-based report throttling mechanism:
var lastPost = DateTime.Now;

bugsplat.ShouldPostException = (ex) =>
{
    var now = DateTime.Now;

    if (now - lastPost < TimeSpan.FromSeconds(3))
    {
        Debug.LogWarning("ShouldPostException returns false. Skipping BugSplat report...");
        return false;
    }

    Debug.Log("ShouldPostException returns true. Posting BugSplat report...");
    lastPost = now;

    return true;
};BugSplat can be configured to upload Windows minidumps created by the UnityCrashHandler. BugSplat will automatically pull Unity Player symbols from the Unity Symbol Server. If your game contains Native Windows C++ plugins, .dll and .pdb files in the Assets/Plugins/x86 and Assets/Plugins/x86_64 folders will be uploaded by BugSplat's PostBuild script and used in symbolication.
To enable uploading of plugin symbols, generate an OAuth2 Client ID and Client Secret on the BugSplat Integrations page. Add your Client ID and Client Secret to the BugSplatOptions object you generated in the Configuration section. Once configured, plugins will be uploaded automatically the next time you build your project.
The methods PostCrash, PostMostRecentCrash, and PostAllCrashes can be used to upload minidumps to BugSplat. We recommend running PostMostRecentCrash when your game launches.
StartCoroutine(bugsplat.PostCrash(new FileInfo("/path/to/crash/folder")));
StartCoroutine(bugsplat.PostMostRecentCrash());
StartCoroutine(bugsplat.PostAllCrashes());
Each of the methods that post crashes to BugSplat also accept a MinidumpPostOptions parameter and a callback. The usage of MinidumpPostOptions and callback are nearly identically to the ExceptionPostOptions example listed above.
You can generate a test crash on Windows with any of the following methods.
Utils.ForceCrash(ForcedCrashCategory.Abort);
Utils.ForceCrash(ForcedCrashCategory.AccessViolation);
Utils.ForceCrash(ForcedCrashCategory.FatalError);
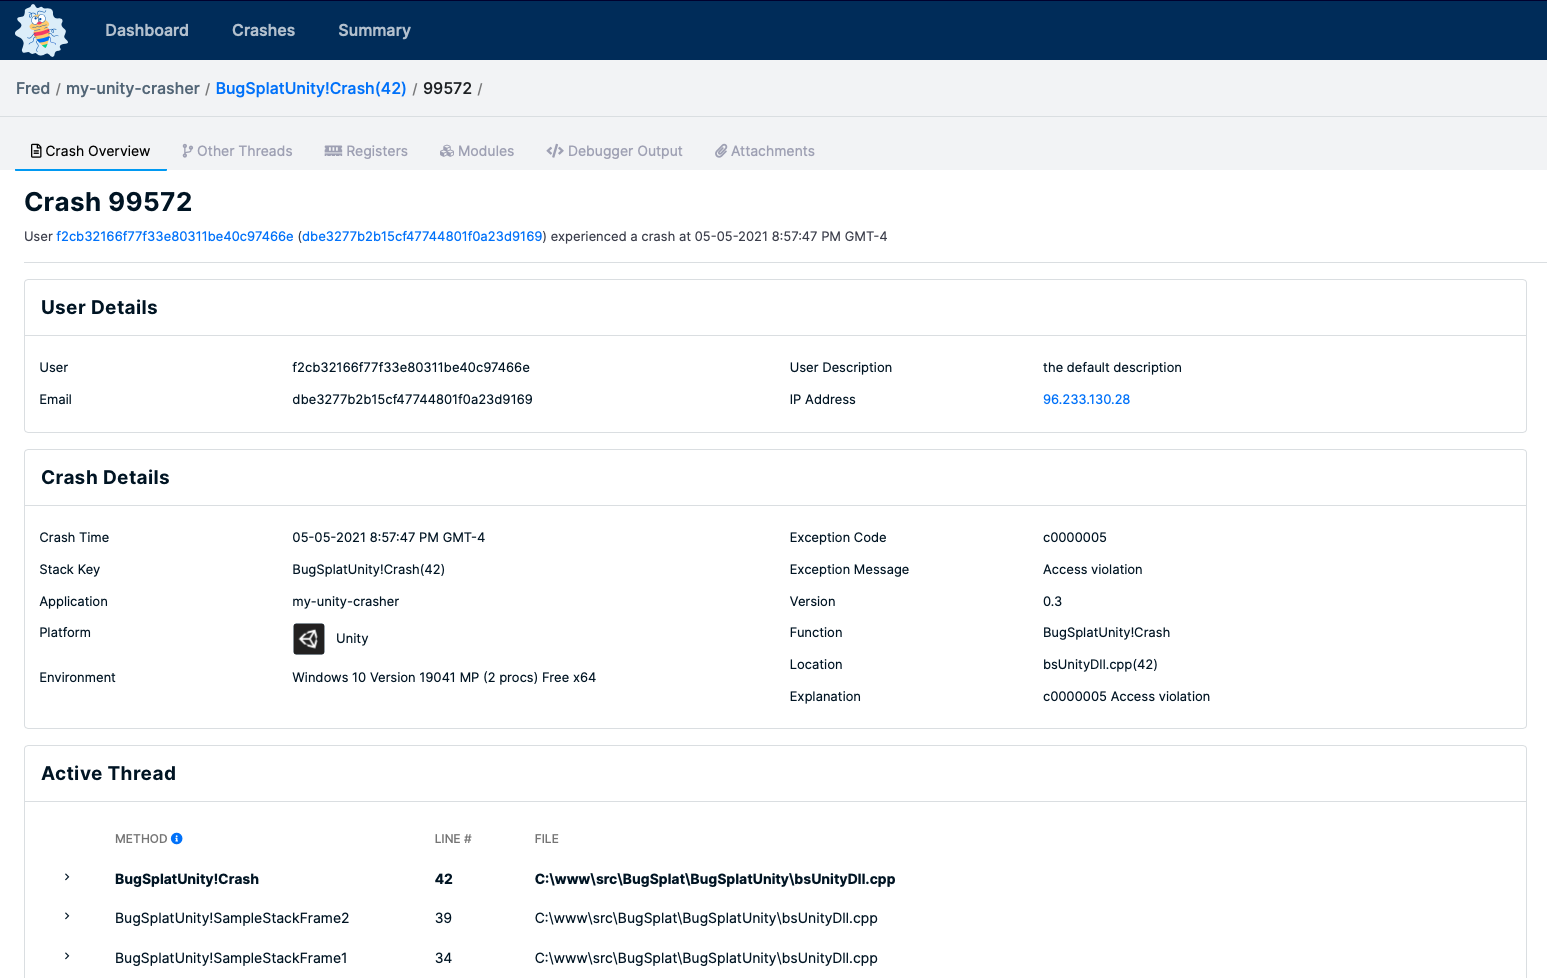
Utils.ForceCrash(ForcedCrashCategory.PureVirtualFunction);Once you've posted an exception or a minidump to BugSplat click the link in the ID column on either the Dashboard or Crashes pages to see details about your crash.
In order to use BugSplat in a Universal Windows Platform application you will need to add some capabilities to the Package.appxmanifest file in the solution directory that Unity generates at build time.
In order to report exceptions and upload log files you will need to add the Internet (Client) capability.
To upload minidumps created on Windows you will need to add the Internet (Client) capability.
Additionally, we found there were some restricted capabilities that were required in order to generate minidumps. Please see this Microsoft document that describes how to configure your system to generate minidumps for UWP native crashes.
To upload minidumps from %LOCALAPPDATA%\CrashDumps you will also need to add the broadFileSystemAccess restricted capability. To add access to the file system you will need to add the following to your Package.appxmanifest:
<Package xmlns:rescap="http://schemas.microsoft.com/appx/manifest/foundation/windows10/restrictedcapabilities" ... >Under the Capabilities section add the broadFileSystemAccess capability:
<Capabilities>
<rescap:Capability Name="broadFileSystemAccess" />
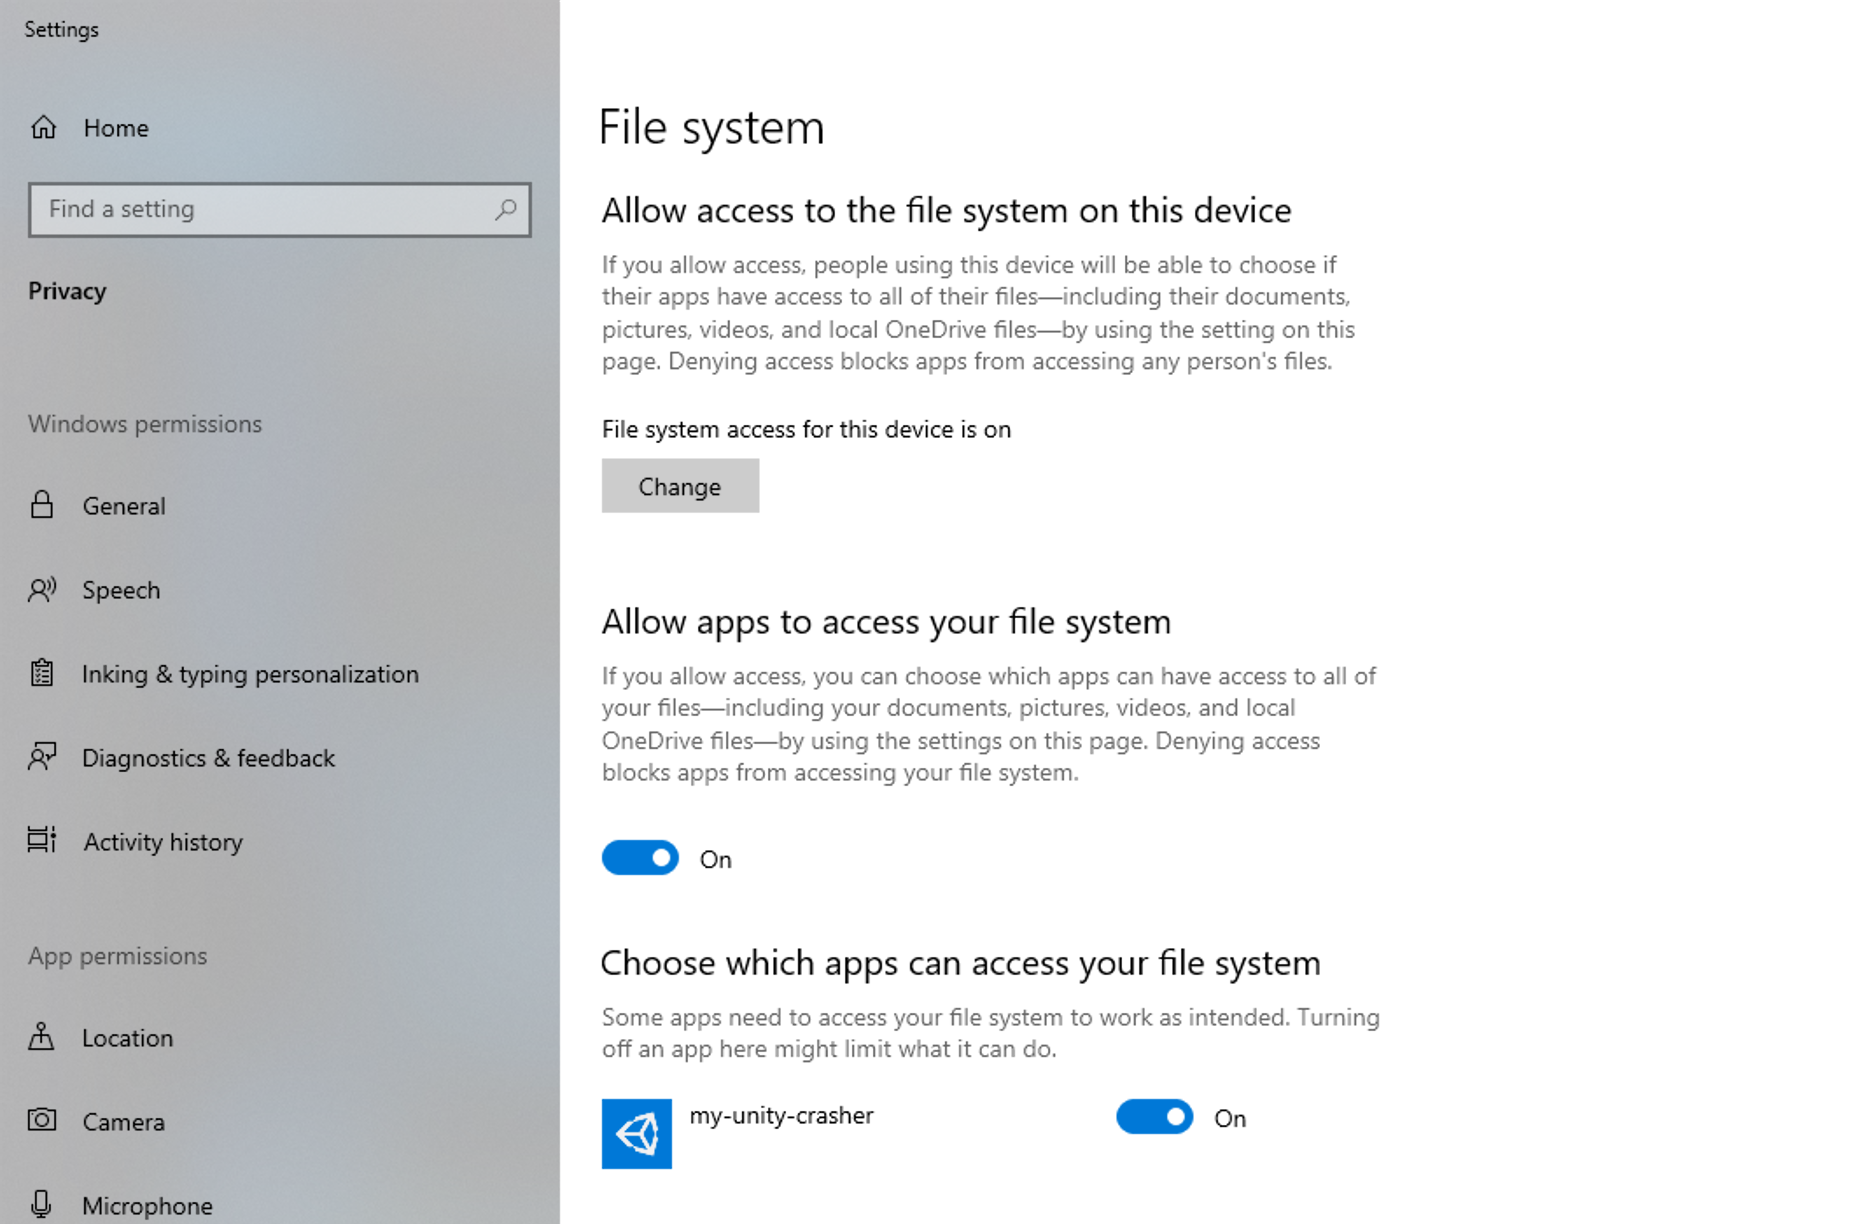
</Capabilities>Finally, ensure that your application has access to the file system. The following is a snippet illustrating where this is set for our my-unity-crasher sample:
BugSplat ❤️s open source! If you feel that this package can be improved, please open an Issue. If you have an awesome new feature you'd like to implement, we'd love to merge your Pull Request. You can also send us an email, join us on Discord, or message us via the in-app chat on bugsplat.com.