This post guides you through the Metalnx Web compilation pipeline. It explains how to build Metalnx Web from scratch.
If you have already installed Metalnx following the Getting Started notes, this step is not required.
Before going any further, make sure you have installed all dependencies necessary to build Metalnx.
Ensure you have the Metalnx git repository in your environment. The Metalnx repository should be as follows:
- src
- packaging
- docs
- contrib
- README
- LICENSE
The src folder is where the Metalnx application code is located. It contains all files that will be compiled and, after the compilation, it will also contains the Metalnx Web application.
Once you have successfully installed Maven (use the mvn --version command to check that), you can build Metalnx. As a Java, Web-based application, Metalnx will be available as a war file at the end of the compilation process.
Browse to the Metalnx src folder in the repository you cloned from the git repository. Listing the src folder content you should see:
emc-metalnx-core
emc-metalnx-services
emc-metalnx-shared
emc-metalnx-ui-admin
metalnx
pom.xml
Under the source folder run the following command for a quickstart:
$ mvn clean generate-sources package -Ppreprod -Dmaven.test.skip=true
Maven is based around the central concept of a build lifecycle. The clean phase cleans the project's working directory, generate-sources generates source code for inclusion in compilation, package takes the compiled code and package it in its distribution format, in this case the format is war.
You do not have to worry about downloading any dependencies. Maven will take care of that for you. Any other package that Metalnx requires will be downloaded from the Maven repository.
After downloading all dependencies, Maven will build all Metalnx subprojects in the following order: emc-metalnx-core, emc-metalnx-services, emc-metalnx-shared, emc-metalnx-ui-admin and metalnx.
When build is completed, you will get a BUILD SUCCESS message. Now, the Metalnx war file exists and it is ready to be deployed. The war file is named metalnx.war and it can be found under metalnx-web/metalnx/target.
With the metalnx.war file in hand, it is easy to deploy it in on an Apache Tomcat server.
There are few different ways to deploy war files in a Tomcat instance. In this tutorial, we will deploy Metalnx through the Tomcat Manager App available at http://{your-tomcat-host}:{your-tomcat-port}/manager/html.
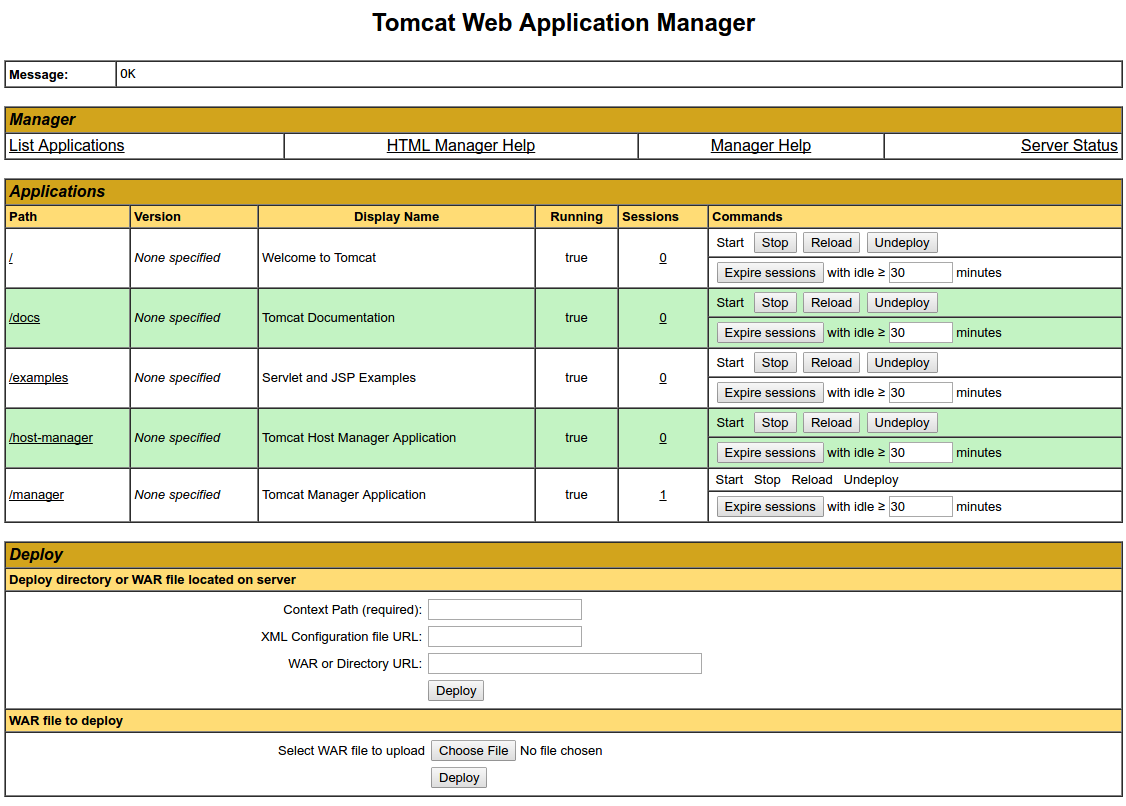
Once on this application manager page, you can select the war file to deploy (under the Deploy) section, find metalnx.war on your file system, select it, and click deploy.
This operation may take a few minutes to complete.
If you want to create rpm or deb packages for Metalnx, proceed to the Package Metalnx post.