Introduction to Cassandra
##Overview
Cassandra is a database, that can be used to manage a large amount of data, some of its features:
- Highly scalable
- Never fails
- Can hold many data types (structured, semi-structured, unstructured)
- Data distribution
- Very fast (writes and reads)
Cassandra consists of the following components:
- Node: this is where data is stored.
- Data centre: bunch of nodes that are related.
- cluster: consists of one or more data centres.
- Commit log: all writes are stored here. in case Cassandra fails.
- Mem-table: data will be written here after commit log.
- SSTable: data will be written here after mem-table has reached a threshold.
- Bloom filter: it is like cache, will be accessed after requests.
- Compaction: when freeing up space, stored stored in a new SSTable.
##Plan for this article
Here we will install Cassandra. make it work with CQLSH. Set it up to work with Java, will also go over an example in Java to show how to do CRUD operations on a TODO list in Cassandra. Finally create an installed directory for the application and create a docker image for the project.
##Installing Cassandra and setting it up to work with Java
First install the latest version of cassandra from here http://cassandra.apache.org/download/ currently it is apache-cassandra-2.2.3-bin.tar.gz unzip it:
####Unzip Cassandra
tar zxvf apache-cassandra-2.2.3-bin.tar.gzIf you like, move the content of apache-cassandra-2.2.3 to a newly created folder called cassandra:
####Move apache-cassandra-2.2.3 to 'cassandra'
mkdir cassandra
mv apache-cassandra-2.2.3/* cassandra
By default Cassandra will make read/write operations from/to the following directories:
- ~/cassandra/var/lib/cassandra
- ~/cassandra/var/log/cassandra
This can be configured on the cassandra.yaml file located ~/cassandra/conf/cassandra.yaml
Lets create these directories if not present to avoid errors:
####Create the read/write directories
mkdir -p var/lib/cassandra
mkdir -p var/log/cassandra
Enable read/write permissions to these directories:
####Enable read /write permissions
chmod 777 var/lib/cassandra/
chmod 777 var/log/cassandra/
Note to check the status of the permission files:
####Check the status for permissions
ls -lLets start cassandra, with your terminal:
####Start Cassandra
cd cassandra
bin/cassandra -f
cqlsh lets you do CQL Cassandra Query Language that will interact with cassandra to insert data, execute queries, and define a schema.
To open a CQL shell and communicate to your local cassandra instance; open a new terminal:
cqlshyou should see:
``bash Connected to Test Cluster at 127.0.0.1:9042. [cqlsh 5.0.1 | Cassandra 2.1.5 | CQL spec 3.2.0 | Native protocol v3] Use HELP for help. cqlsh>
to see all the cqlsh commands:

```bash
help
you get:
Documented shell commands:
===========================
CAPTURE      COPY  DESCRIBE  EXPAND  PAGING  SOURCE
CONSISTENCY  DESC  EXIT      HELP    SHOW    TRACING

CQL help topics:
================
ALTER                        CREATE_TABLE_OPTIONS  SELECT
ALTER_ADD                    CREATE_TABLE_TYPES    SELECT_COLUMNFAMILY
ALTER_ALTER                  CREATE_USER           SELECT_EXPR
ALTER_DROP                   DELETE                SELECT_LIMIT
ALTER_RENAME                 DELETE_COLUMNS        SELECT_TABLE
ALTER_USER                   DELETE_USING          SELECT_WHERE
ALTER_WITH                   DELETE_WHERE          TEXT_OUTPUT
Create a keyspace which is a namespace for tables, and can create options for a set of tables:
CREATE KEYSPACE mykeyspace
WITH REPLICATION = { 'class' : 'SimpleStrategy', 'replication_factor' : 1 };
we just created a keyspace that is called mykeyspace.
To work within mykeyspace:
USE mykeyspace;To create a table called todolist:
CREATE TABLE todolist (name text PRIMARY KEY, task text, status text );Insert data into the table:
INSERT INTO todolist (name, task, status) VALUES ('George', 'Buy a computer', 'done');
INSERT INTO todolist (name, task, status) VALUES ('John', 'Graduate from college', 'in progress');
INSERT INTO todolist (name, task, status) VALUES ('Ron', 'Buy a car', 'Done');
To query this table:
SELECT * FROM todolist;You should see the table:
 name   | status      | task
--------+-------------+-----------------------
 George |        Done |        Buy a computer
   John | in progress | Graduate from college
    Ron |        Done |             Buy a car


(3 rows)
You can request data related to one name:
SELECT * FROM todolist WHERE name = 'John';Will return the data for only John:
 name | status      | task
------+-------------+-----------------------
 John | in progress | Graduate from college
You can also query the data by it status field, by first creating an index of status:
CREATE INDEX ON todolist (status);And then query lets say the Done status:
SELECT * FROM todolist WHERE status = 'Done';You will get all the todoitems that have a status of Done:
 name   | status | task
--------+--------+----------------
 George |   Done | Buy a computer
    Ron |   Done |      Buy a car
We can copy the data in the table todolist to a file, i called testcopy located in ~/cassandra/testcopy:
COPY todolist (name,task, status) TO '~/cassandra/testcopy';if we open the file, you will see the following:
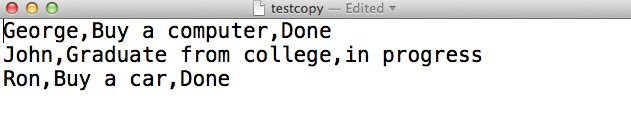
The table was copied successfully to a file.
This was a brief intro into cassandra, a brief demonstration on how to use cqlsh to communicate with cassandra's database; index data, query data, and copy data to a file. In the next section will show how to use cassandra with java to do CRUD operations on a todolist.
##CRUD operations on a todo list with cassandra via java
In this example, we will create a todoitem object that holds the following fields:
- ID (name of the person)
- description (what he has to do)
- category (category of task)
- Date (system's date and time)
public class TodoItem {


    private String id;
    private String description;
    private String category;
    private final LocalDateTime date = LocalDateTime.now();


    public TodoItem(String id, String description, String category) {
        this.id = id;
        this.description = description;
        this.category = category;


    }
we will create three todoitem objects, post them to a cassandra table via java, then do CRUD operations on them.
in detail this this is what will do:
- post the three items to casssandra
- query what we have posted
- update one of them
- query all data to compare
- delete one item
- query all data to compare
- delete all the data from the table
- query again.
####let's get started
With your IDEA create a new java project cassnadra-crud with a gradle application plugin.
Using gradle import the following dependencies with build.gradle
####build.gradle Listing
apply plugin: 'idea'
apply plugin: 'java'
apply plugin: 'jetty'
apply plugin: 'application'

applicationName = 'todocass'

applicationDefaultJvmArgs = ["-Dlogback.configurationFile=etc/todosolr/logging.xml"]

sourceCompatibility = 1.8
version = '1.0'

repositories {
    mavenLocal()
    mavenCentral()
}

mainClassName = "com.example.Main"

dependencies {


    compile 'com.datastax.cassandra:cassandra-driver-core:2.1.5'
    compile 'org.apache.cassandra:cassandra-all:2.1.5'

    testCompile "junit:junit:4.11"
    testCompile "org.slf4j:slf4j-simple:[1.7,1.8)"

    //logback dependencies
    compile 'ch.qos.logback:logback-core:1.1.3'
    compile 'ch.qos.logback:logback-classic:1.1.3'
    compile 'org.slf4j:slf4j-api:1.7.12'
}

//Install/copy tasks
task copyDist(type: Copy) {
    dependsOn "installApp"
    from "$buildDir/install/todocass"
    into 'opt/todocass'
}

task copyLog(type: Copy) {
    from "src/main/resources/logback.xml"
    into "etc/todocass/"
}


task copyLogToImage(type: Copy) {
    from "src/main/resources/logback.xml"
    into "image-todo-cass/etc"
}
task copyDistToImage(type: Copy) {
    dependsOn "installApp"
    from "$buildDir/install/todocass"
    into "$projectDir/image-todo-cass/opt/todocass"
}
To enable logback and avoid errors, add logback.xml under ~/src/main/resources with the following configurations:
####logback.xml Listing
<?xml version="1.0" encoding="UTF-8"?>
<configuration>

    <appender name="STDOUT" class="ch.qos.logback.core.ConsoleAppender">
        <encoder>
            <pattern>conf %d{HH:mm:ss.SSS} [%thread] %-5level %logger{5} - %msg%n</pattern>
        </encoder>
    </appender>

    <appender name="FILE" class="ch.qos.logback.core.rolling.RollingFileAppender">
        <file>var/logging/logs</file>
        <encoder class="ch.qos.logback.classic.encoder.PatternLayoutEncoder">
            <Pattern>%d{yyyy-MM-dd_HH:mm:ss.SSS} [%thread] %-5level %logger{36} - %msg%n</Pattern>
        </encoder>

        <rollingPolicy class="ch.qos.logback.core.rolling.FixedWindowRollingPolicy">
            <FileNamePattern>var/logging/logs%i.log.zip</FileNamePattern>
            <MinIndex>1</MinIndex>
            <MaxIndex>10</MaxIndex>
        </rollingPolicy>

        <triggeringPolicy class="ch.qos.logback.core.rolling.SizeBasedTriggeringPolicy">
            <MaxFileSize>2MB</MaxFileSize>
        </triggeringPolicy>
    </appender>

    <logger name="com.example.Main" level="DEBUG" additivity="false">
        <appender-ref ref="STDOUT" />
        <appender-ref ref="FILE" />
    </logger>

    <root level="INFO">
        <appender-ref ref="STDOUT" />
    </root>
</configuration>
After you do the above and run later you will notice that a directory var/logging/logs will be created, this is where the logs will be stored.
<file>var/logging/logs</file>Make a class TodoItem, this will hold the todoitem object:
####TodoItem.java Listing
package com.example;


import java.time.LocalDateTime;

/**
 * Created by fadi on 5/17/15.
 */
public class TodoItem {


    private String id;
    private String description;
    private String category;
    private final LocalDateTime date = LocalDateTime.now();


    public TodoItem(String id, String description, String category) {
        this.id = id;
        this.description = description;
        this.category = category;


    }

    public String getId(){
        return this.id;
    }

    public  String getDescription(){
        return this.description;
    }

    public String getCategory(){
        return this.category;
    }

//    @Field
//    public void setId(String id){
//        this.id = id;
//    }
//
//    @Field
//    public void setDescription(String description){
//        this.description = description;
//    }
//    @Field
//    public void setCategory(String category){
//        this.category = category;
//    }


    @Override
    public String toString() {
        return  "VALUES ( " + "'" + this.id +"'" + ", " + "'" + this.description +"'" + ", " + "'" + this.category +"'" +", "  + "'" + date +"'" + ")";

    }
}
Create a class Main, this is where will do the CRUD operations, lets explain it a bit.
The process of doing CRUD operations on cassandra's data via java is as follows:
- Create a cluster instance and add a contact point to it which is our localhost in this example
 //Creating Cluster object
Cluster cluster = Cluster.builder().addContactPoint("127.0.0.1").build();- Create a session instance and connect it to the cluster
//Creating Session object
Session session = cluster.connect();
Now we are connected to cassandra, note in order to talk with cassandra we need to know CQL (cassandra query language), it is heavily syntax sensitive, in this example will go over a few commands, which are probably needed the most for normal operations.
- Create a keyspace called todolist, this is where data tables are located.
//create keyspace
String keyspace = "CREATE KEYSPACE IF NOT EXISTS todolist  WITH replication = {'class': 'SimpleStrategy', 'replication_factor':1}";
session.execute(keyspace);
Note `session.excute() will send the commands to cassandra, the tricky part is to get the string syntax correct to execute properly.
- Use the keyspace todolist, enables the keyspace:
//using the KeySpace
session.execute("USE todolist");- Create a table called
todolisttable, this is where we storetodoitemdata
 //create table
 String table = "CREATE TABLE todolisttable(ID text PRIMARY KEY, "
                    + "Description text, "
                    + "Category text, "
                    + "Date timestamp )";
 session.execute(table);
Now we have a table that has four fields; ID of type text this is also the index of the table you can access items by providing this ID, Description of type text, category of type text, and Date of type timestamp; these fields match the TodoItem fields since we are going to store them here.
- Now we are ready to post some data to cassandra's table to do so, create three
todoitemitems:
TodoItem item = new TodoItem("George", "Buy a new computer", "Shopping");
TodoItem item2 = new TodoItem("John", "Go to the gym", "Sport");
TodoItem item3 = new TodoItem("Ron", "Finish the homework", "Education" );
Then Post them to cassandra:
//index data
String task1 = "INSERT INTO todolisttable (ID, Description, Category, Date)"

                    + item.toString();

String task2 = "INSERT INTO todolisttable (ID, Description, Category, Date)"

                    + item2.toString();

String task3 = "INSERT INTO todolisttable (ID, Description, Category, Date)"

                    + item3.toString();
  //indexing data
session.execute(task1);
session.execute(task2);
session.execute(task3);
In order to match CQL syntax for posting data, we made the toString() method in the TodoItem class, and we have used it in the above as you can see.
@Override
    public String toString() {
        return  "VALUES ( " + "'" + this.id +"'" + ", " + "'" + this.description +"'" + ", " + "'" + this.category +"'" +", "  + "'" + date +"'" + ")";
also note the current date is coming from:
private final LocalDateTime date = LocalDateTime.now();- Now we have the tree data items on cassandra, lets do a query and print them out:
//Query all data
String query = "SELECT * FROM todolisttable";
//the result of queries will be in the form of a ResultSet object
ResultSet data = session.execute(query);
System.out.println("Query all data on cassandra after the initial indexing:\n" + data.all());
Note when we query the data from cassandra they are of type ResultSet.
We get:
Query all data on cassandra after the initial indexing:
[Row[George, Shopping, Tue May 19 15:27:59 PDT 2015, Buy a new computer], Row[John, Sport, Tue May 19 15:27:59 PDT 2015, Go to the gym], Row[Ron, Education, Tue May 19 15:27:59 PDT 2015, Finish the homework]]
They are an exact match to what they are supposed to be.
- Update one field in the table, we will change the field
Descryptionandcategoryfor the index id = Ron, then query all the data to compare:
//Update table
String update = "UPDATE todolisttable SET Category='Fun',Description='Go to the beach' WHERE ID='Ron'";
 //Updating the data
            session.execute(update);
//query all data again
            ResultSet data1 = session.execute(query);
            System.out.println("\nQuery data after updating the table where ID=Ron:\n" + data1.all() );
We get:
Query data after updating the table where ID=Ron:
[Row[George, Shopping, Tue May 19 15:31:25 PDT 2015, Buy a new computer], Row[John, Sport, Tue May 19 15:31:25 PDT 2015, Go to the gym], Row[Ron, Fun, Tue May 19 15:31:25 PDT 2015, Go to the beach]]
As you see the field description and category have changed for the row with id= Ron.
- Delete a row by its id, where id = George, then query again to compare:
//Deleting data where the index id = George
            String delete = "DELETE FROM todolisttable WHERE ID='George'";
 //deleting data where ID= George
            session.execute(delete);

            //query all data after deleting
            ResultSet data2 = session.execute(query);
            System.out.println("\nQuery data after deleting the entry with id=george:\n" + data2.all());
We get:
Query data after deleting the entry with id=george:
[Row[John, Sport, Tue May 19 15:31:25 PDT 2015, Go to the gym], Row[Ron, Fun, Tue May 19 15:31:25 PDT 2015, Go to the beach]]- Now delete all the data, and query the results again:
 //Deleting all data
           String deleteall ="TRUNCATE todolisttable";
  //deleting all data from table
            session.execute(deleteall);

            //query all data after deleting everything
            ResultSet data3 = session.execute(query);
            System.out.println("\nQuery data after deleting everything:\n" + data3.all());
We get:
Query data after deleting everything:
[]- To test loggin, we have added:
static final Logger logger = LoggerFactory.getLogger(Main.class);

//testing logging
logger.debug("testing", data1);- Finally shut down; delete table and keyspace, close the session and cluster:
 //SHUT DOWN-----------------
//delete keyspace
String deletekeyspace = "DROP KEYSPACE todolist";

//delete table
String deletetable = "DROP TABLE todolisttable";
//deleting table todolisttable
session.execute(deletetable);
//deleting keyspace
session.execute(deletekeyspace);
//close session
session.close();
//close cluster
cluster.close();
This is it, for instructions on how to run it, and clone the code go to the end, here is the code listing for Main
####Mian.java Listing
package com.example;

import com.datastax.driver.core.Cluster;
import com.datastax.driver.core.ResultSet;
import com.datastax.driver.core.Session;
import org.slf4j.Logger;
import org.slf4j.LoggerFactory;


/**
 * Created by fadi on 5/18/15.
 */
public class Main {


    static final Logger logger = LoggerFactory.getLogger(Main.class);


        public static void main(String args[]){

            TodoItem item = new TodoItem("George", "Buy a new computer", "Shopping");
            TodoItem item2 = new TodoItem("John", "Go to the gym", "Sport");
            TodoItem item3 = new TodoItem("Ron", "Finish the homework", "Education" );

//            System.out.println(item);
//            System.out.println(item2);
//            System.out.println(item3);


            //create keyspace
//            String keyspace = "CREATE KEYSPACE todolist WITH replication "
//                    + "= {'class':'SimpleStrategy', 'replication_factor':1}; ";

            String keyspace = "CREATE KEYSPACE IF NOT EXISTS todolist  WITH replication = {'class': 'SimpleStrategy', 'replication_factor':1}";

            //index data
            String task1 = "INSERT INTO todolisttable (ID, Description, Category, Date)"

                    + item.toString();

            String task2 = "INSERT INTO todolisttable (ID, Description, Category, Date)"

                    + item2.toString();

            String task3 = "INSERT INTO todolisttable (ID, Description, Category, Date)"

                    + item3.toString();


            //delete keyspace
            String deletekeyspace = "DROP KEYSPACE todolist";

            //delete table
            String deletetable = "DROP TABLE todolisttable";

            //create table
            String table = "CREATE TABLE todolisttable(ID text PRIMARY KEY, "
                    + "Description text, "
                    + "Category text, "
                    + "Date timestamp )";

            //Query all data
            String query = "SELECT * FROM todolisttable";

            //Update table
            String update = "UPDATE todolisttable SET Category='Fun',Description='Go to the beach' WHERE ID='Ron'";

            //Deleting data where the index id = George
            String delete = "DELETE FROM todolisttable WHERE ID='George'";

            //Deleting all data
           String deleteall ="TRUNCATE todolisttable";


//----------------------------------------------------------------------------------------------------------------------------


            //Creating Cluster object
            Cluster cluster = Cluster.builder().addContactPoint("127.0.0.1").build();


            //Creating Session object
            Session session = cluster.connect();

            //create keyspace
            session.execute(keyspace);
            System.out.println("\nKeysapace todolist is created");

            //using the KeySpace
            session.execute("USE todolist");


            //Create table
            session.execute(table);


            //indexing data
            session.execute(task1);
            session.execute(task2);
            session.execute(task3);

            System.out.println("\nDATA CREATED and INDEXED\n");

            //the result of queries will be in the form of a ResultSet object
            ResultSet data = session.execute(query);

            System.out.println("Query all data on cassandra after the initial indexing:\n" + data.all());

            //Updating the data
            session.execute(update);

            //query all data again
            ResultSet data1 = session.execute(query);

            //testing logging
            logger.debug("testing", data1);

            System.out.println("\nQuery data after updating the table where ID=Ron:\n" + data1.all() );

            //deleting data where ID= George
            session.execute(delete);

            //query all data after deleting
            ResultSet data2 = session.execute(query);
            System.out.println("\nQuery data after deleting the entry with id=george:\n" + data2.all());

            //deleting all data from table
            session.execute(deleteall);

            //query all data after deleting everything
            ResultSet data3 = session.execute(query);
            System.out.println("\nQuery data after deleting everything:\n" + data3.all());

            //SHUT DOWN-----------------

            //deleting table todolisttable
            session.execute(deletetable);
            //deleting keyspace
            session.execute(deletekeyspace);
            //close session
            session.close();
            //close cluster
            cluster.close();

        }
    }
##Create an installed diretory for the app todocass
In order to create an installed directory for todocass, we have added two tasks in build.gradle:
To copy logback.xml to etc:
task copyLog(type: Copy) {
    from "src/main/resources/logback.xml"
    into "etc/todocass/"
}
to install the app with all jars and an executable:
//Install/copy tasks
task copyDist(type: Copy) {
    dependsOn "installApp"
    from "$buildDir/install/todocass"
    into 'opt/todocass'
}
To create the directory do the following:
cd cassandra-crud
gradle copyLog
gradle copyDist
To test/run it:
opt/todocass/bin/todocassYou should get the following:
Keysapace todolist is created

DATA CREATED and INDEXED

Query all data on cassandra after the initial indexing:
[Row[George, Shopping, Sun May 24 14:18:09 PDT 2015, Buy a new computer], Row[John, Sport, Sun May 24 14:18:09 PDT 2015, Go to the gym], Row[Ron, Education, Sun May 24 14:18:09 PDT 2015, Finish the homework]]
conf 14:18:10.329 [main] DEBUG c.e.Main - testing

Query data after updating the table where ID=Ron:
[Row[George, Shopping, Sun May 24 14:18:09 PDT 2015, Buy a new computer], Row[John, Sport, Sun May 24 14:18:09 PDT 2015, Go to the gym], Row[Ron, Fun, Sun May 24 14:18:09 PDT 2015, Go to the beach]]

Query data after deleting the entry with id=george:
[Row[John, Sport, Sun May 24 14:18:09 PDT 2015, Go to the gym], Row[Ron, Fun, Sun May 24 14:18:09 PDT 2015, Go to the beach]]

Query data after deleting everything:
[]
also after running var/loggong/logs will be created, withs logs printed on logs file:
2015-05-24_12:05:05.601 [main] DEBUG com.example.Main - testing
2015-05-24_12:05:27.620 [main] DEBUG com.example.Main - testing
2015-05-24_12:05:35.621 [main] DEBUG com.example.Main - testing
2015-05-24_12:06:32.200 [main] DEBUG com.example.Main - testing
2015-05-24_13:12:54.987 [main] DEBUG com.example.Main - testing
2015-05-24_14:18:10.329 [main] DEBUG com.example.Main - testing
##Create a docker image
In order to create a docker image for this project:
-
Create a folder called
image-todo-cass -
add a file called
Dockerfile.Dockerfilewill take care of the building process for your image when you rundocker buildlater.
cd ~/image-todo-cass
touch Dockerfile
open Dockerfile
add the following to it:
####Dockerfile Listing
FROM java:openjdk-8

COPY opt /opt
COPY etc /etc
COPY var /var

ENTRYPOINT opt/todocass/bin/run.sh- Let's populate the
image-todo-casswith the project files, to do so we have added two tasks tobuild.gradle.
To copy logback.xml to image-todo-cass/etc:
task copyLogToImage(type: Copy) {
    from "src/main/resources/logback.xml"
    into "image-todo-cass/etc"
}
To install the app to image-todo-cass/opt with all jars:
task copyDistToImage(type: Copy) {
    dependsOn "installApp"
    from "$buildDir/install/todocass"
    into "$projectDir/image-todo-cass/opt/todocass"
}
Lets populate:
gradle copyLogToImage
gradle copyDistToImage- Now we add a
run.shsince this was our entrypoint in theDockerfile.
cd ~/cassandra-crud/image-todo-cass/opt/todocass/bin
touch run.sh
open run.sh
then add the following script to this shell:
#!/usr/bin/env bash
opt/todocass/bin/todocass- Make run.sh an executable file:
 pwd
~/cassandra-crud/image-todo-cass/
chmod +x opt/todocass/bin/run.sh - Run it from
image-todo-cassto make sure it works and to createvar/logging/logs:
opt/todocass/bin/run.sh var/logging/logs will be created.
- Now we are ready to build this as a docker image:
$ pwd
~/cassandra-crud/image-todo-cass/

docker build -t example/todocass:1.0 .
example/todocass will represent the name of the image/repo and 1.0 would be your tag you can use it to keep track of versions. This will take a minute.
- Make sure it was built:
docker imagesyou should see something like:
REPOSITORY          TAG                 IMAGE ID            CREATED             VIRTUAL SIZE
example/todocass    1.0                 af11c1c4497e        About an hour ago   864.5 MB
##Run it
You can get the code for this example from github:
git clone https://github.com/javaboon/research.gitwith your terminal run cassandra:
cd ~/cassandra
bin/cassandra -f
Then run Main:
cd ~/cassandra-crud
gradle clean build
gradle run
or run it from your IDEA.
You should see the following:
Keysapace todolist is created

DATA CREATED and INDEXED

Query all data on cassandra after the initial indexing:
[Row[George, Shopping, Tue May 19 15:54:31 PDT 2015, Buy a new computer], Row[John, Sport, Tue May 19 15:54:31 PDT 2015, Go to the gym], Row[Ron, Education, Tue May 19 15:54:31 PDT 2015, Finish the homework]]

Query data after updating the table where ID=Ron:
[Row[George, Shopping, Tue May 19 15:54:31 PDT 2015, Buy a new computer], Row[John, Sport, Tue May 19 15:54:31 PDT 2015, Go to the gym], Row[Ron, Fun, Tue May 19 15:54:31 PDT 2015, Go to the beach]]

Query data after deleting the entry with id=george:
[Row[John, Sport, Tue May 19 15:54:31 PDT 2015, Go to the gym], Row[Ron, Fun, Tue May 19 15:54:31 PDT 2015, Go to the beach]]

Query data after deleting everything:
[]
To shut down cassandra, simply ^C in the terminal where you ran it.
This is it we have introduced cassandra, demonstrated how it works with cqlsh, and we have made CRUD operations on todoitem in cassandra via java.