Release testing instructions for WC Payments 2.8.0
All of the following scenarios are to test the new UPE from Stripe. All of the tests will require UPE to be enabled. The easiest way to do this is with the WCPay Dev plugin. Visit the WCPay dev plugin page and check the Enable UPE checkout option and submit. Alternatively, in the database, add _wcpay_feature_upe with a value of 1, to the wp_options table. In addition to having UPE enabled, the tests require at least one regular product and one subscription product in the store.
Regular Checkout
- Add regular product to cart and go to checkout as a guest.
- Confirm that UPE fields are displayed.
- Attempt submitting with missing credit card fields and confirm errors are displayed.
- Attempt to submit with invalid credit card fields and confirm errors are displayed.
- Provide complete and accurate credit card fields and checkout.
- Confirm order complete page is shown.
- In the admin area, under WooCommerce > Orders, confirm that the latest order was created successfully.
- Under transactions, confirm that the transaction details are recorded successfully.
Saved Payment Method
- Add regular item to cart and go to checkout as a logged in user.
- Confirm that UPE fields are displayed.
- Provide complete and accurate credit card fields.
- Check the save payment method option and checkout.
- Confirm order complete page is shown.
- In the admin area, under WooCommerce > Orders, confirm that the latest order was created successfully.
- Under transactions, confirm that the transaction details are recorded successfully. (There is a known issue here that customer data is not recorded.)
- Back as a customer, add another item to cart and go to checkout to confirm that the saved payment method is displayed.
- Confirm you can successfully checkout with that saved payment method.
Pay for Order Flow
- Create an order from WooCommerce > Orders > New Order. Or change an existing order to 'Pending Payment'
- Click on 'Customer Payment Page', You should see UPE form.
- Note: There is a bug here, not related to UPE that always show the form, even when 'Use a new payment method' is not selected.
- Select 'Use a new payment method', fill the form but do not fill some of the inputs.
- Click on 'Pay for Order', check that you see the errors displayed.
- Fill out the form, check the box 'Save payment information to my account for future purchases.', click on 'Pay for Order', verify the order is placed.
- Check that the payment method has been saved, for example from My Account > Payment Methods.
- Set the order again to Pending Payment and test with a card that requires confirmation (4000002500003155).
- Test without saving the payment method.
Subscription with UPE
- Install and enable the Subscriptions plugin.
- Create a subscription product.
- Add the subscription product to the cart and continue with checkout.
- Checkout and confirm the subscription was successfully processed in the admin area.
- Confirm that the subscription was processed successfully from the customer's My Account > Subscriptions area.
- Check ability to renew now on subscription.
- Change renewal date to be sooner if desired (min of 1 hour ahead) and confirm subscription automatically renews.
Manage Payment Methods
- As a logged in user, go to My Account > Manage Payments > Add Payment Method
- Select WooCommerce Payments, verify UPE iFrame is displayed
- Enter all the fields, click on Add Payment Method.
- Check that you are redirected to Manage Payments, there is a notice indicating the Payment Method was added and that you see it on the list.
- Check that you can checkout using the newly saved payment method.
- Go back to Manage Payment Methods, check that you can set the payment method as default and delete it.
Giropay Checkout
- Change store currency to Euros
- Add Giropay payment method from WooCommerce > Settings > Payments > Payment Methods
- Add a regular product to cart
- Go to checkout, confirm UPE fields are displayed with option to select Giropay.
- Select Giropay and checkout
- Approve the transaction from the Stripe test page
- Confirm order complete page is shown.
- In the admin area, under WooCommerce > Orders, confirm that the latest order was created successfully.
- Under transactions, confirm that the transaction details are recorded successfully.
Sofort Checkout
- Change store currency to Euros
- Add Sofort payment method from WooCommerce > Settings > Payments > Payment Methods
- Add a regular product to cart
- Go to checkout, confirm UPE fields are displayed with option to select Sofort.
- Select Sofort and a valid country and checkout
- Approve the transaction from the Stripe test page
- Confirm order complete page is shown.
- In the admin area, under WooCommerce > Orders, confirm that the latest order was created successfully.
- Under transactions, confirm that the transaction details are recorded successfully.
Ensure Payment Request Buttons are hidden when there are unsupported items in the cart
Note: This test requires the Advanced Shipping Packages plugin. You'll find instructions on how to install it in the WooCommerce Payments v2.8.0 call for testing.
There are several steps to performing this test:
- Create 2 different shipping methods
- Create 2 different shipping classes
- Create 2 different shipping packages
- Assign shipping classes to 2 distinct products
- Ensure Payment Request Buttons are hidden under the right conditions
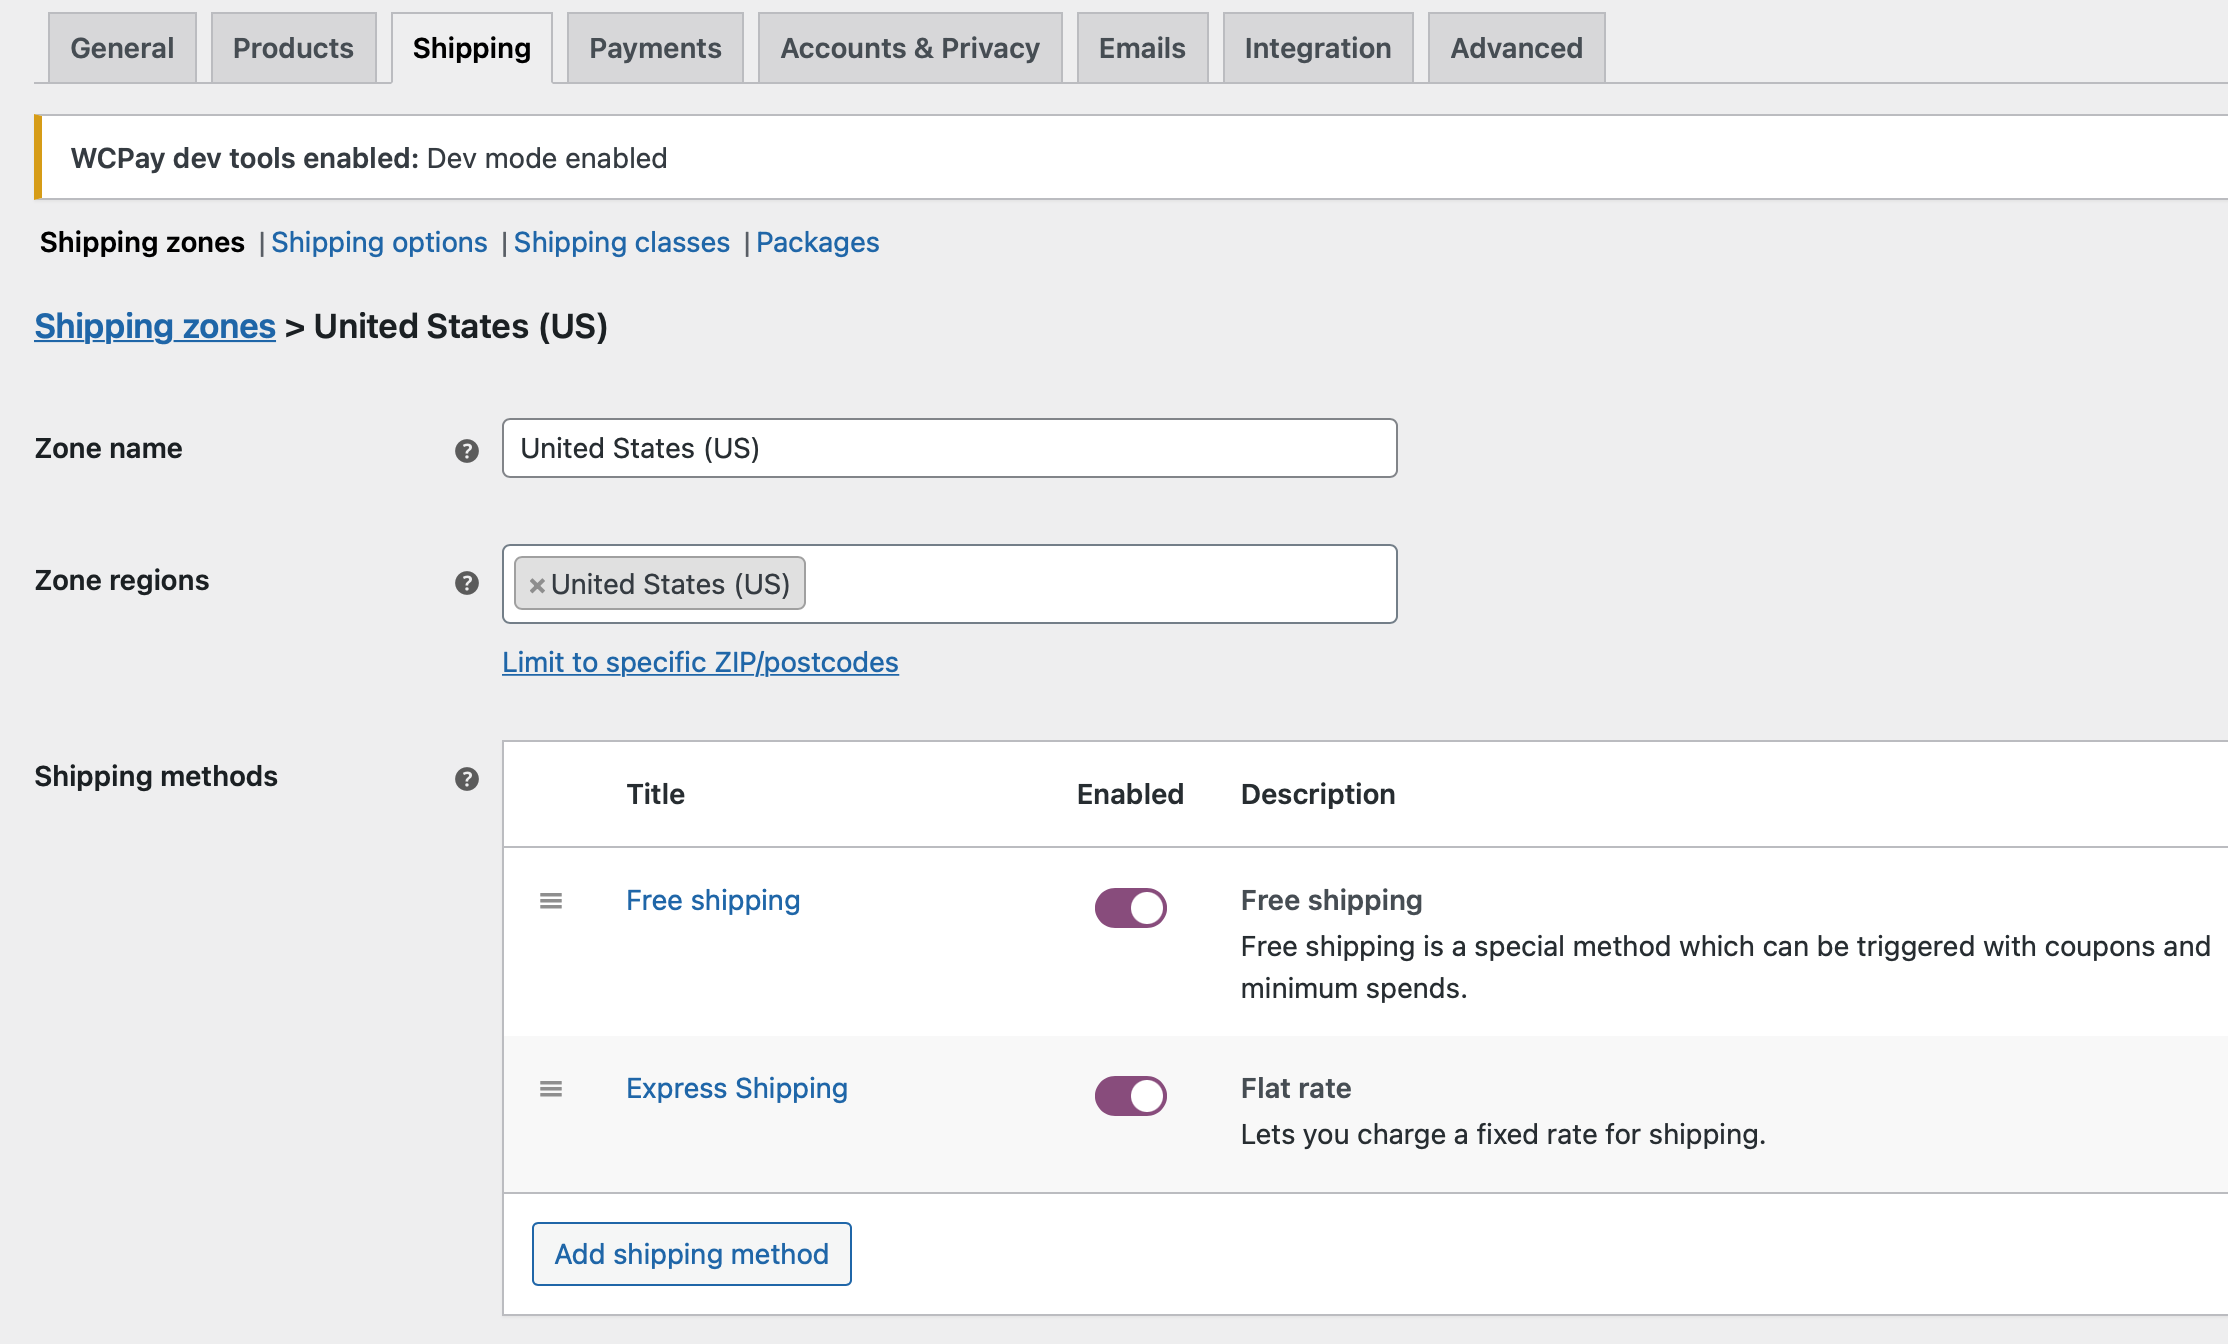
- Navigate to WooCommerce > Settings > Shipping.
- Create a new Shipping Zone if one does not exist, otherwise modify a shipping zone that already exists.
- Click the Add shipping method button and create a Free shipping shipping method.
- Click the Add shipping method button and create a Flat rate shipping method. The rate can be any value greater than 0.
Example result:
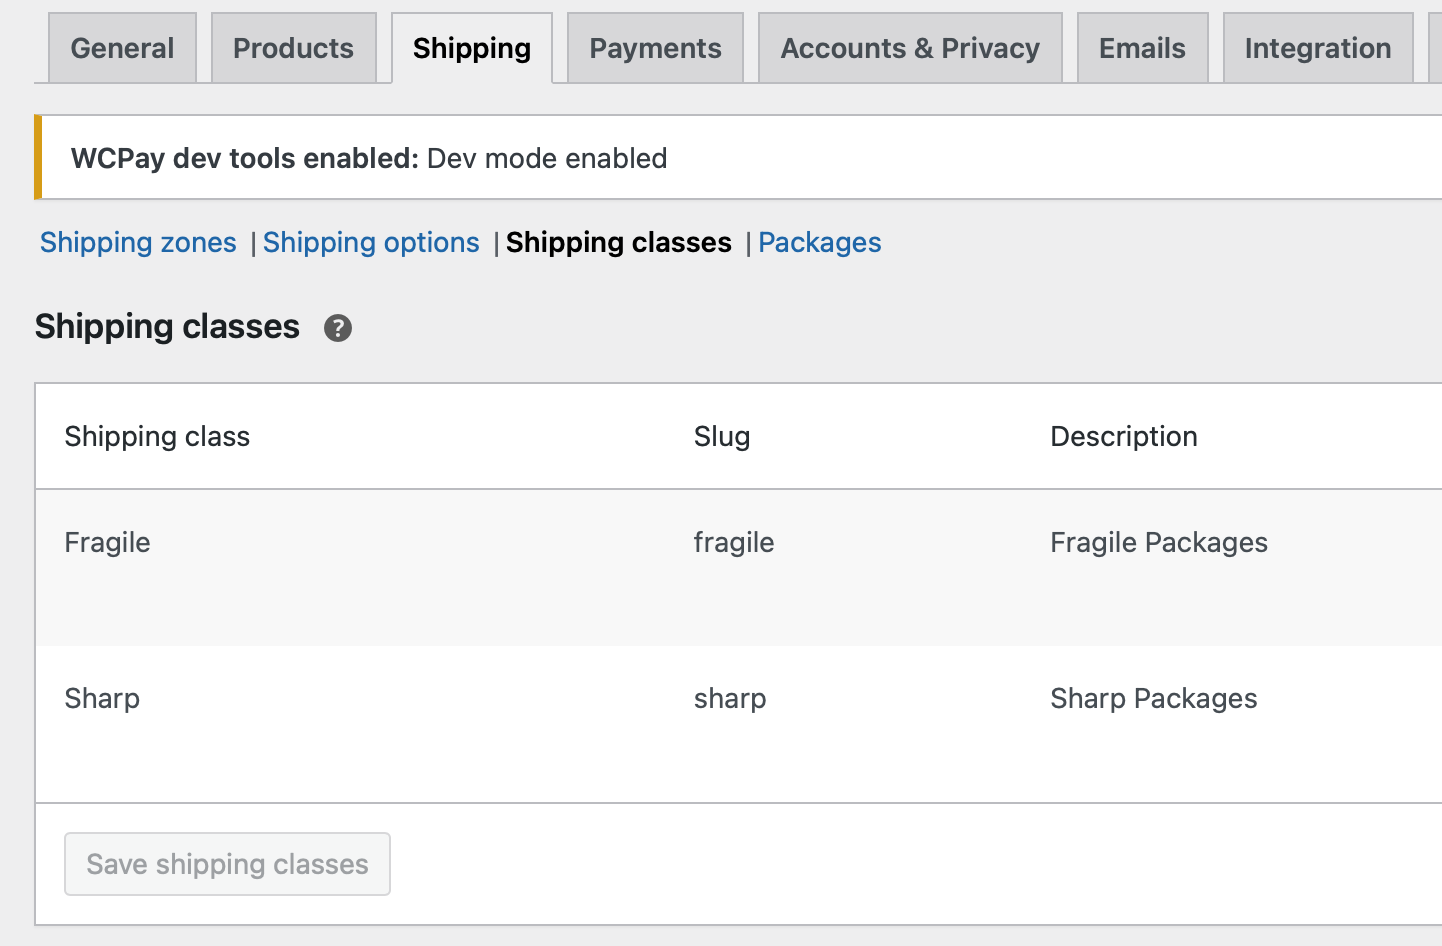
- Navigate to WooCommerce > Settings > Shipping > Shipping Classes.
- Click Add shipping class.
- Choose any name, slug, and description.
- Add another shipping class by repeating steps 2 and 3.
- Click Save shipping classes.
Example result:
- Navigate to WooCommerce > Settings > Shipping > Packages.
- Click Add shipping package.
- Fill in the title with any value.
- Add a Shipping package condition where [Contains shipping class] [Equal to] [<shipping_class>]
- Fill in the Package name with any value.
- Add a Shipping package settings & content condition where [Shipping class] [Equal to] [<shipping_class>]. Make sure the value of
<shipping_class>here is the same as in the previous condition. - Click Publish.
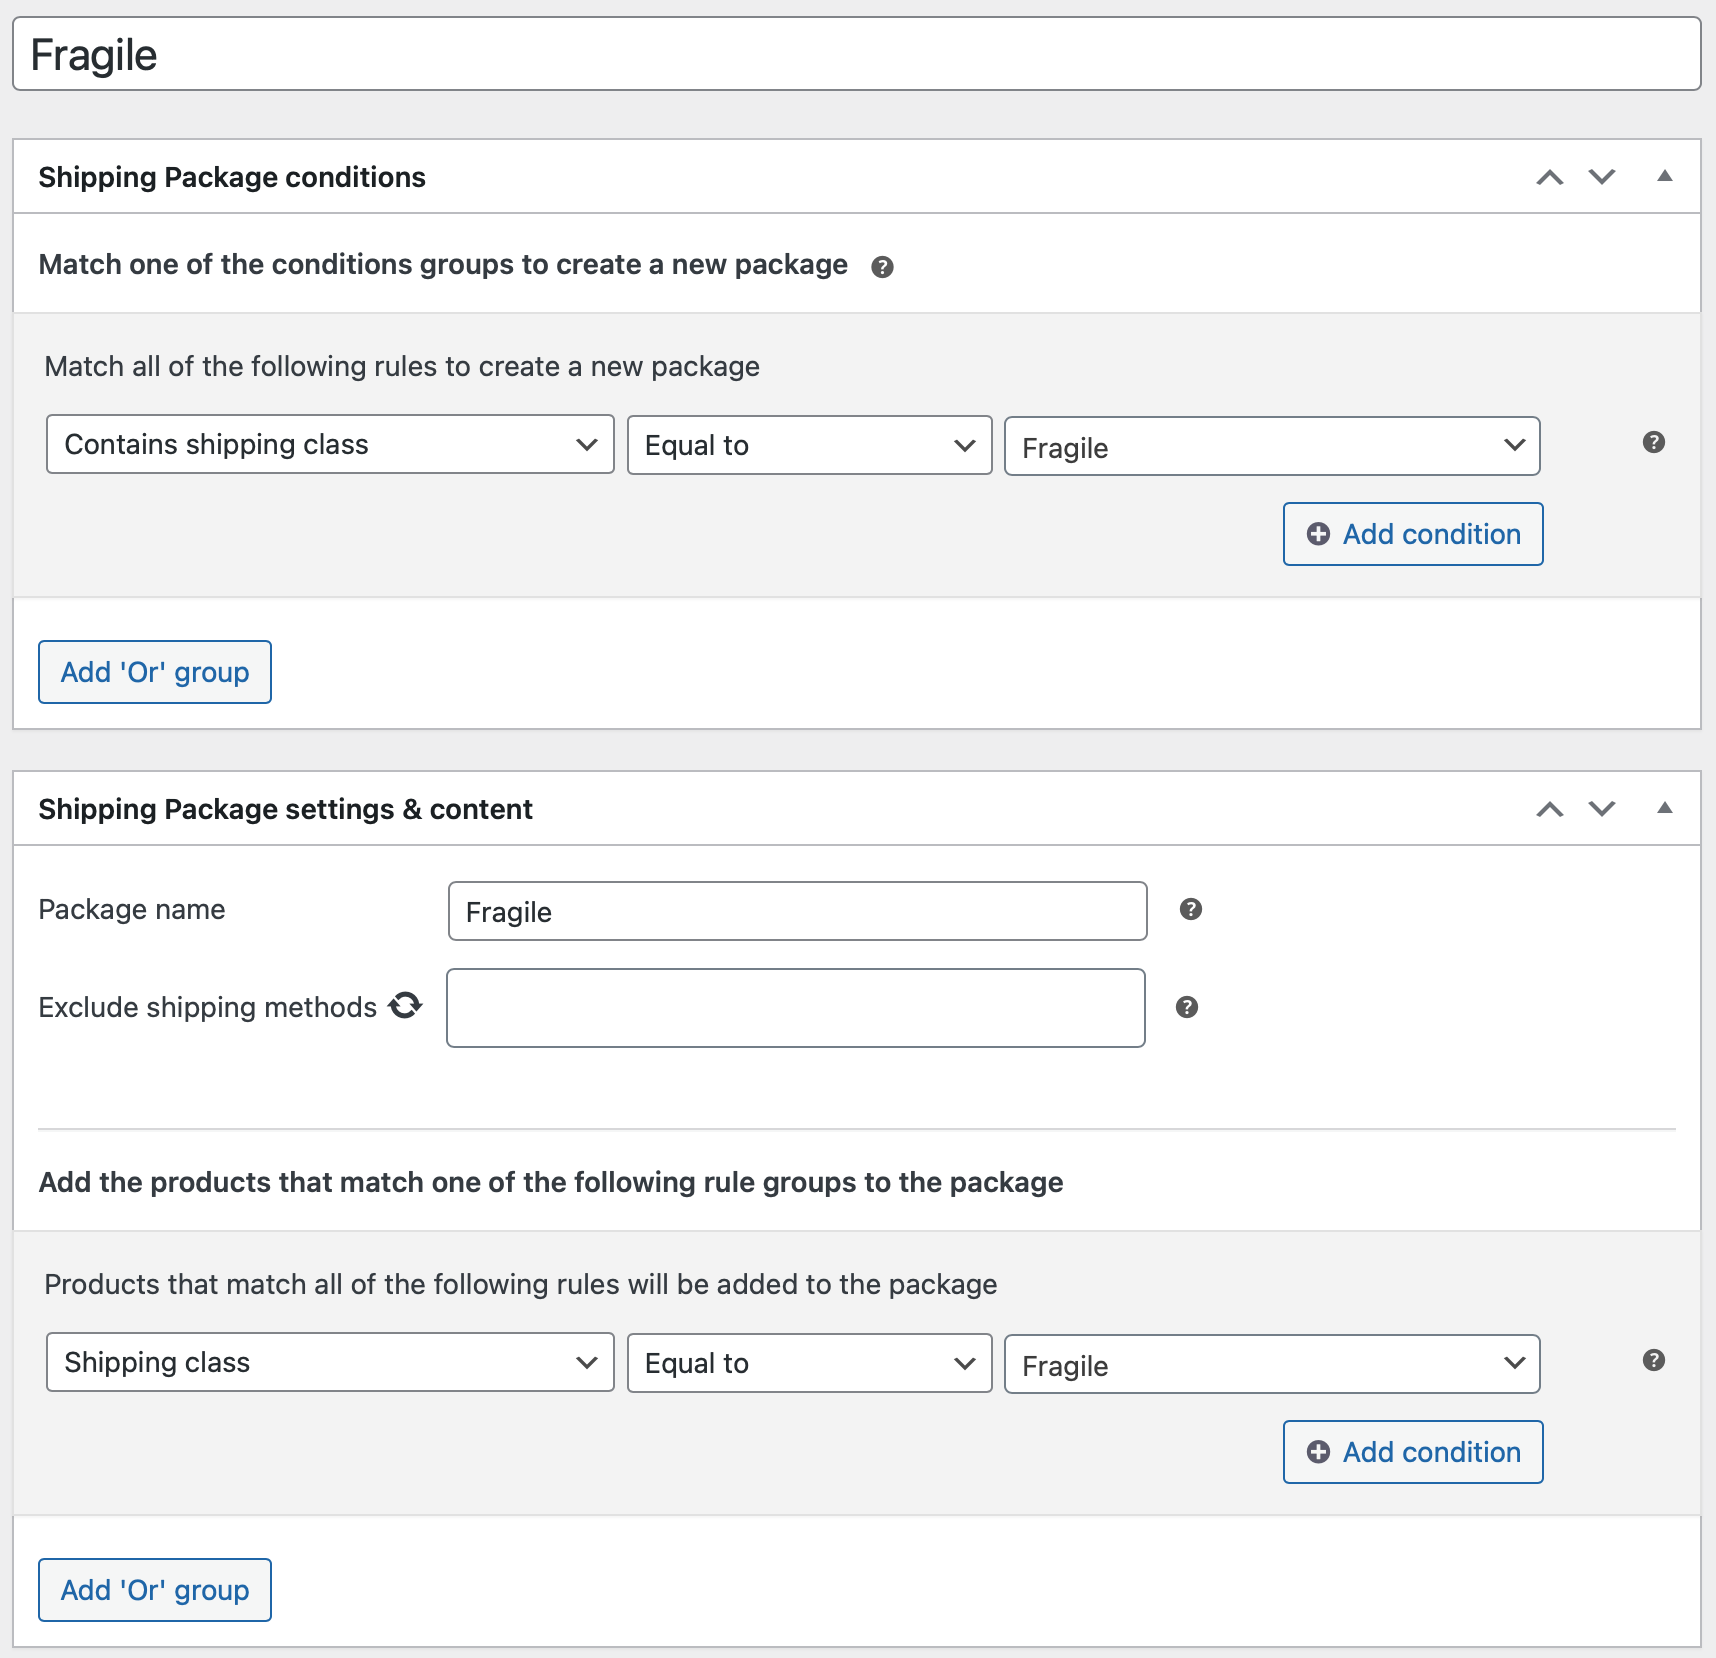
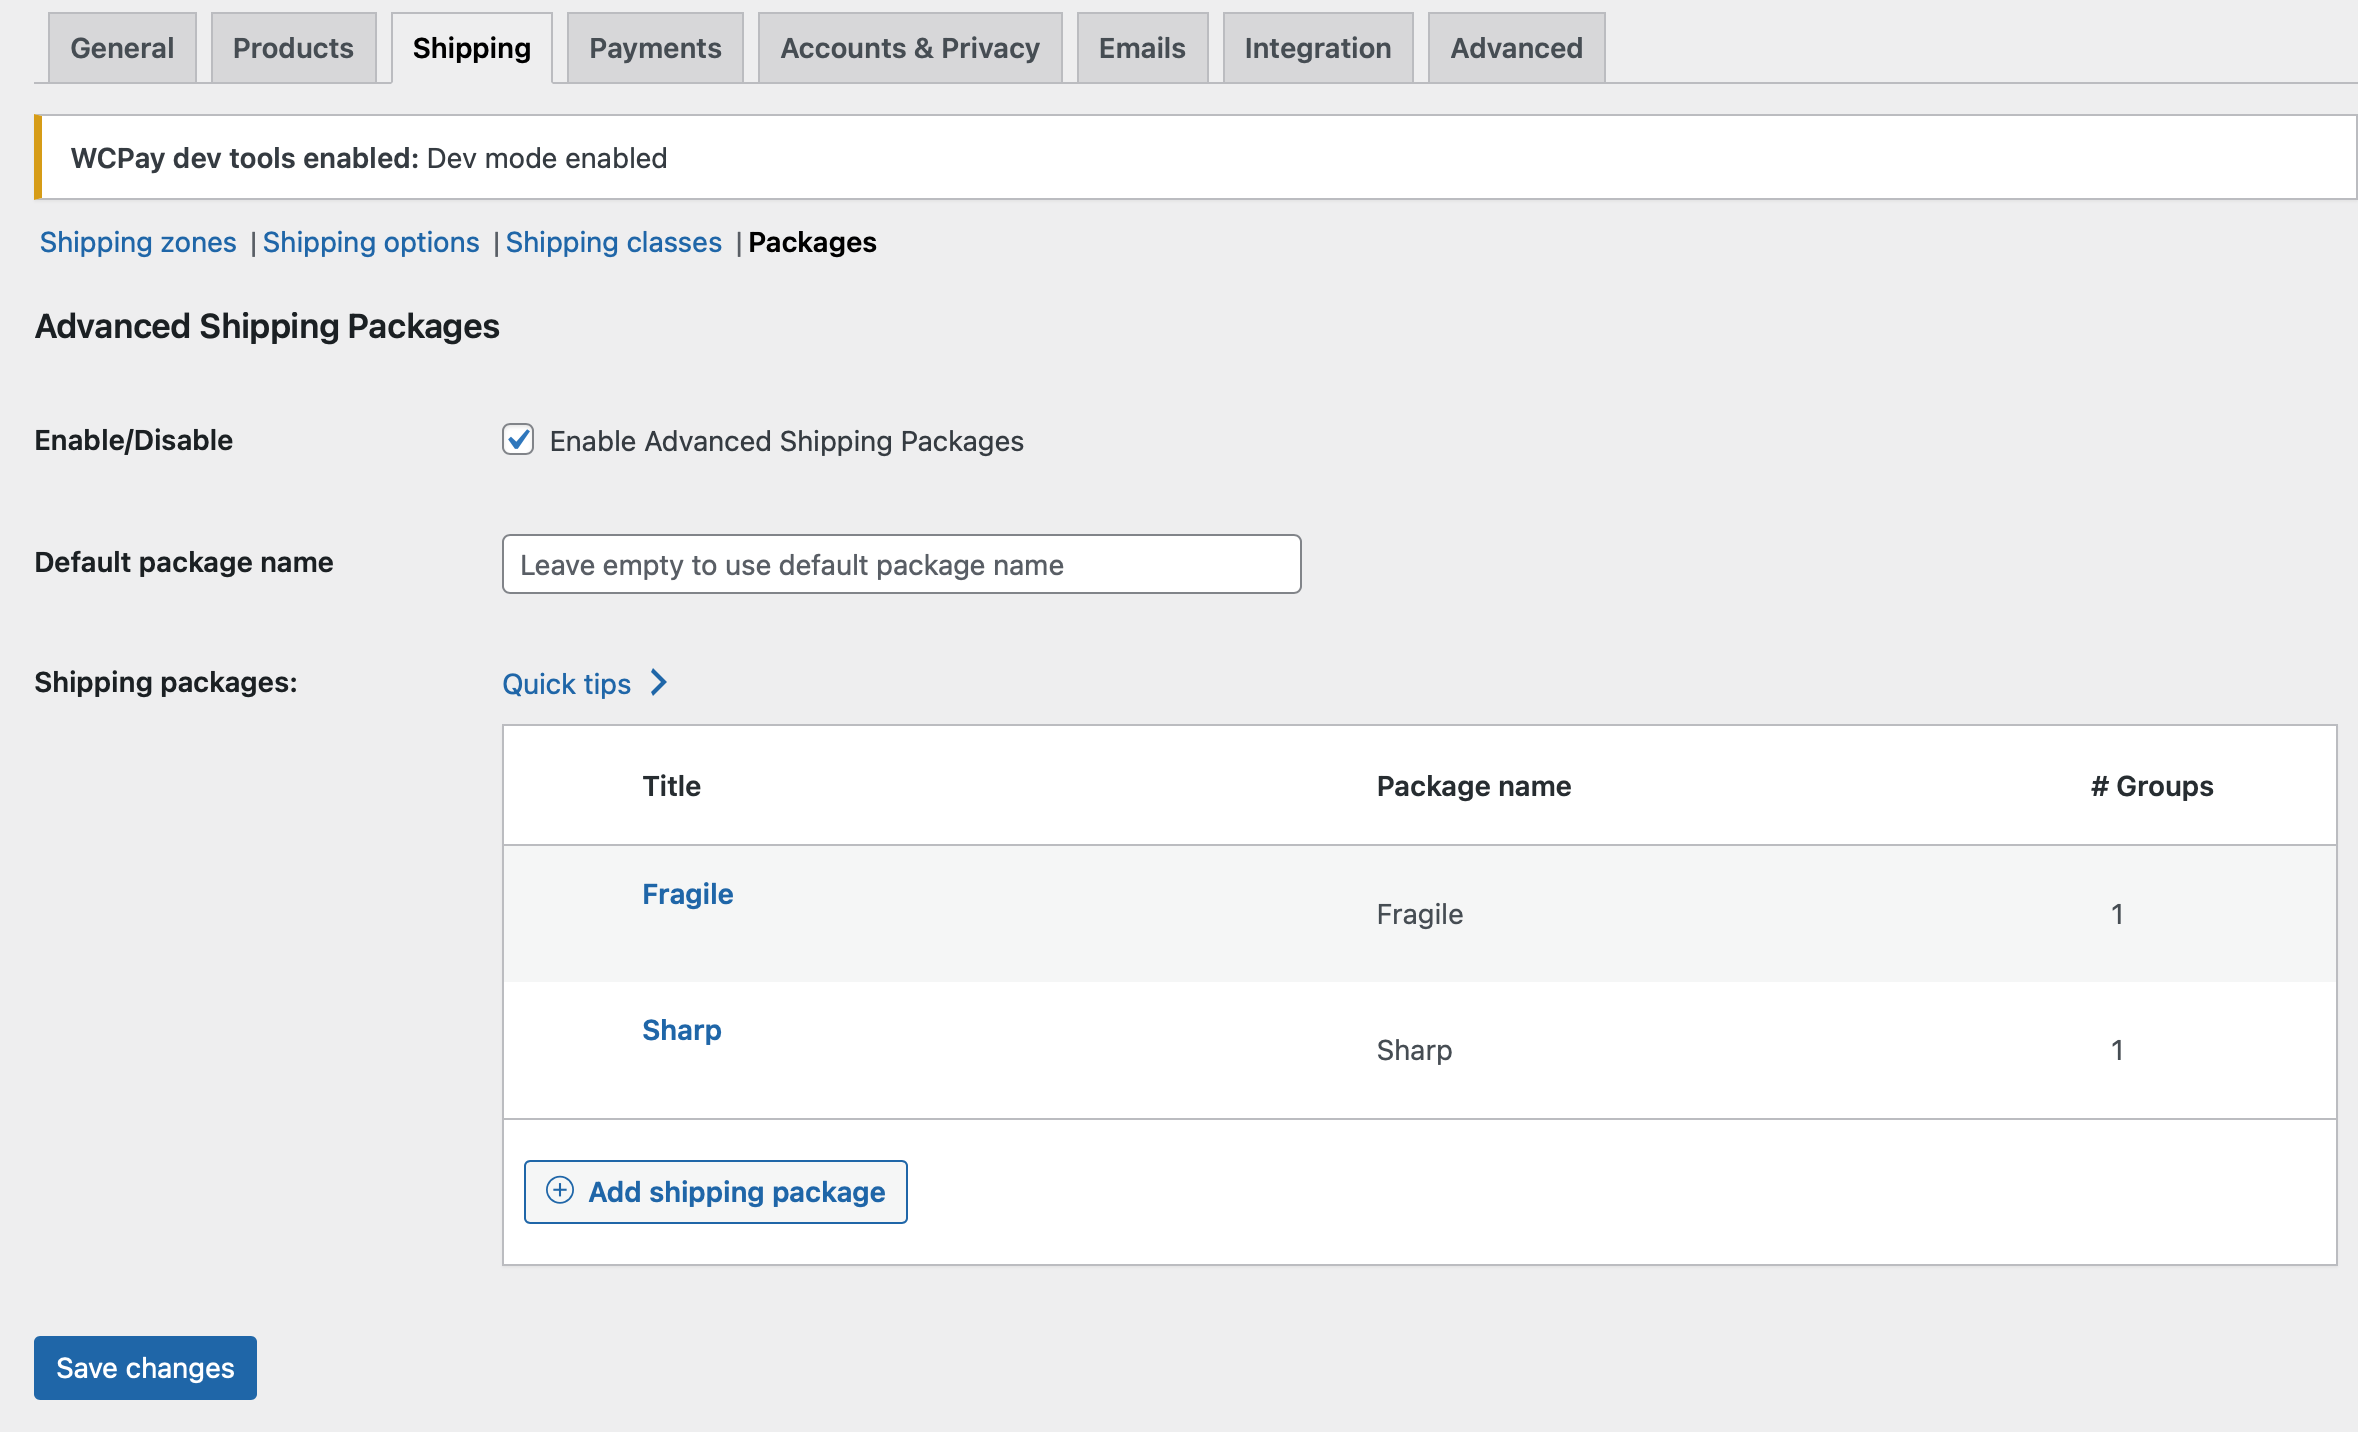
- Now repeat the process and create a second shipping package, but make sure you use a different value for
<shipping_class>.
Example result:
- Navigate to Products > All Products.
- Choose 2 different products (e.g. Beanie and Sunglasses)
- Assign each product a different shipping class (you'll find this under Product Details > Shipping)

- Click Update after you've assigned a product its shipping class.
Ensure Payment Request Buttons are hidden under the right conditions
- Add both products with the shipping classes you just created to the cart.
- Navigate to the Cart page.
- Make sure that no PRBs are visible.
- Navigate to the product page of one of the products with one of the shipping classes you created.
- Make sure that the PRB is visible.
- Remove 1 of the items from the cart.
- Reload the product page you're currently on.
- Make sure the PRB is visible.
- Navigate to the cart page.
- Make sure the PRB is visible.
- Remove the last item from the cart.
- Add 1 or more items to the cart that you did not associate with a shipping package.
- Navigate the cart page.
- Make sure the PRB is visible.